Камча́тка, Russia - The Mutnowski and Gorely Volcanoes

Please see my comments on the Tolbachik Volcano Circuit page. After our incredible adventure in the Kluchewskaya Cluster National Park, we drove for 11 hours back to Petropawlowsk or rather to nearby Paratunka, a spot full of hot springs!

Our next objective was the Mutonvsky Volcanic Plateau and its two active volcanoes: Mutnowsky and Gorely. We needed good weather and we were lucky again. We had sunny weather during crucial days and then the rain returned. We hiked out in a cold wind and rain.

This area is quite different from the Tolbachik Circuit. The volcanoes are not as steep and majestic but they have incredible craters with lakes and active vents. The Mutnovsky crater is almost unbelievable. It felt like walking into another world through a narrow gap in the rocky crater. I was truly awe struck and could not believe that the place was real.

We felt that it was an incredible experience to see the magnitude of geothermal formations in such a small place. Furthermore, one can wander around without any restrictions and get close to some very spectacular places.

Evgeny’s drone provided us with a completely different perspective and allowed us to see the grandeur from high above without having to rent a helicopter. We left tired but happy to have been able to see such an unbelievable spot.

kamchatka map.jpg
kamchatka map 2.jpg
The Koryaksky Volcano near Petropawlowsk Kamchatsky (PK). It is 3,456m high. It belongs to the Avachinskaya group of Volcanoes. It had a small eruption of ash in 2009 forcing landing aircraft to change course. the upper part has a 35 degree slope an…

The Koryaksky Volcano near Petropawlowsk Kamchatsky (PK). It is 3,456m high. It belongs to the Avachinskaya group of Volcanoes. It had a small eruption of ash in 2009 forcing landing aircraft to change course. the upper part has a 35 degree slope and some exposed rocky sections.

The Avachinsky Volcano 2,751m high is the closest volcano to PK and apparently quite easy to ascend.

The Avachinsky Volcano 2,751m high is the closest volcano to PK and apparently quite easy to ascend.

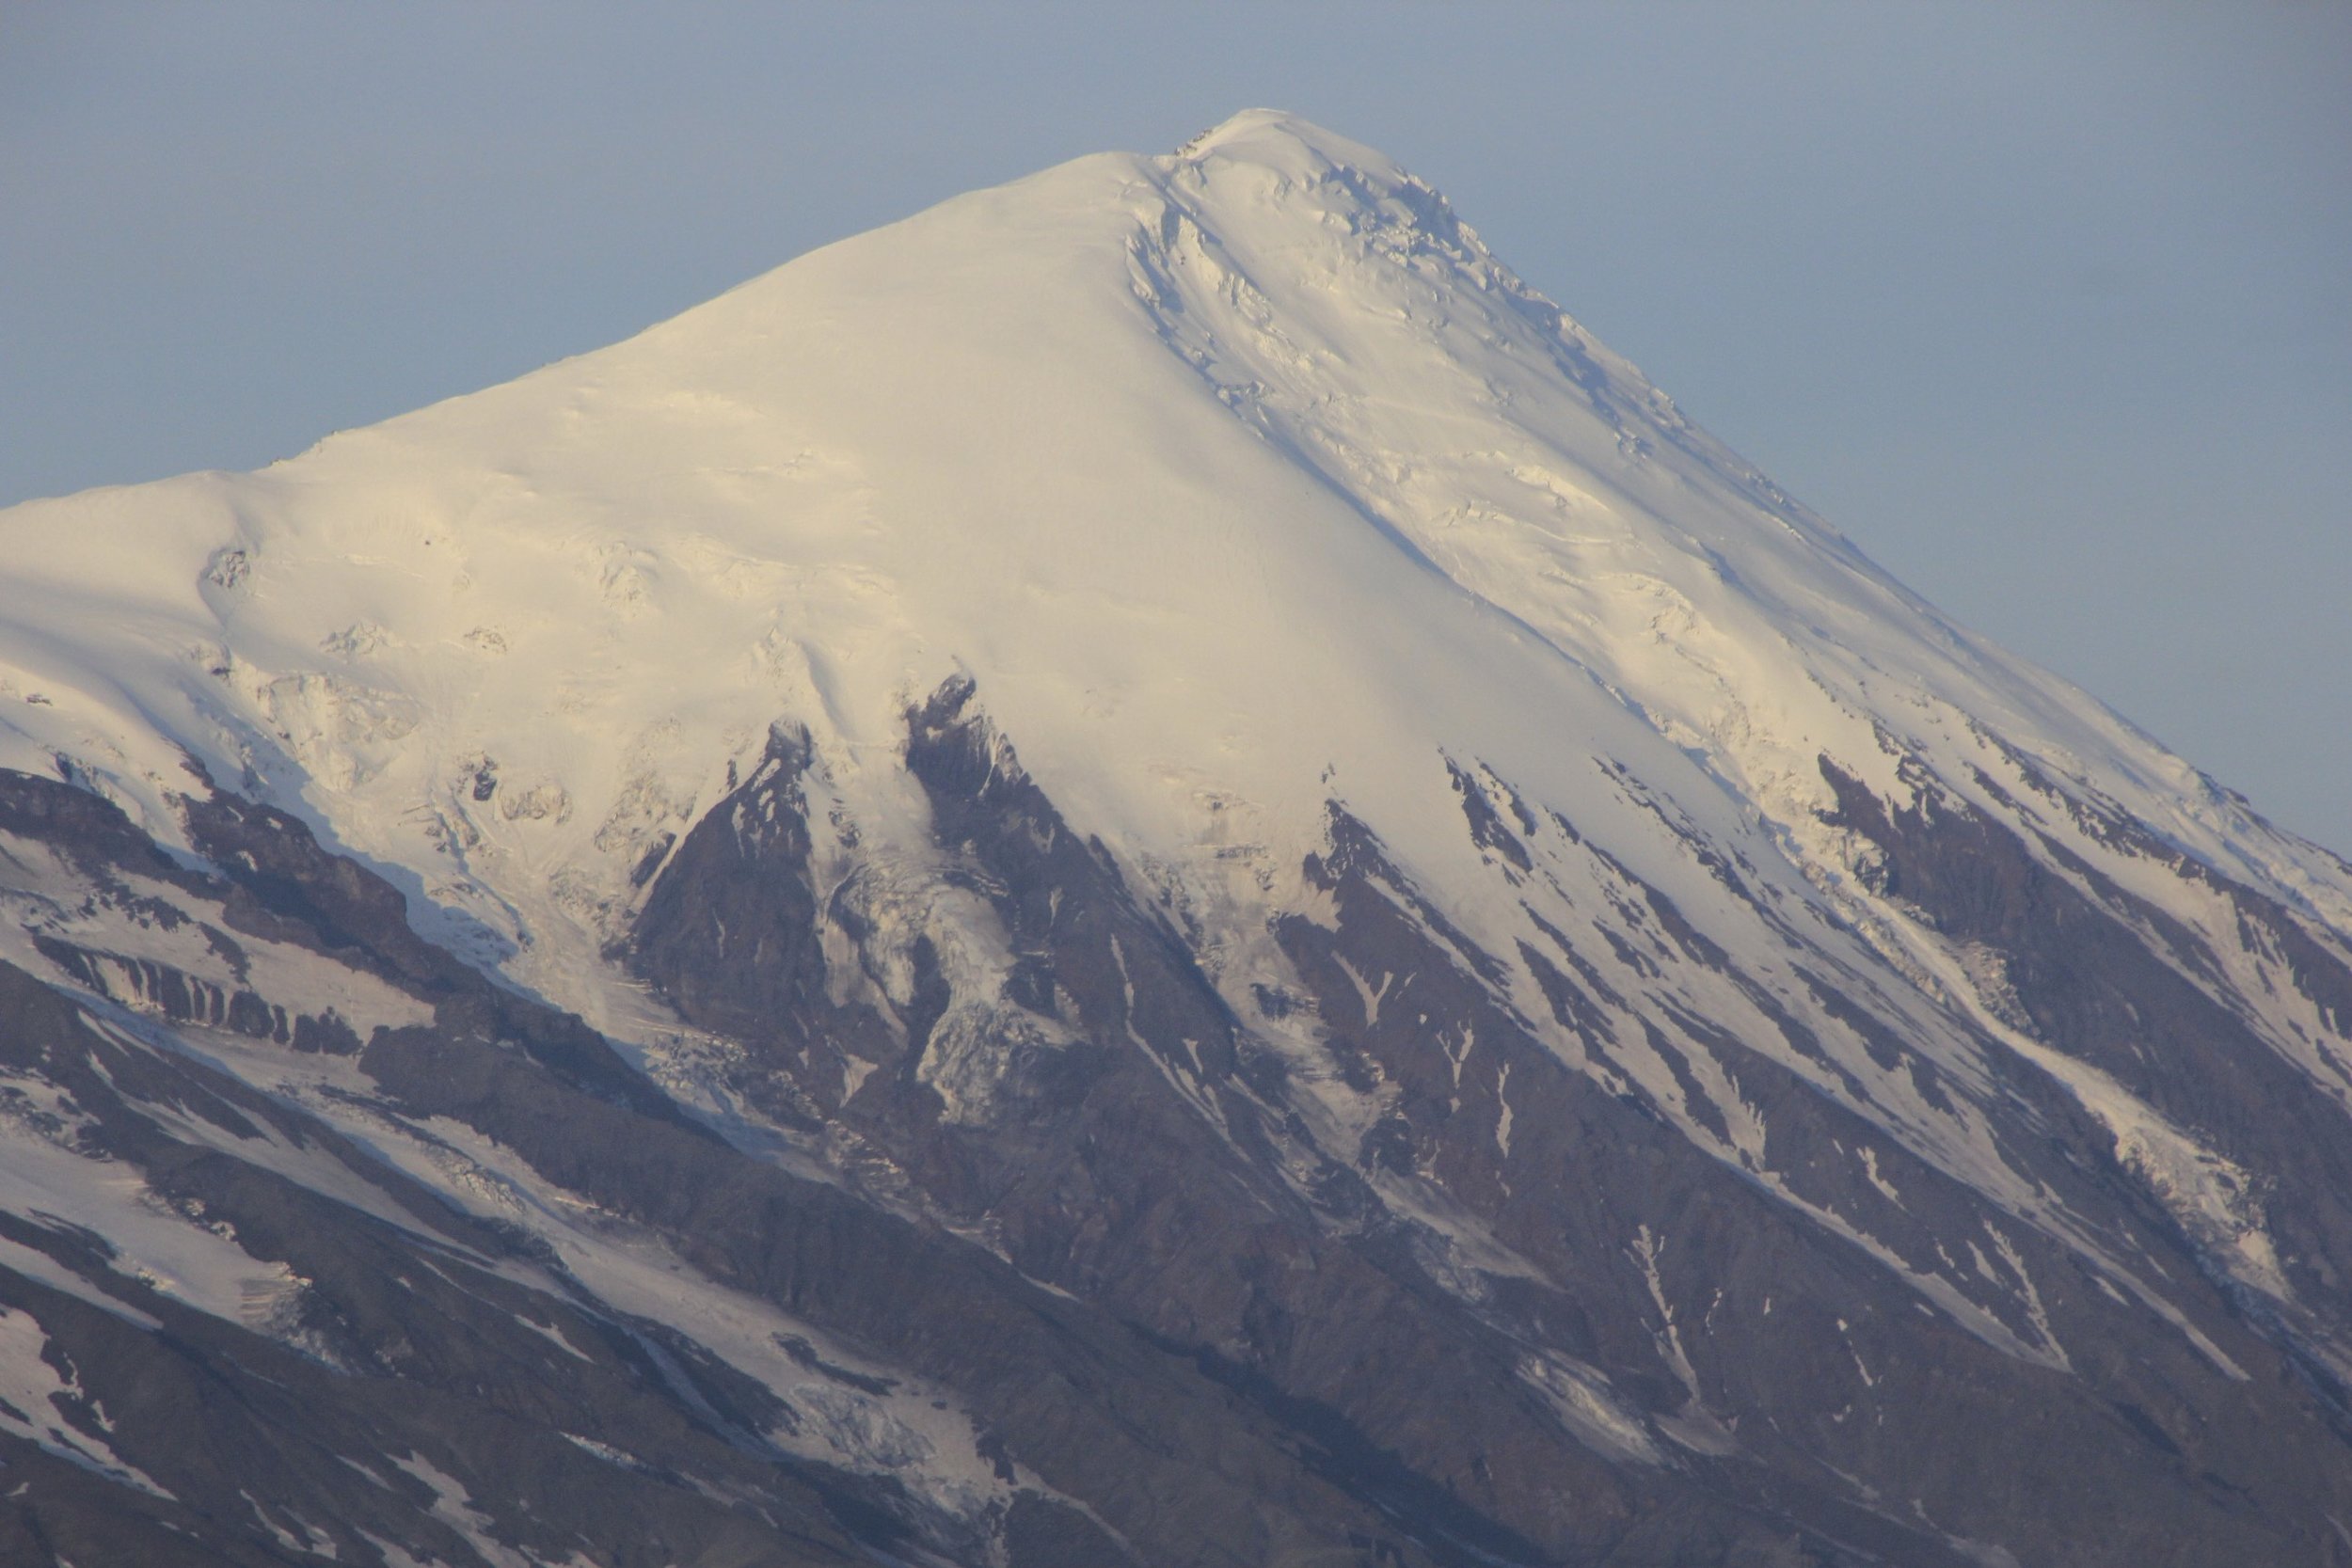
The closeup of the upper section of the Koryaksky Volcano.

The closeup of the upper section of the Koryaksky Volcano.

The Vilyuchinsky Volcano 2,173m. It is 1.5 hr away from PK by car on a so-so road. The sign at its base indicated that it required 6 hours for an ascent.

The Vilyuchinsky Volcano 2,173m. It is 1.5 hr away from PK by car on a so-so road. The sign at its base indicated that it required 6 hours for an ascent.

The viewpoint for the Vilyuchinsky Volcano.

The viewpoint for the Vilyuchinsky Volcano.

The road from PK to The Plateau of the Mutnovsky Volcano. The area of the Mutnovsky Volcano is located about 70km south from PK and is on the edge of the Mutnovsky National Park. The volcanic plateau is 600 to 900m high where cones of active volcano…

The road from PK to The Plateau of the Mutnovsky Volcano. The area of the Mutnovsky Volcano is located about 70km south from PK and is on the edge of the Mutnovsky National Park. The volcanic plateau is 600 to 900m high where cones of active volcanoes tower above the alpine tundra, free of snow only for three months of the year. There are three volcanoes in the area: the active Muntovsky and Gorely and the dormant Vilyuchinsky. The area receives over 15m of snow in winter! The road is not muddy but very rocky and dusty,

We set up our camp at the base of the Gorely Volcano. The hike to the top of the crater takes an hour (850m elevation gain) but the hike around the entire crater takes a few hours.

We set up our camp at the base of the Gorely Volcano. The hike to the top of the crater takes an hour (850m elevation gain) but the hike around the entire crater takes a few hours.

The dormant Vilyuchinsky Volcano. At the base of the Gorely Volcano you can see the parking for the day-trippers from PK.

The dormant Vilyuchinsky Volcano. At the base of the Gorely Volcano you can see the parking for the day-trippers from PK.

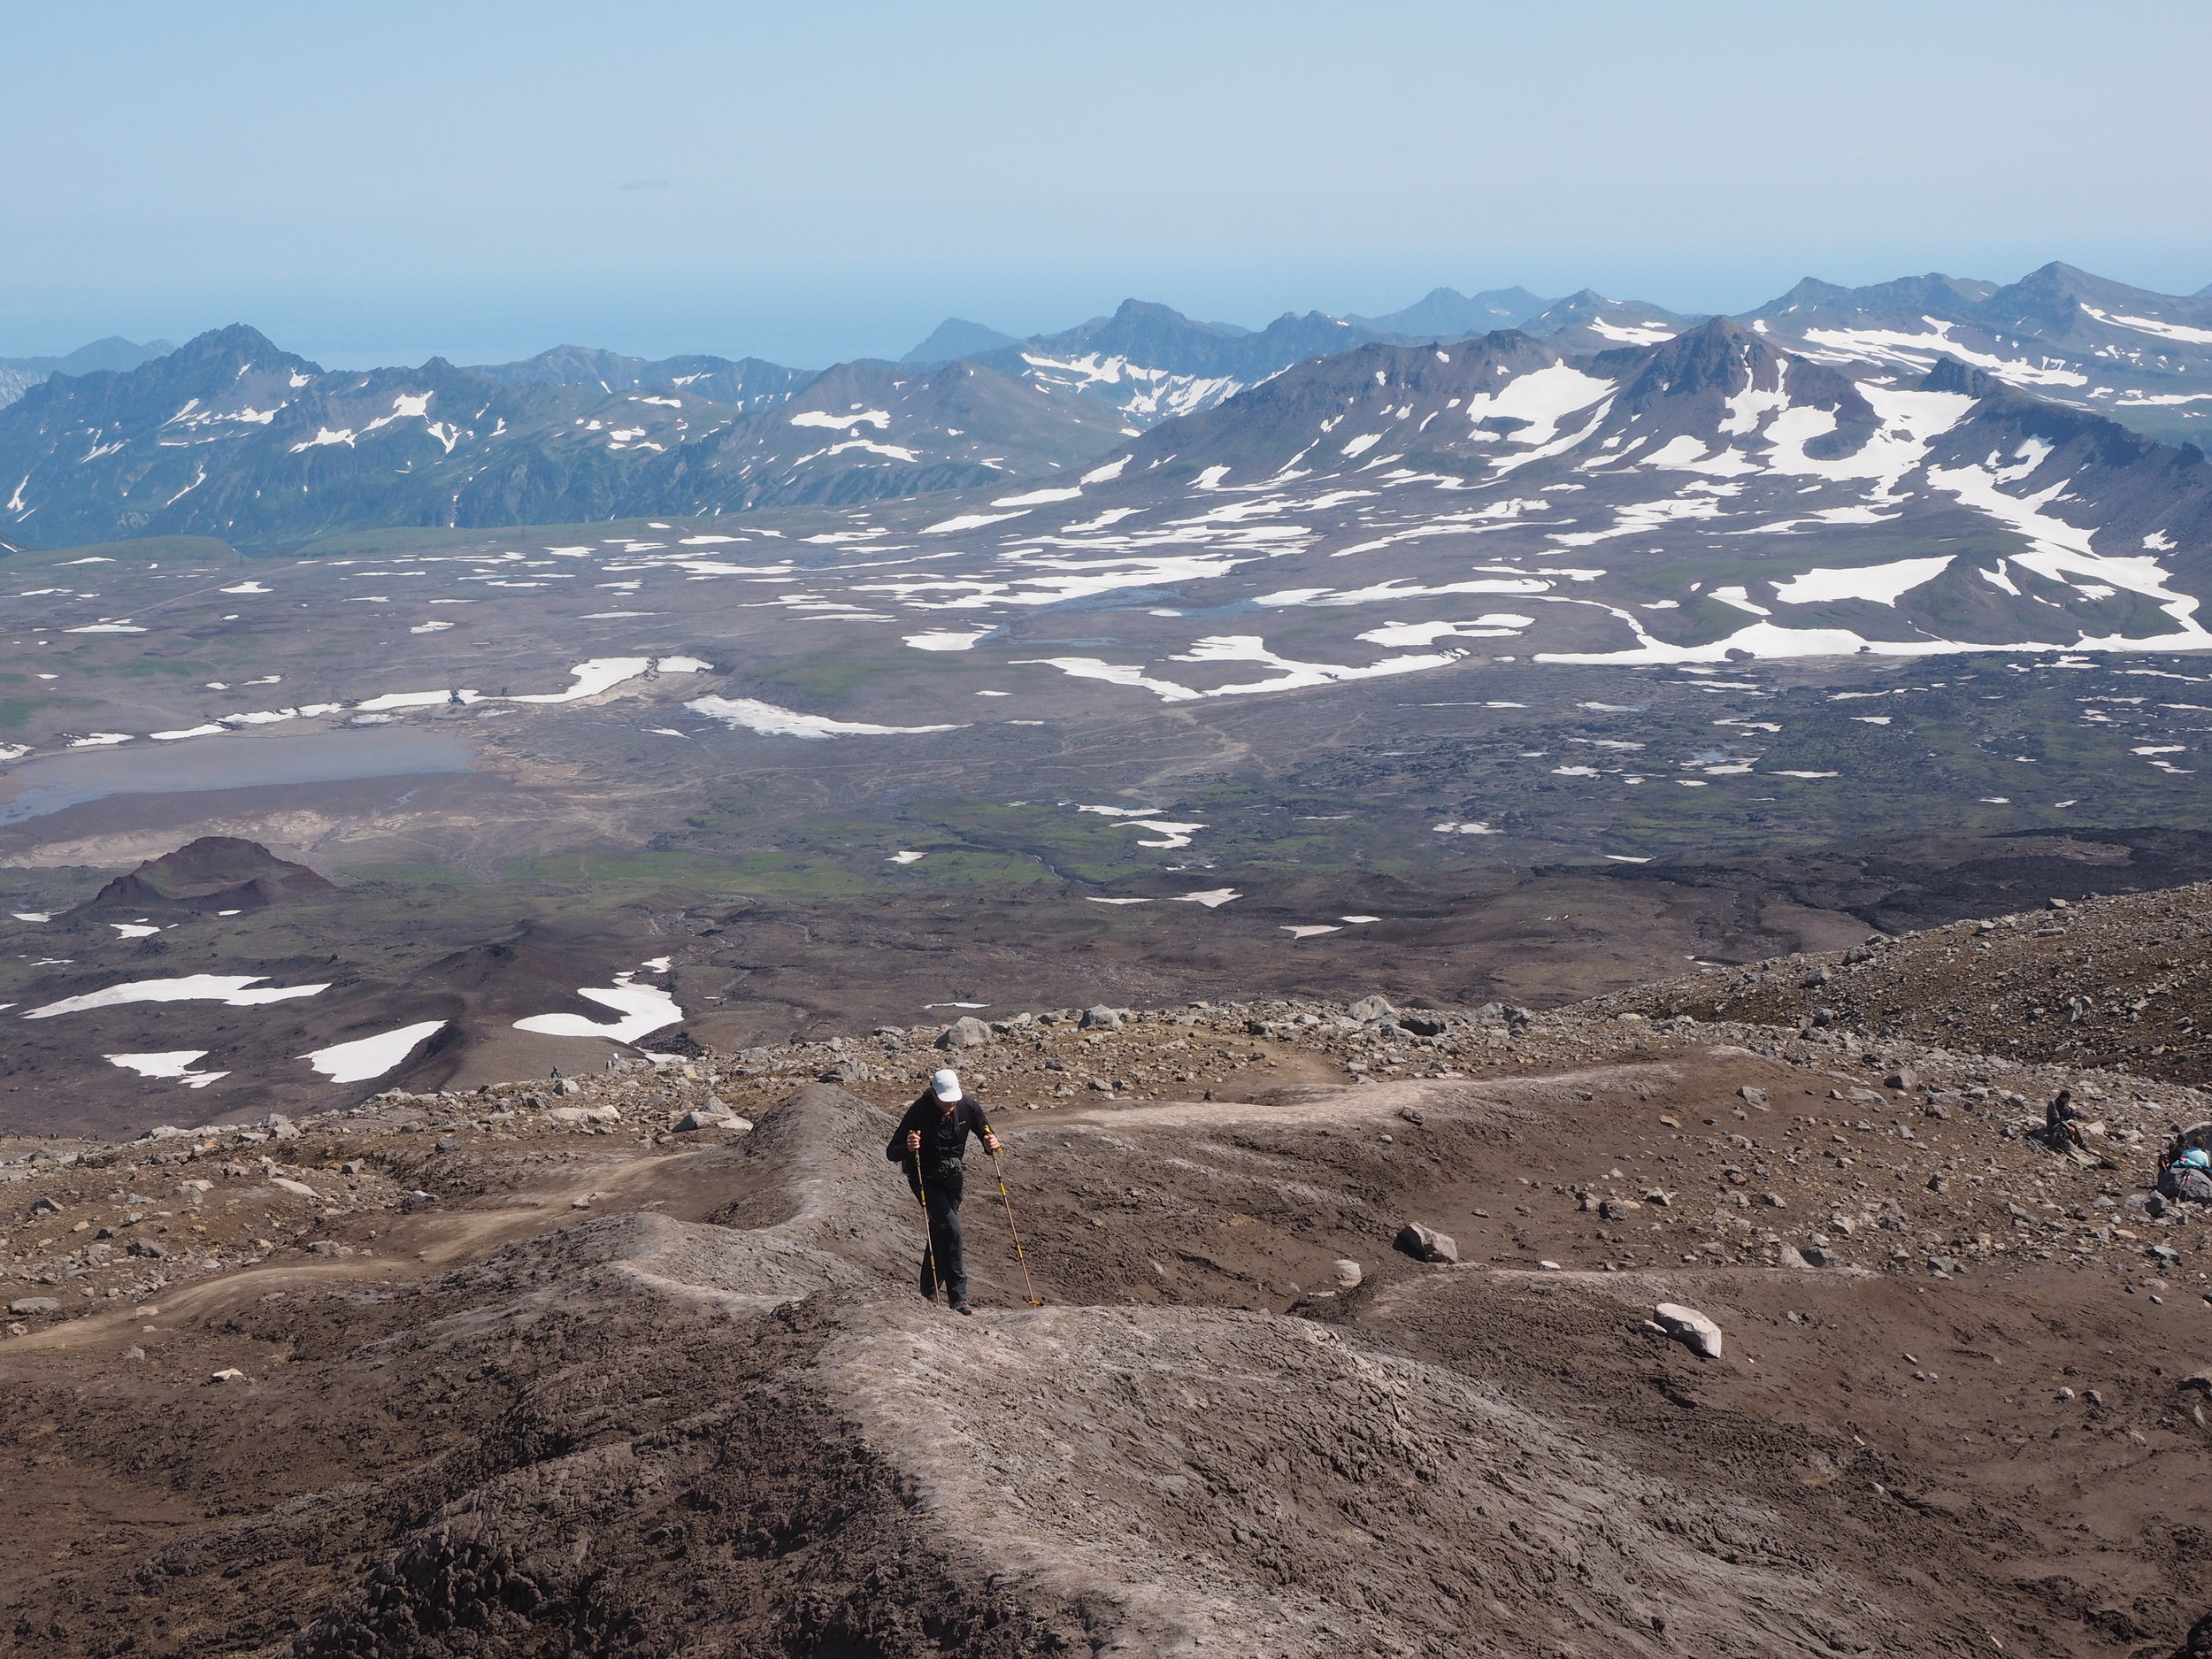
The upper section of the Gorely Volcano. The ascent has an easy gradient but it is long in distance.

The upper section of the Gorely Volcano. The ascent has an easy gradient but it is long in distance.

Photo by Evgeny Androssov. Going up the Gorely Volcano. The high Mutnovsky Plateau is beyond. You can even see the Pacific Ocean in the distance.

Photo by Evgeny Androssov. Going up the Gorely Volcano. The high Mutnovsky Plateau is beyond. You can even see the Pacific Ocean in the distance.

Almost at the top! The Gorely Volcano is located in a large caldera 13 x 12 km in size. The Volcano has 11 craters! The craters are strung one after another. The variety of craters and ease of access make this volcano one of the most spectacular in …

Almost at the top! The Gorely Volcano is located in a large caldera 13 x 12 km in size. The Volcano has 11 craters! The craters are strung one after another. The variety of craters and ease of access make this volcano one of the most spectacular in Kamchatka.

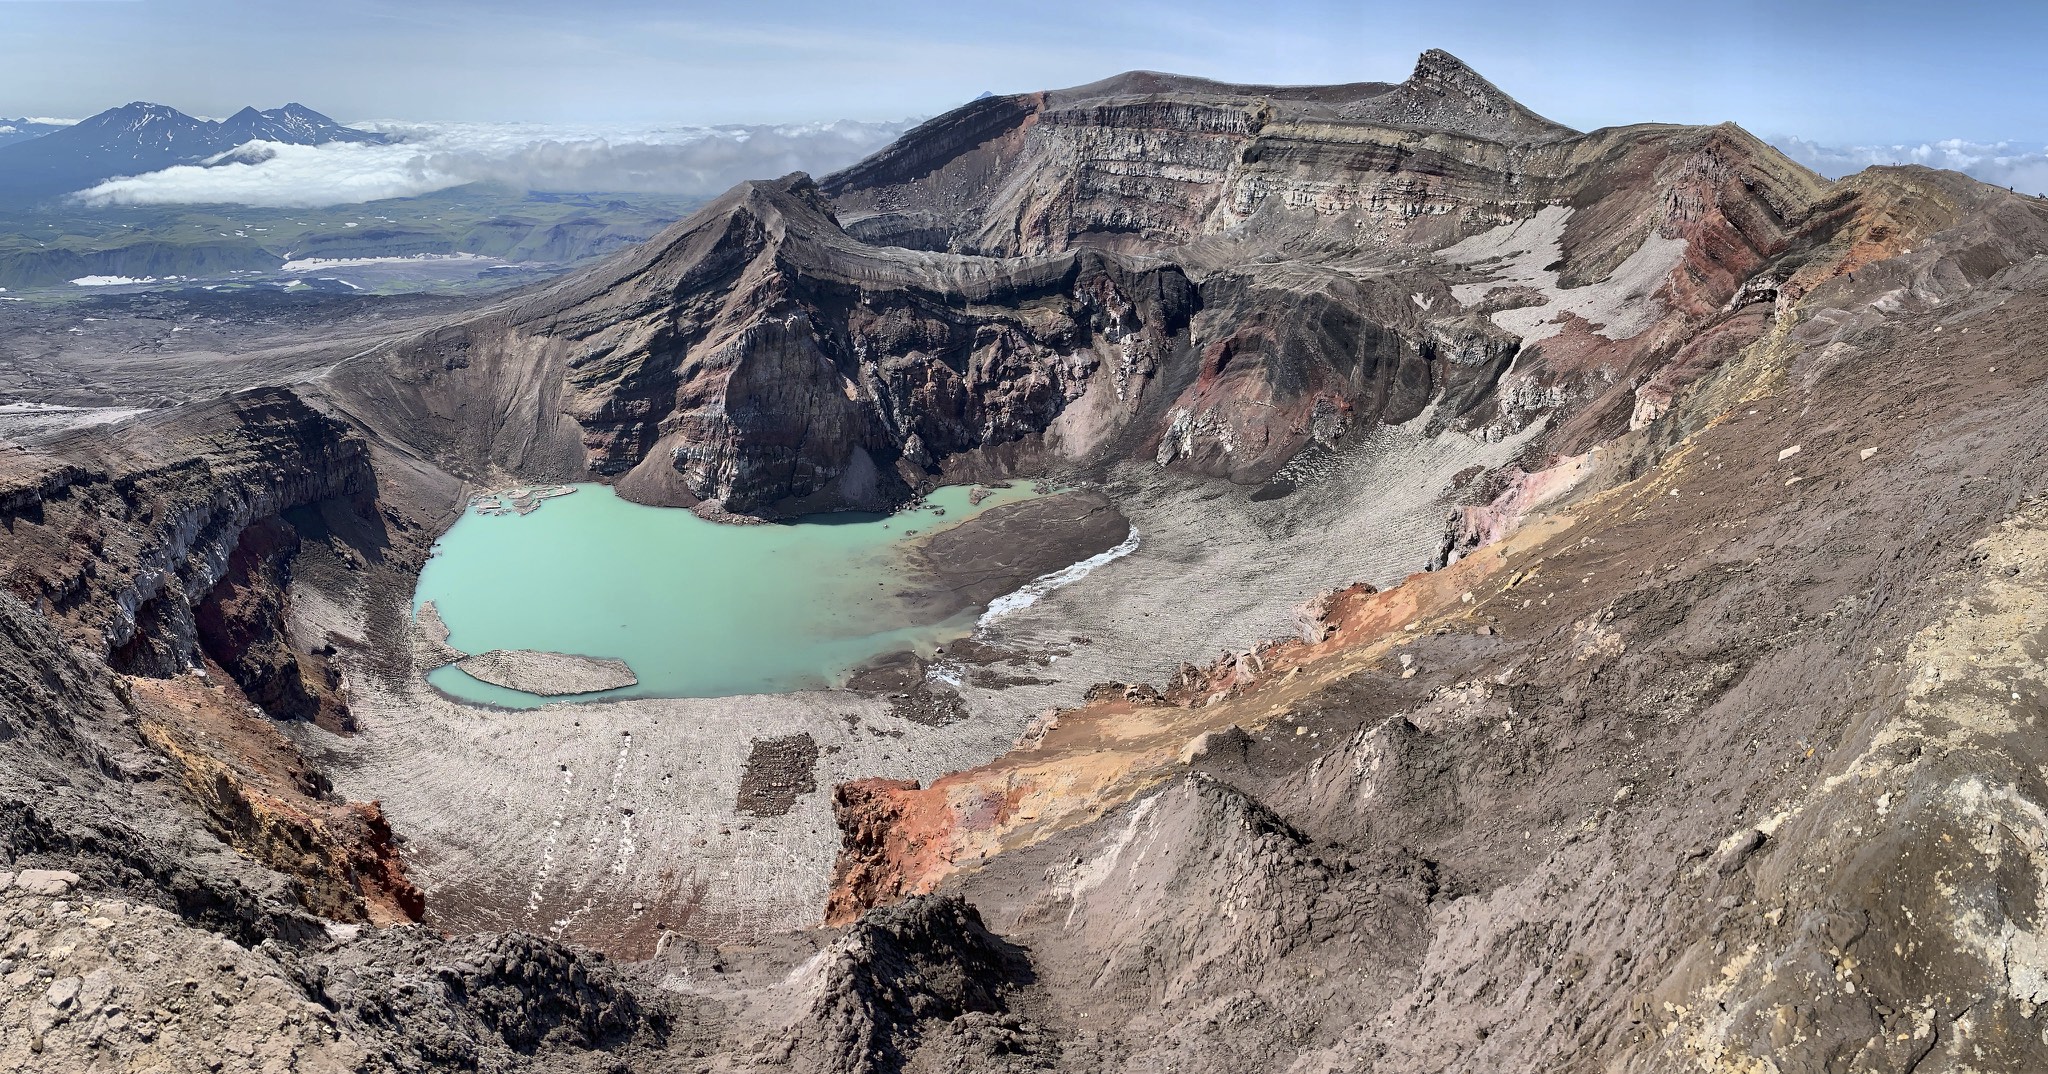
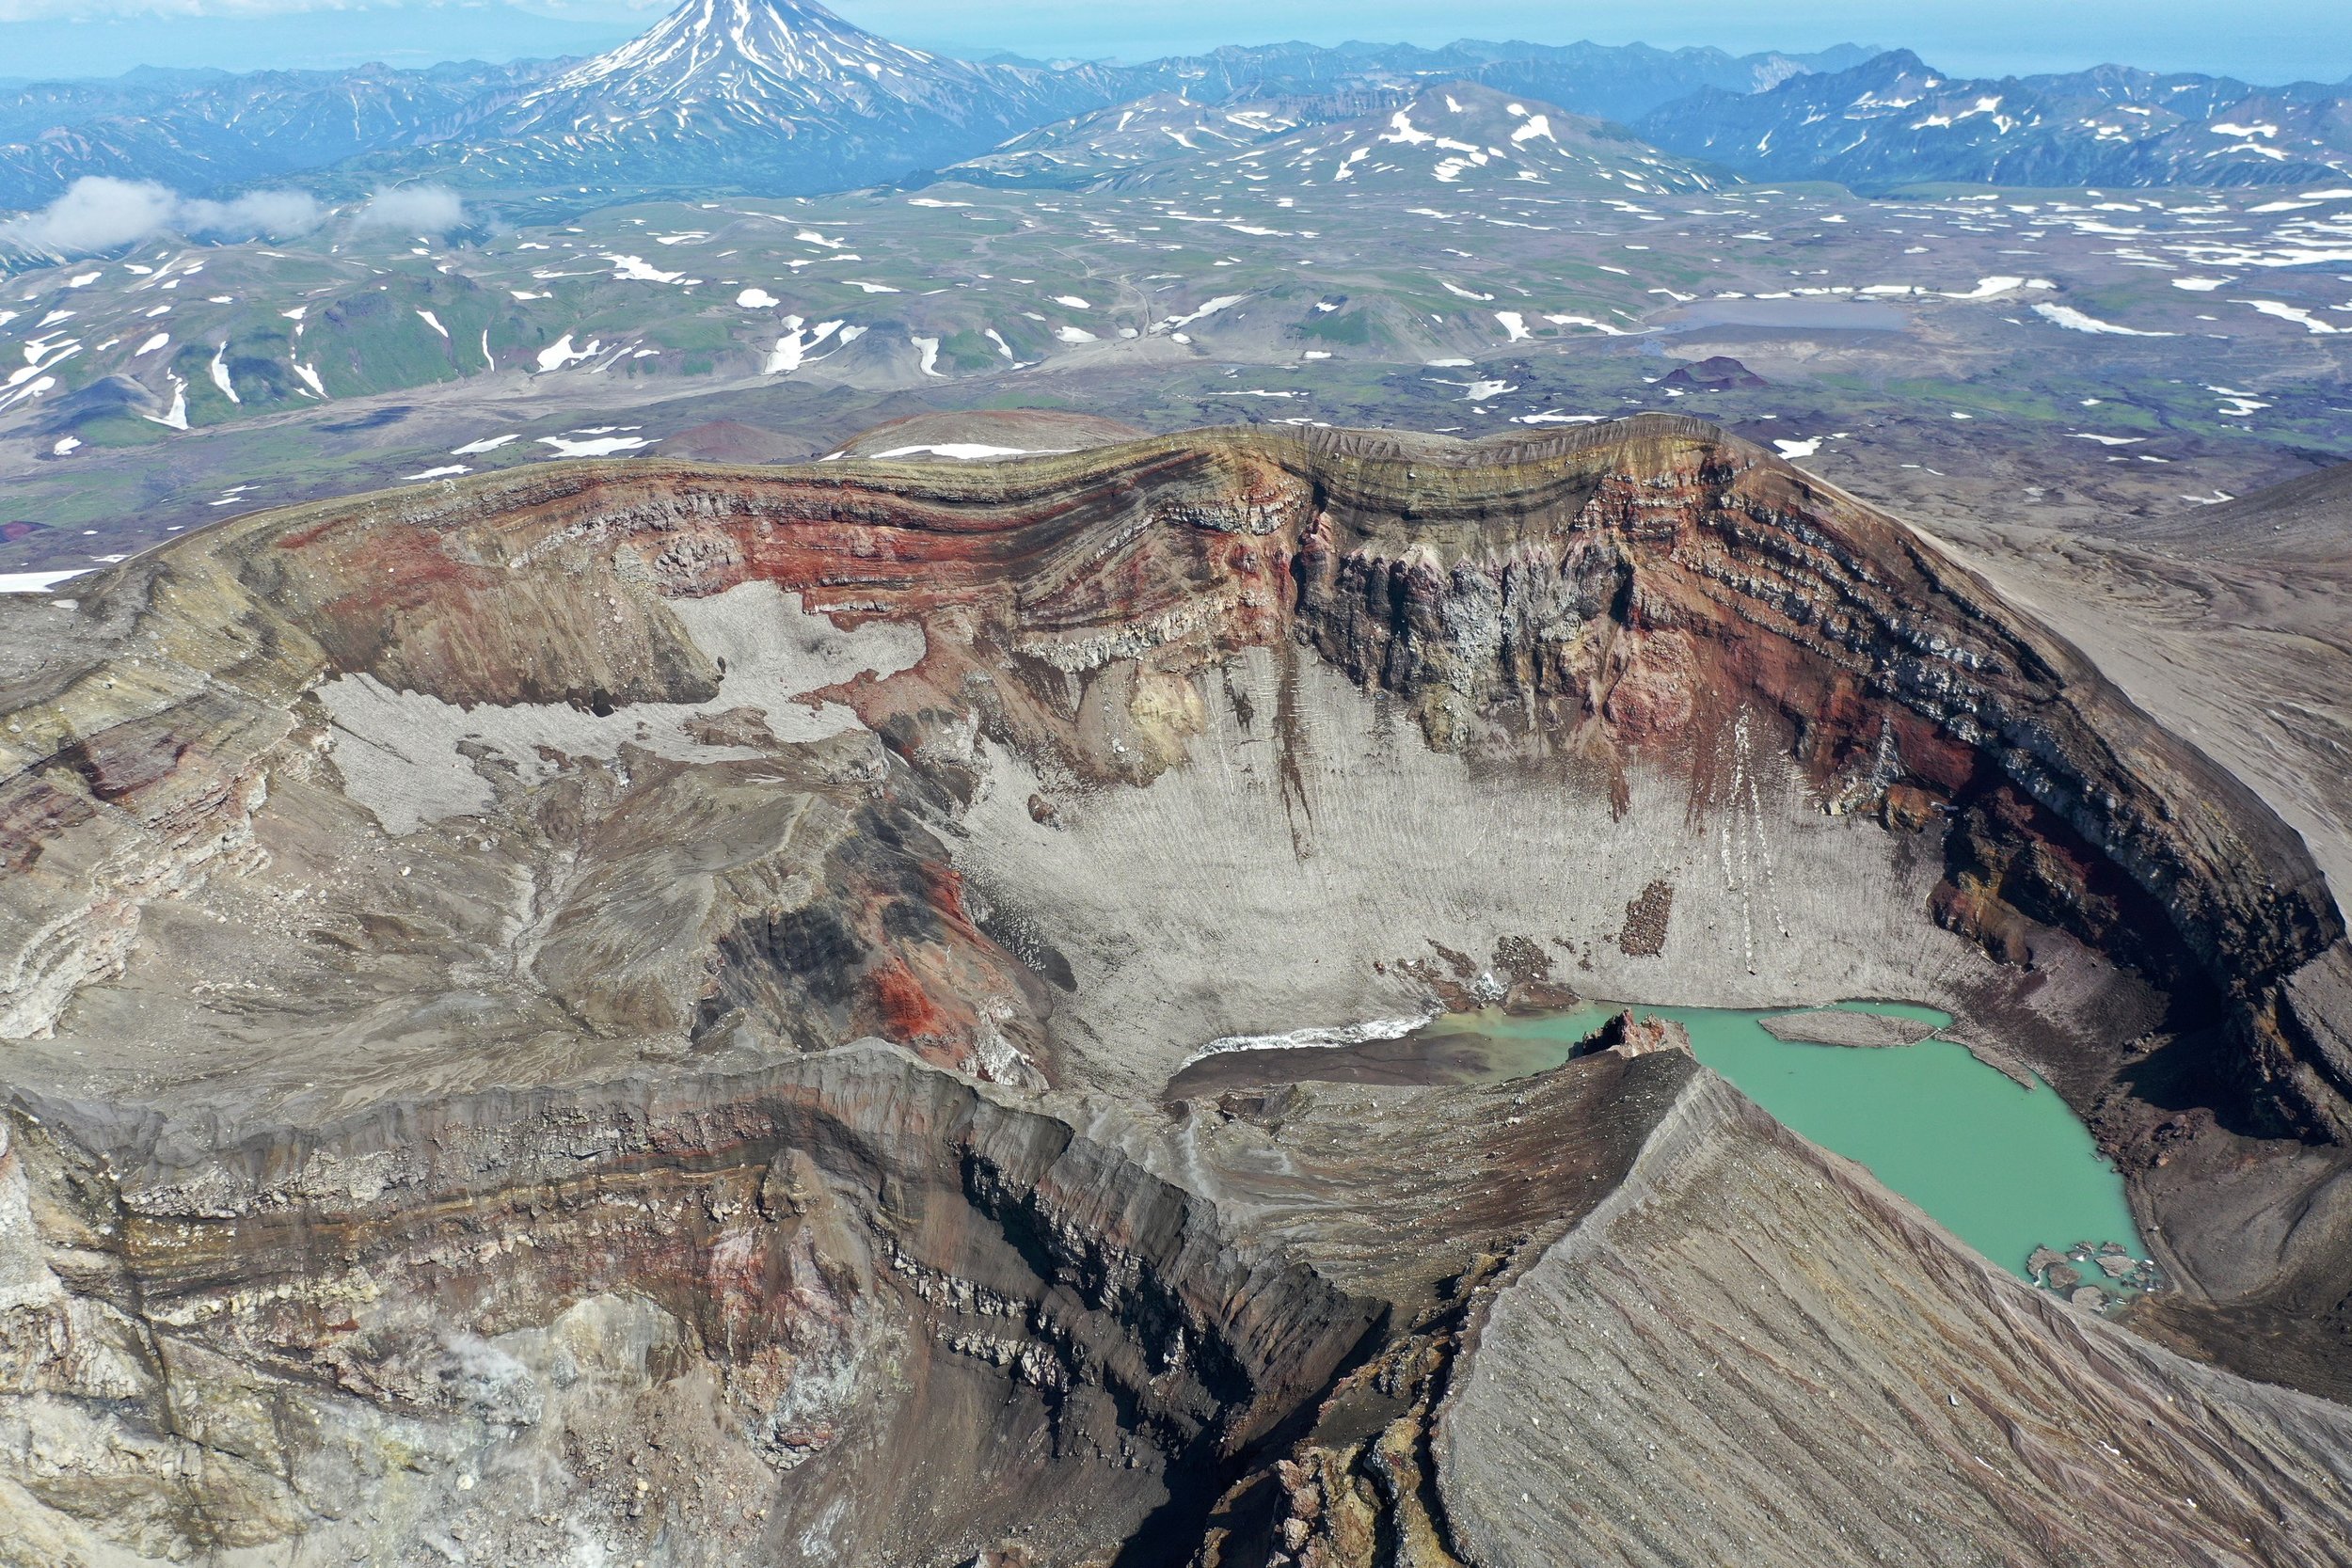
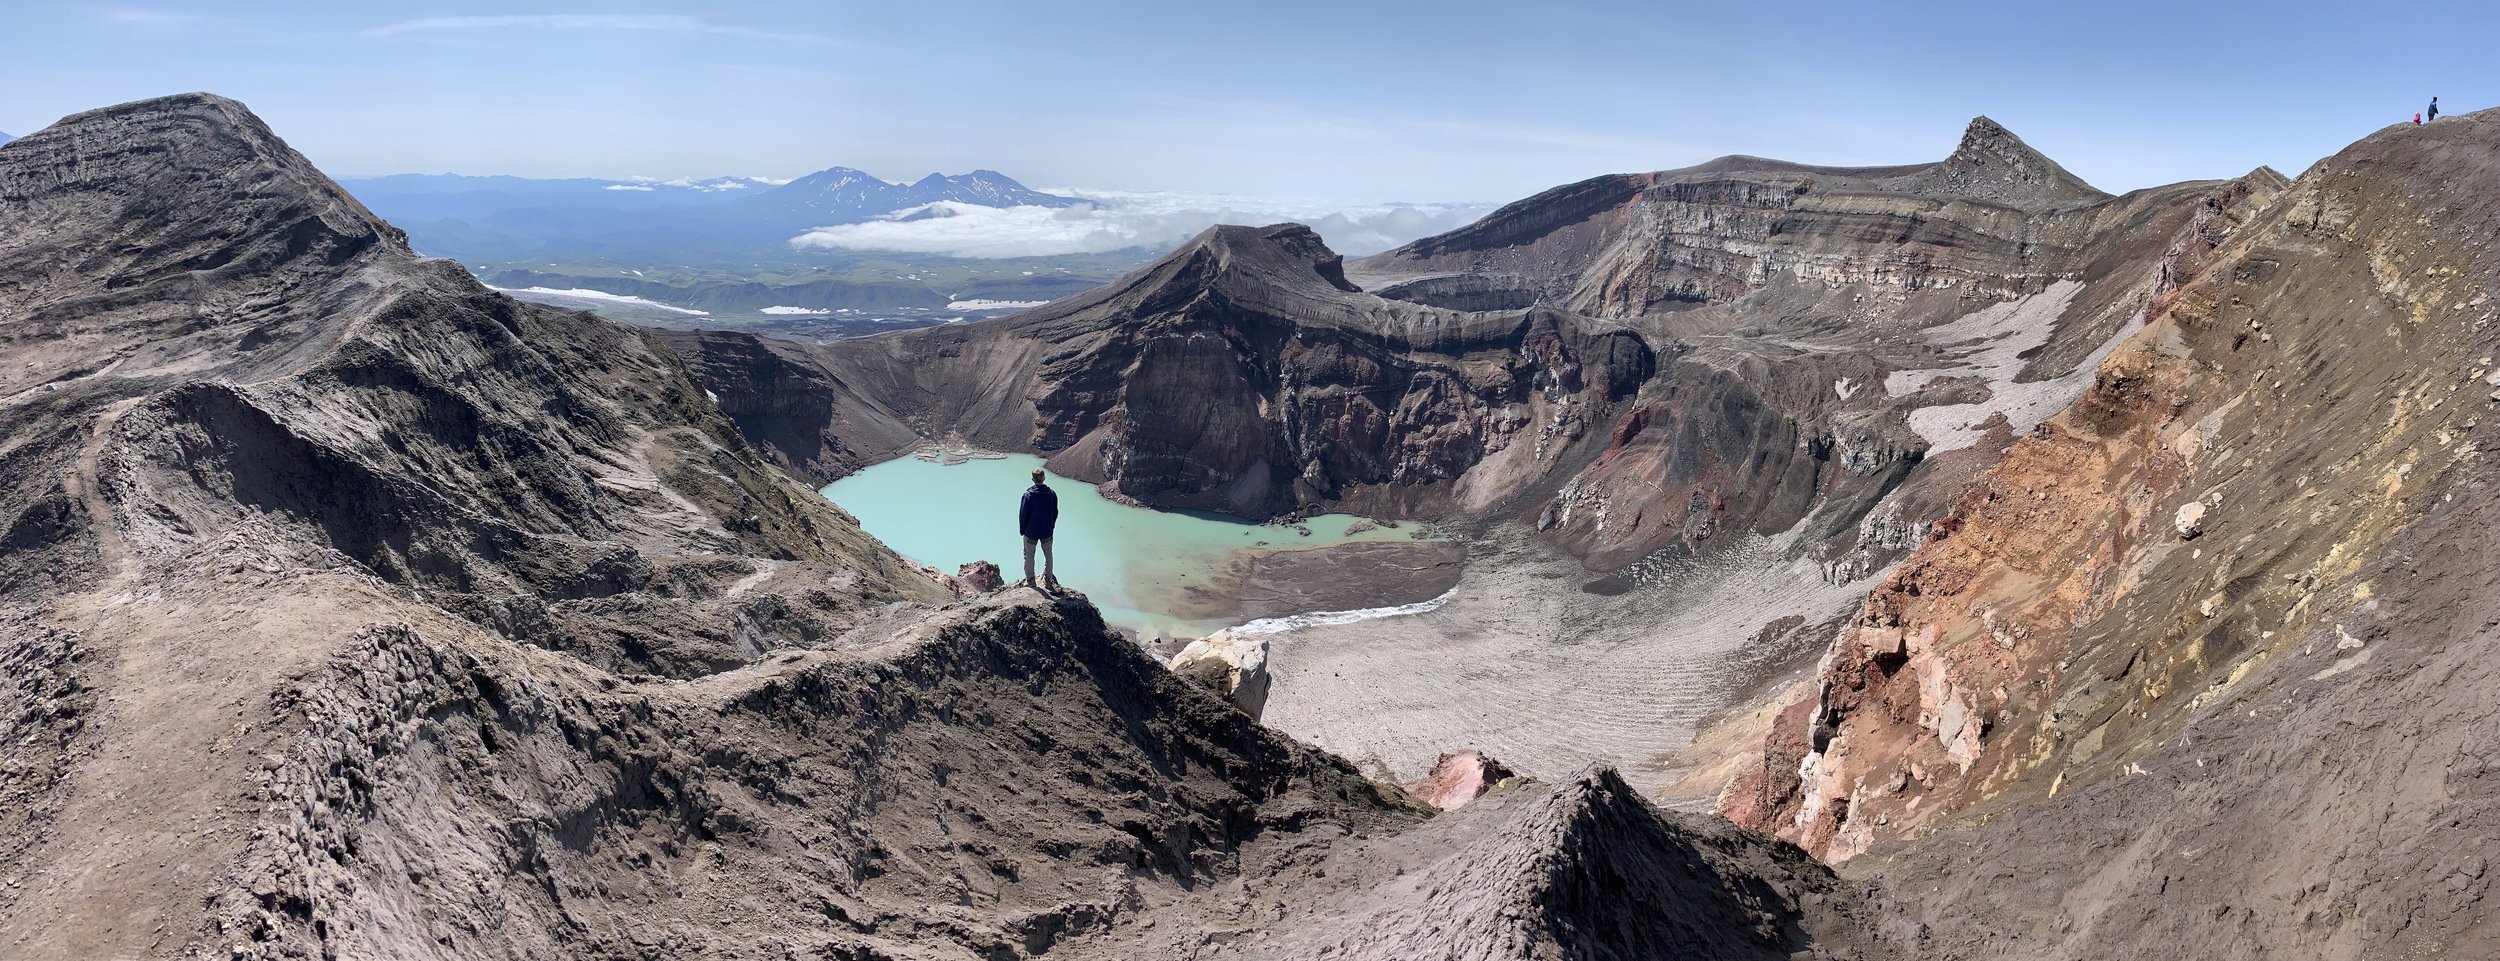
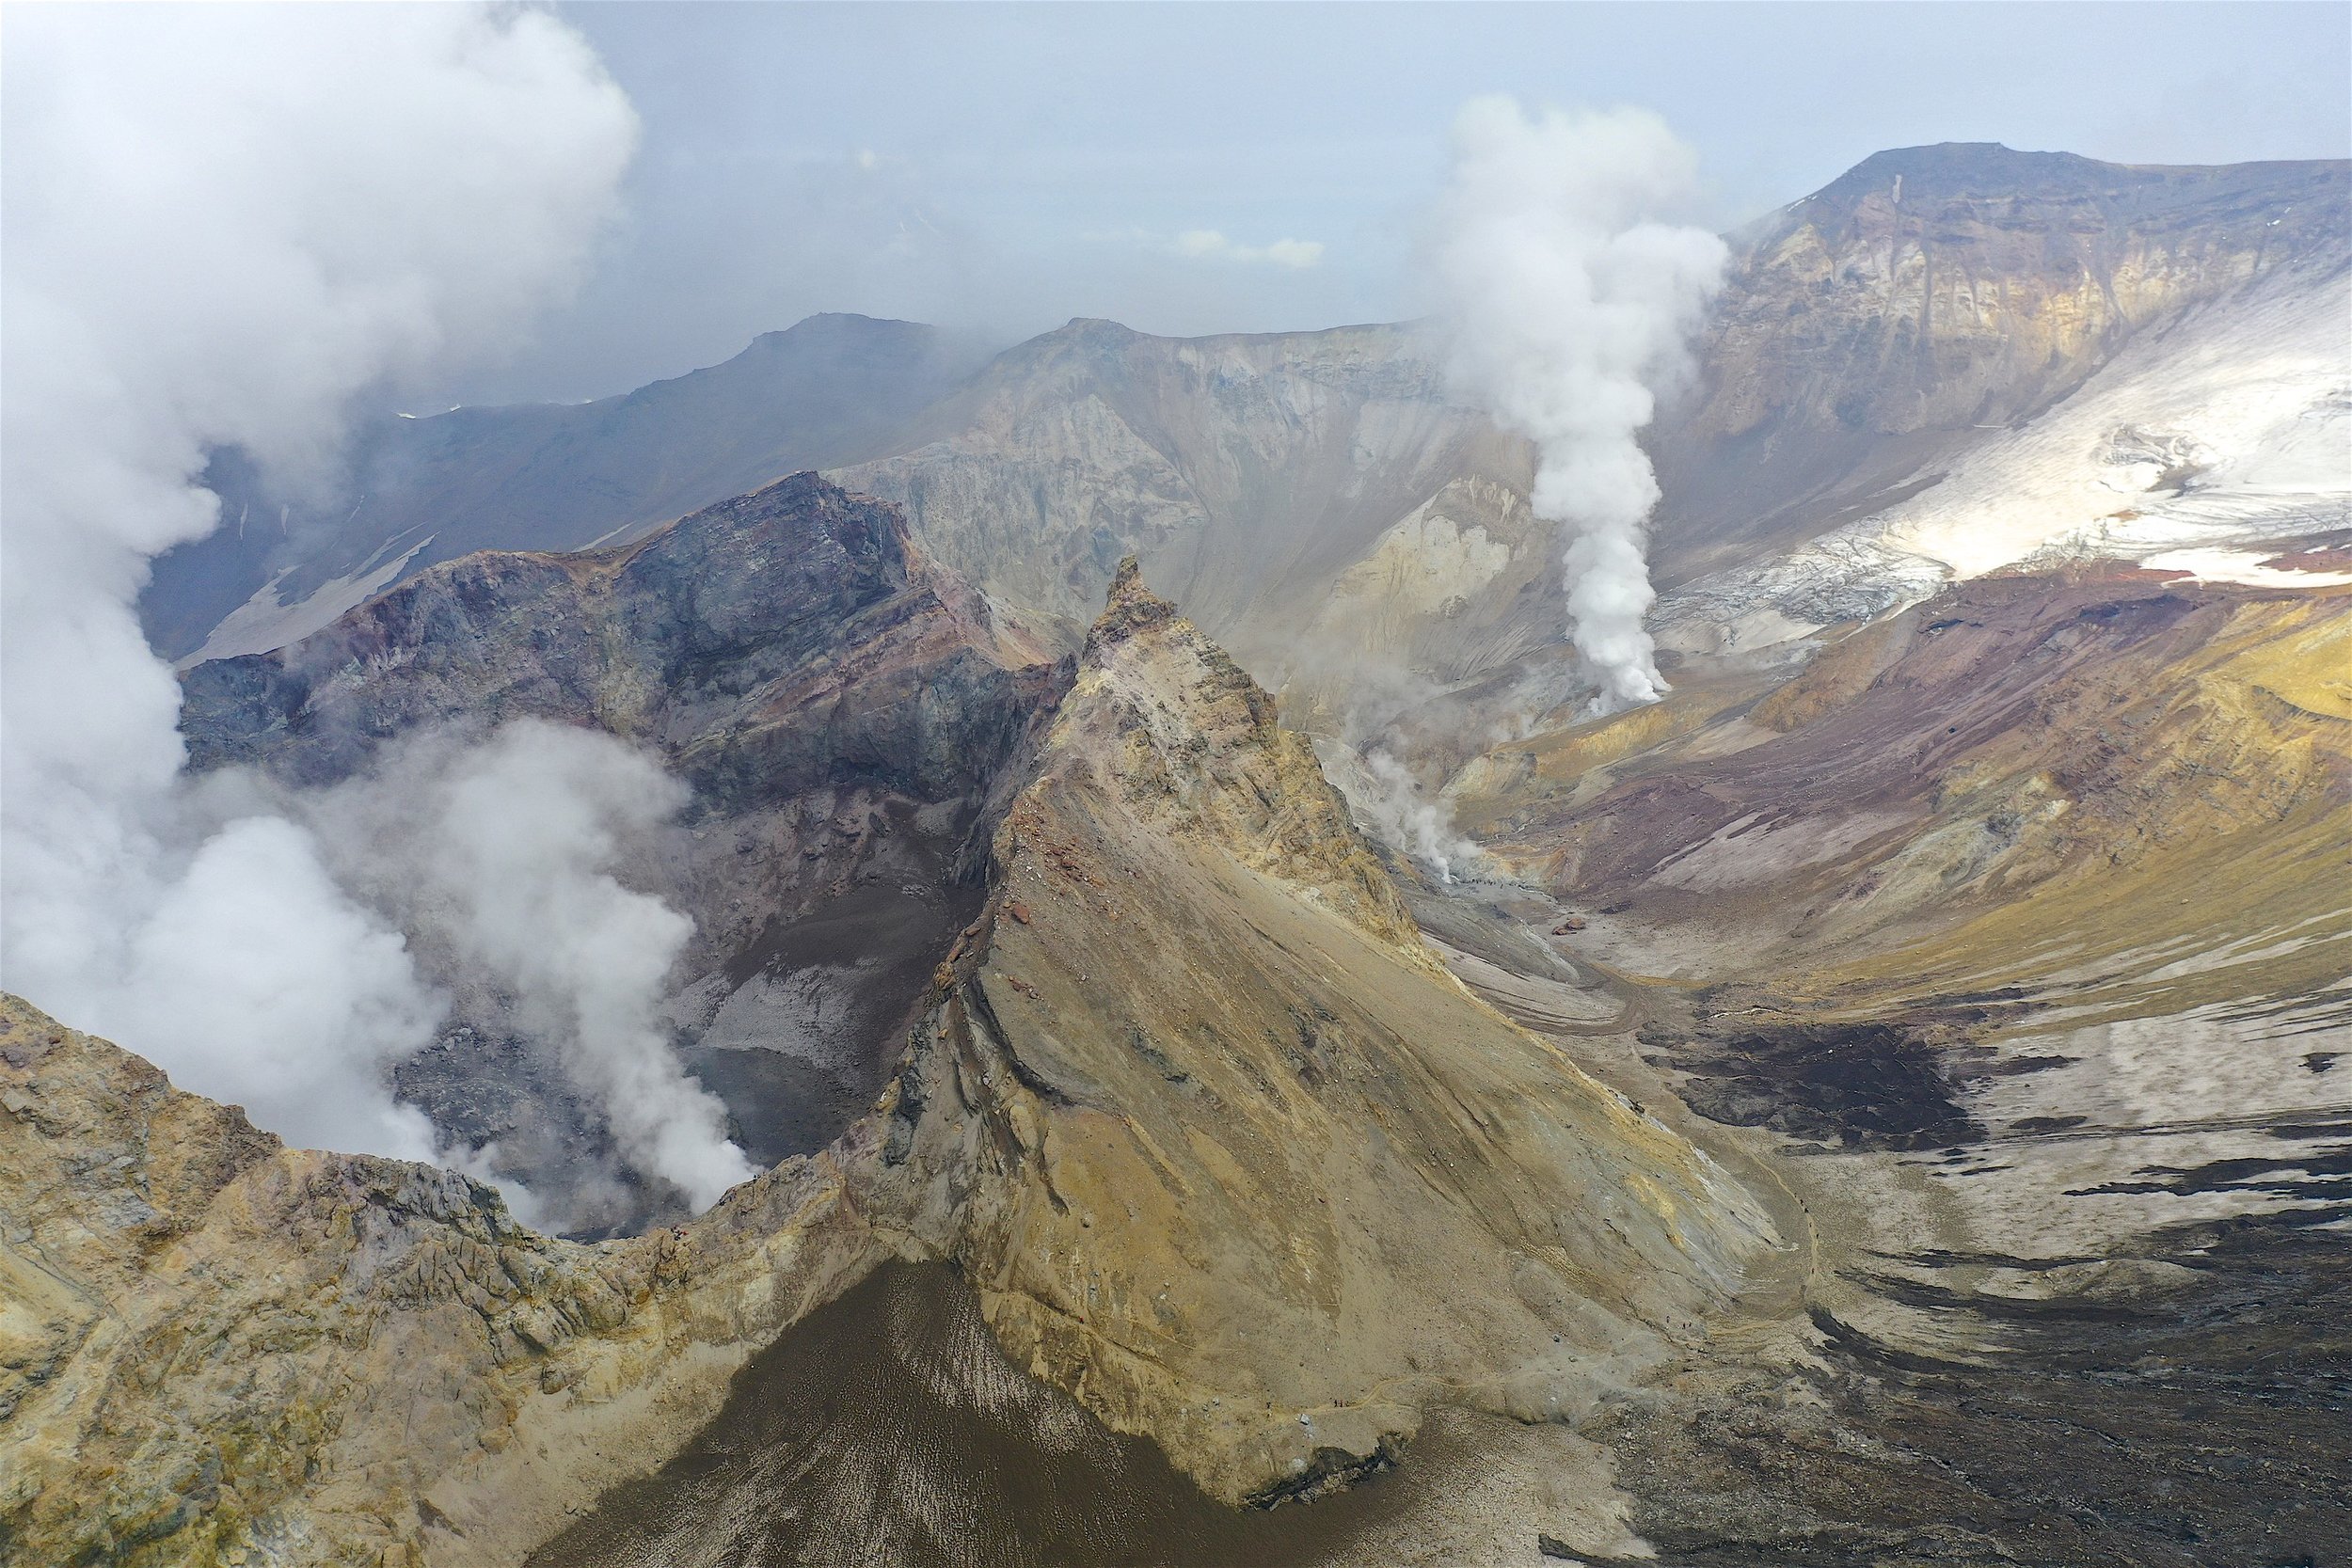
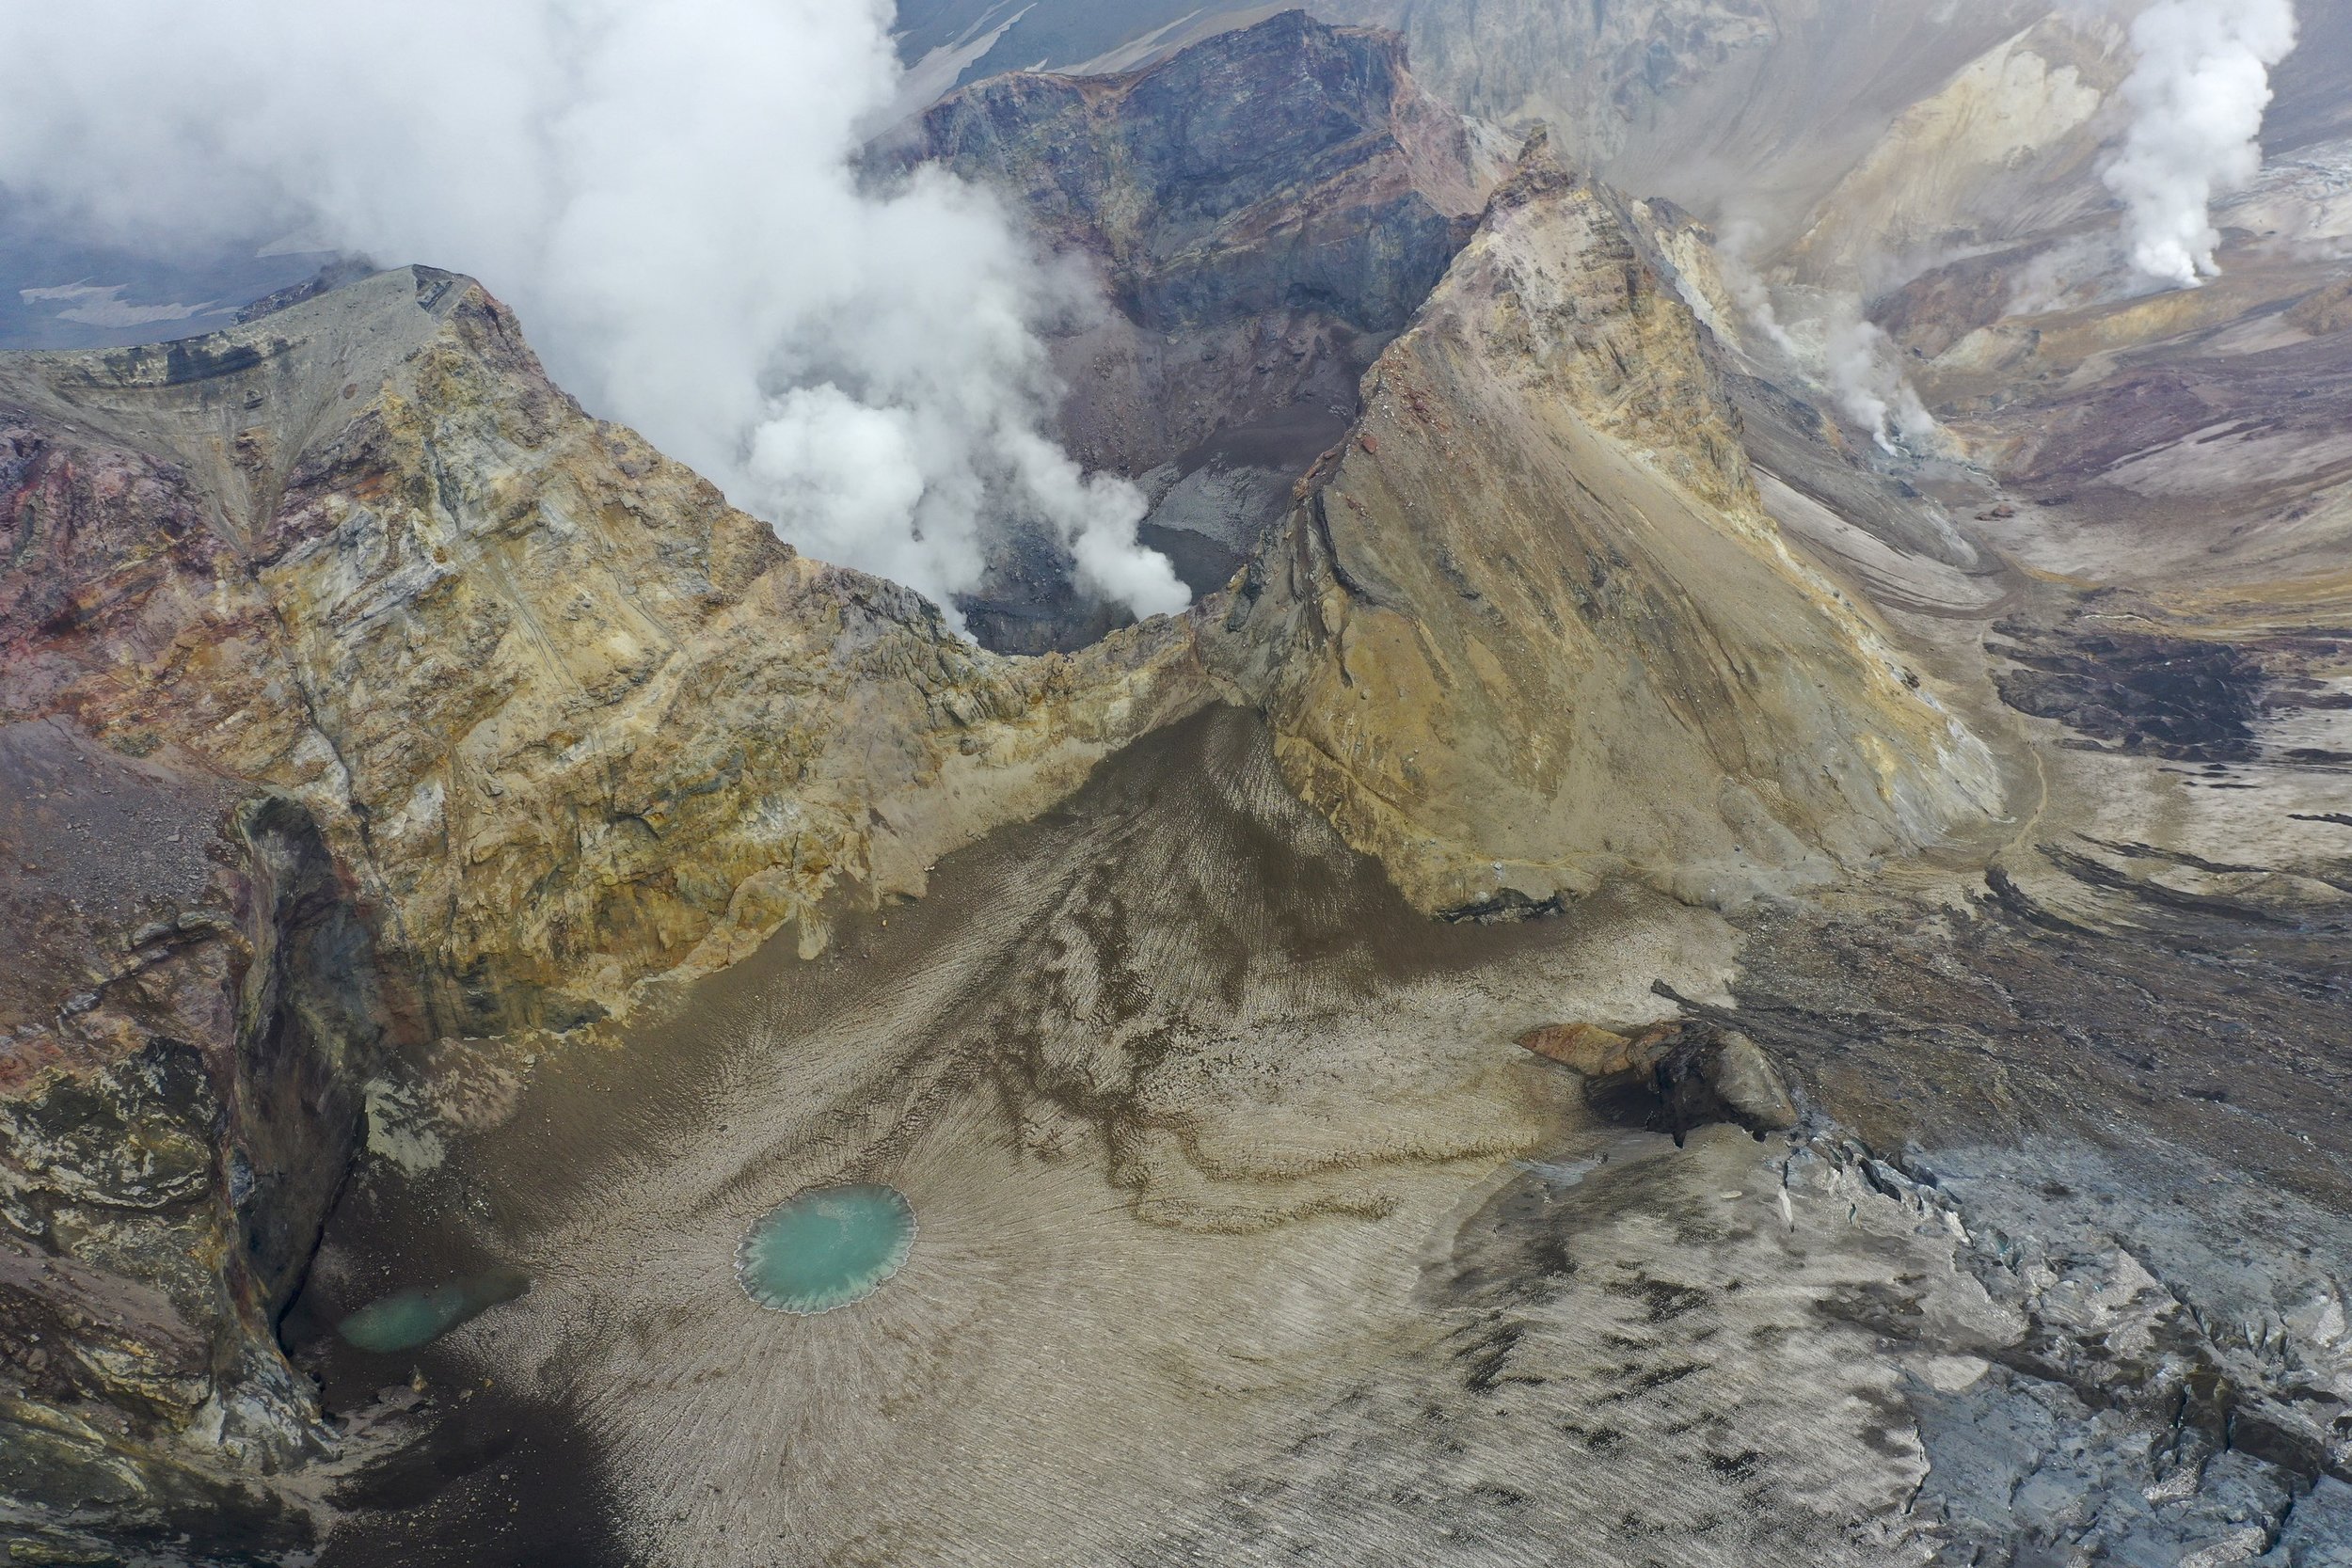
The main crater with a beautiful lake inside. The Gorely Volcano had 9 explosive eruptions in the past. Next to this lake crater is the eruptive crater with an active gas vent. The top of the mountain is the prominent fin in the distance.

The main crater with a beautiful lake inside. The Gorely Volcano had 9 explosive eruptions in the past. Next to this lake crater is the eruptive crater with an active gas vent. The top of the mountain is the prominent fin in the distance.

drone photo by Evgeny Androssov

drone photo by Evgeny Androssov

The active crater of the Gorely Volcano with the active gas vent on the lower right side. The gas vent has a temperature of 900C. The activity began in 2010 and is still ongoing. The drone photo by Evgeny Androssov.

The active crater of the Gorely Volcano with the active gas vent on the lower right side. The gas vent has a temperature of 900C. The activity began in 2010 and is still ongoing. The drone photo by Evgeny Androssov.

One of the main craters of the Gorely Volcano seen from the drone. Photo by Evgeny Androssov.

One of the main craters of the Gorely Volcano seen from the drone. Photo by Evgeny Androssov.

The edge of the crater and the beautiful volcanic lake. Photo by Evgeny Androssov.

The edge of the crater and the beautiful volcanic lake. Photo by Evgeny Androssov.

The path around the crater is very spectacular. It is like a walkway in the sky!

The path around the crater is very spectacular. It is like a walkway in the sky!

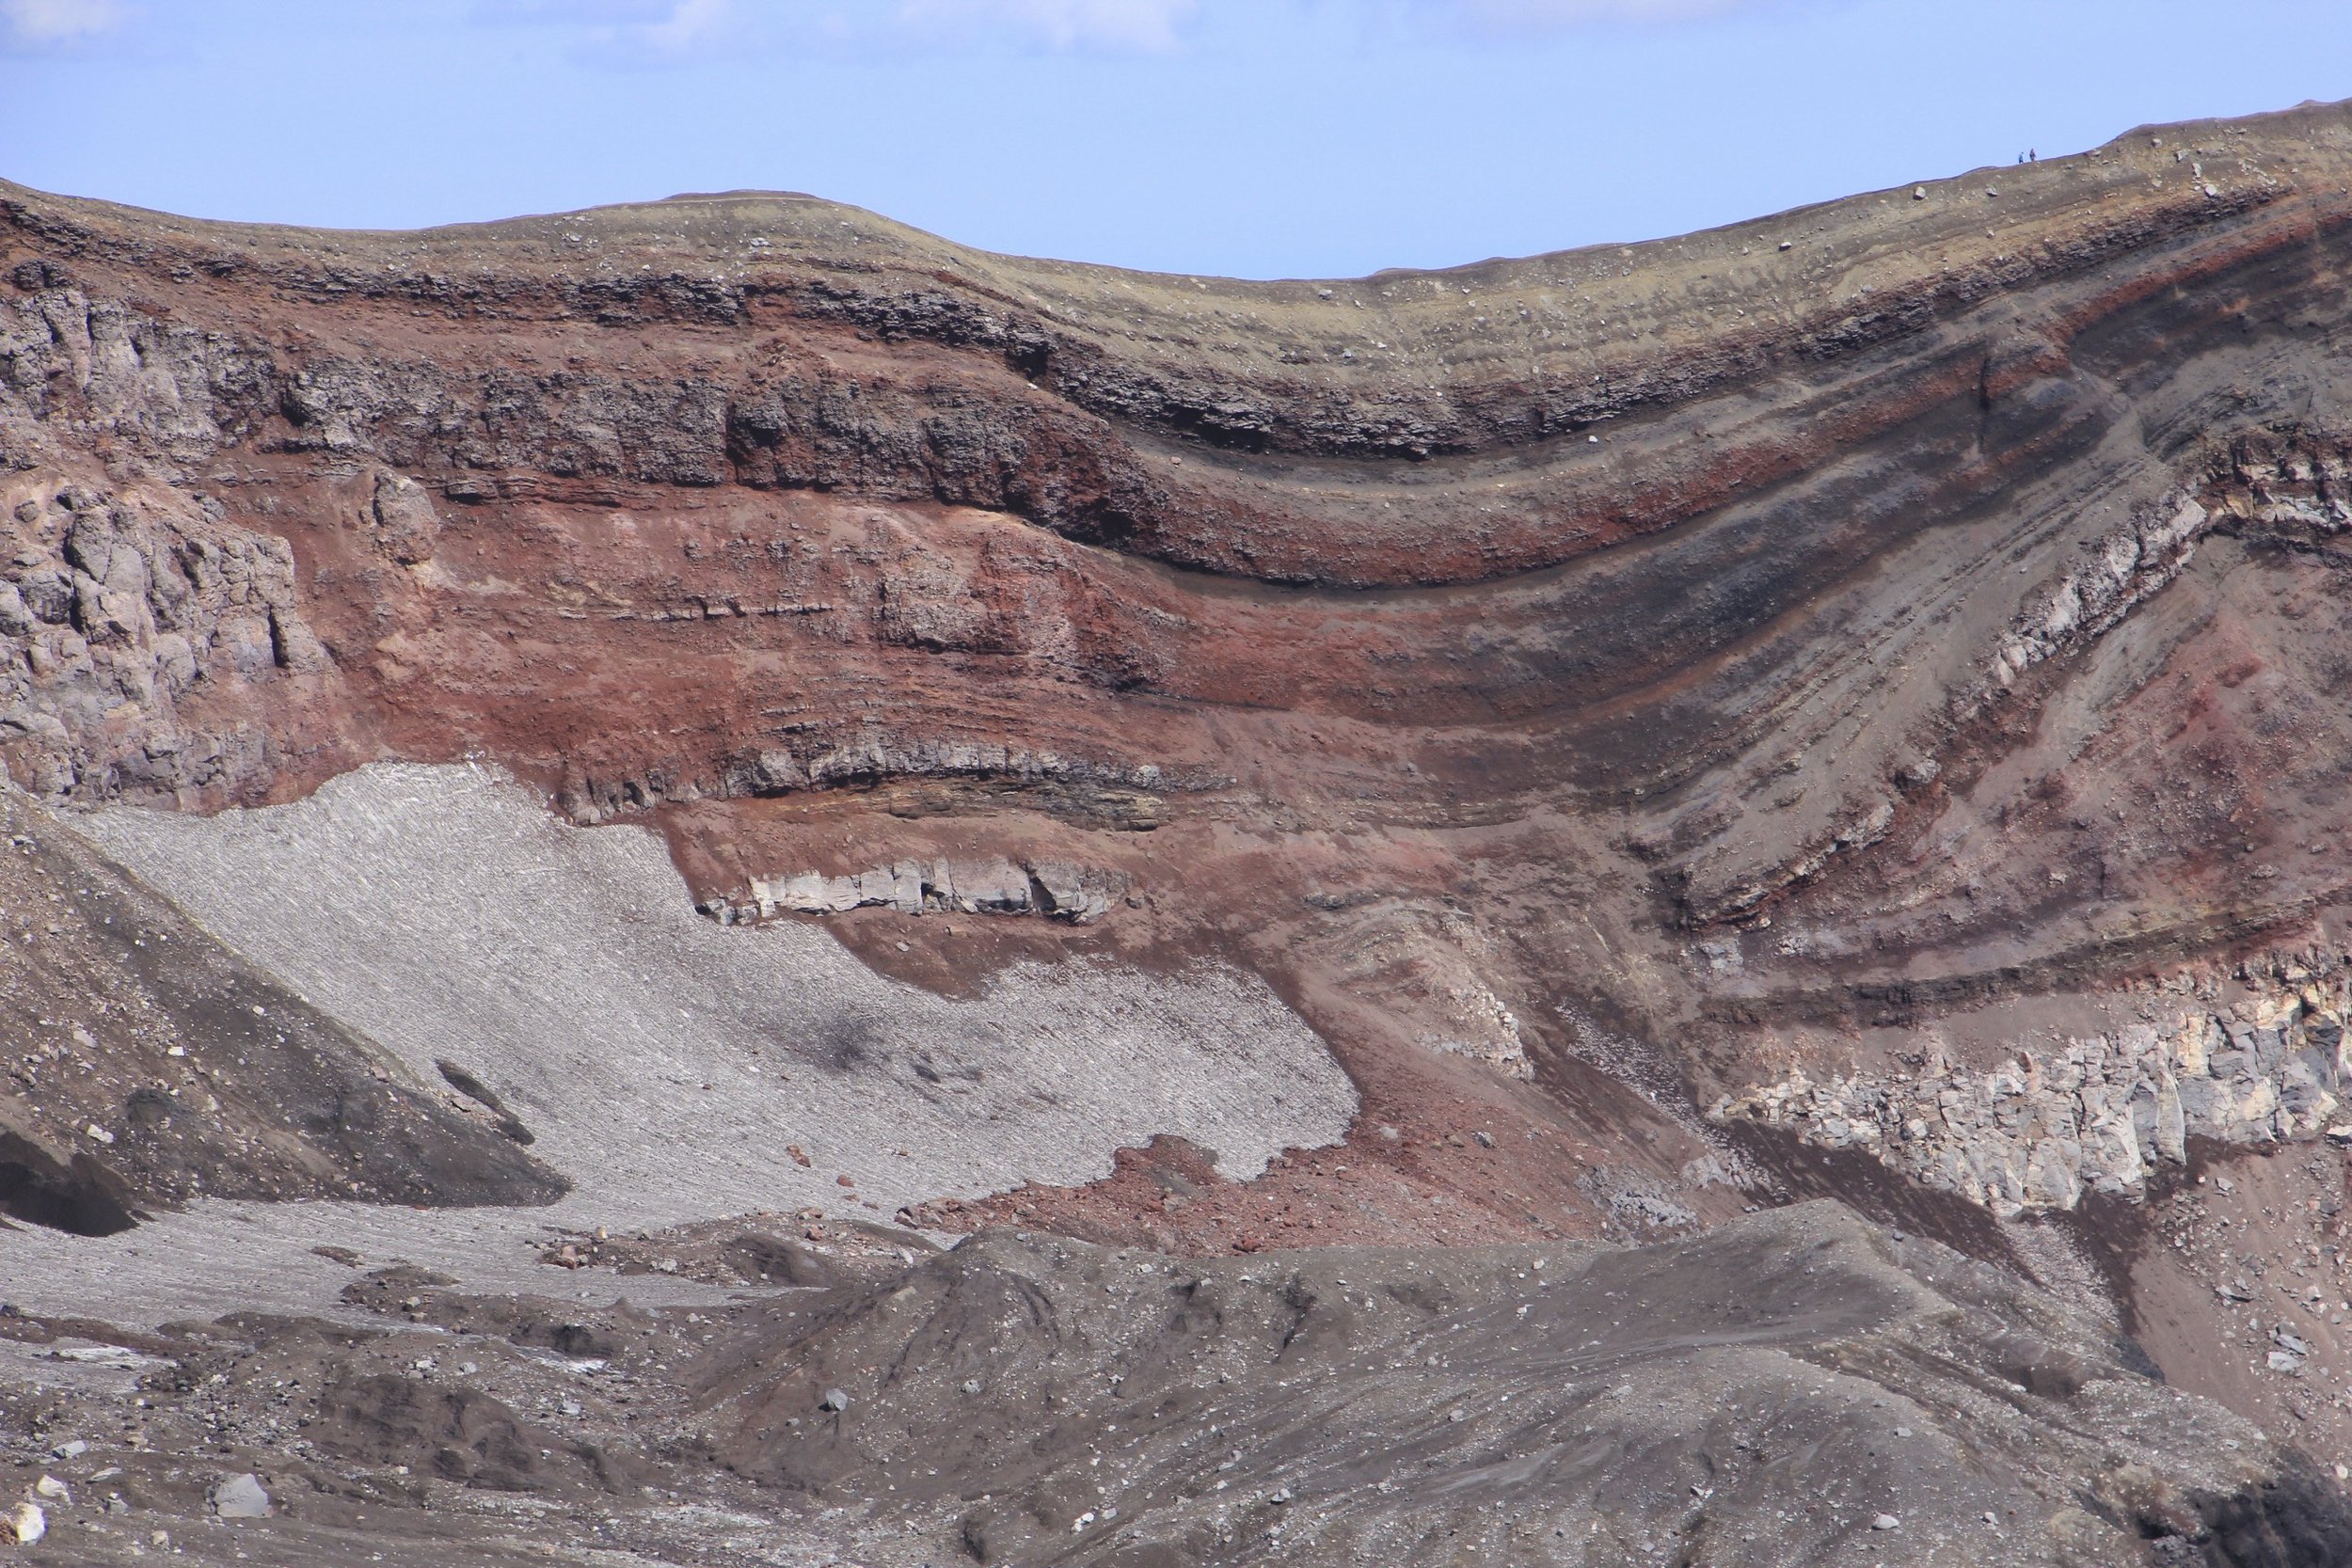
Fantastic formations of the main crater.

Fantastic formations of the main crater.

The edge of the main crater.

The edge of the main crater.

IMG_9542.jpg
The entire main crater of the volcano is quite large and requires a few hours to traverse. It is a great hike though providing views of various craters, the surrounding plateau, and distant volcanoes.

The entire main crater of the volcano is quite large and requires a few hours to traverse. It is a great hike though providing views of various craters, the surrounding plateau, and distant volcanoes.

The path around the Gorely craters.

The path around the Gorely craters.

The bulky Mutnovsky Volcano towering over the plateau.

The bulky Mutnovsky Volcano towering over the plateau.

The Mutnovsky Volcano seen from the top of the Gorely Volcano. To access the active crater of the Mutnovsky, we walked through the canyon break in the crater wall. The existence of a glacier inside an active volcano was quite incredible.

The Mutnovsky Volcano seen from the top of the Gorely Volcano. To access the active crater of the Mutnovsky, we walked through the canyon break in the crater wall. The existence of a glacier inside an active volcano was quite incredible.

The top of the Gorely Volcano is 2000m high.

The top of the Gorely Volcano is 2000m high.

The view from the top of Gorely.

The view from the top of Gorely.

The elevation of the highest point on the Gorely Volcano.

The elevation of the highest point on the Gorely Volcano.

One of the active areas and the steaming ground.

One of the active areas and the steaming ground.

The active main crater of the Gorely Volcano.

The active main crater of the Gorely Volcano.

IMG_3216.jpg
The view from the top of Gorely to the Mutnowsky Volcanic Plateau.

The view from the top of Gorely to the Mutnowsky Volcanic Plateau.

Walking on the rim of the Gorely crater with the Opala Volcano in the distance (2,475m).

Walking on the rim of the Gorely crater with the Opala Volcano in the distance (2,475m).

This side of the mountain was quite hot. Even on this warm day, the steam was visible (and smell-able).

This side of the mountain was quite hot. Even on this warm day, the steam was visible (and smell-able).

An unnamed crater of the Gorely Volcano and Mutnowski Volcano behind.

An unnamed crater of the Gorely Volcano and Mutnowski Volcano behind.

On the edge of the Gorely crater with Mutnovsky in the distance.

On the edge of the Gorely crater with Mutnovsky in the distance.

The active crater of Gorely, We walked by numerous active vents and the smell of sulfur was in the air.

The active crater of Gorely, We walked by numerous active vents and the smell of sulfur was in the air.

The closeup of one of the vents of the Gorely Volcano.

The closeup of one of the vents of the Gorely Volcano.

One can take a day trip to the Gorely crater from PK for around $700 US per person. The large Mi8 helicopter takes about 24 passengers. It has max cruising speed of 225km/h and a flight range of 900km. It is the most popular twin engine helicopter i…

One can take a day trip to the Gorely crater from PK for around $700 US per person. The large Mi8 helicopter takes about 24 passengers. It has max cruising speed of 225km/h and a flight range of 900km. It is the most popular twin engine helicopter in the world. We observed their approach and landing. On the next photo, see the helicopter parked in front of the crater for scale!

The Mi8 helicopter parked at the rim of the active crater on Gorely Volcano.

The Mi8 helicopter parked at the rim of the active crater on Gorely Volcano.

The Mutnovsky Volcano 2,323m is 15km away.

The Mutnovsky Volcano 2,323m is 15km away.

The Gorely Volcano from our camp.

The Gorely Volcano from our camp.

Walking through the remains of the 15m snow drifts!

Walking through the remains of the 15m snow drifts!

The bears and us shared the path. Thankfully not at the same time!

The bears and us shared the path. Thankfully not at the same time!

The bulky Gorely in the distance.

The bulky Gorely in the distance.

Approaching the Mutnovsky Volcano, still 4km away. We camped here and hiked to the crater without our heavy packs.

Approaching the Mutnovsky Volcano, still 4km away. We camped here and hiked to the crater without our heavy packs.

The Mutnovsky Volcano has a complex structure. It is really formed from four separate stratovolcanoes with a common top and a double crater of 2 x 1.5km in size. The Vulkannaya River broke through the wall of the crater creating a gorge and provided…

The Mutnovsky Volcano has a complex structure. It is really formed from four separate stratovolcanoes with a common top and a double crater of 2 x 1.5km in size. The Vulkannaya River broke through the wall of the crater creating a gorge and provided an access point to the inner crater.

The campsite for the Muntovsky Volcano.

The campsite for the Muntovsky Volcano.

The gap in the crater walls formed by the Vulkannaya River. The trail goes along the crater walls. It feels like walking into a castle!

The gap in the crater walls formed by the Vulkannaya River. The trail goes along the crater walls. It feels like walking into a castle!

The gorge of the Vulcannaya River. There is a wonderful waterfall further down.

The gorge of the Vulcannaya River. There is a wonderful waterfall further down.

Day-trippers from PK. It is a full day excursion with a long and shaky drive on both ends of the trip.

Day-trippers from PK. It is a full day excursion with a long and shaky drive on both ends of the trip.

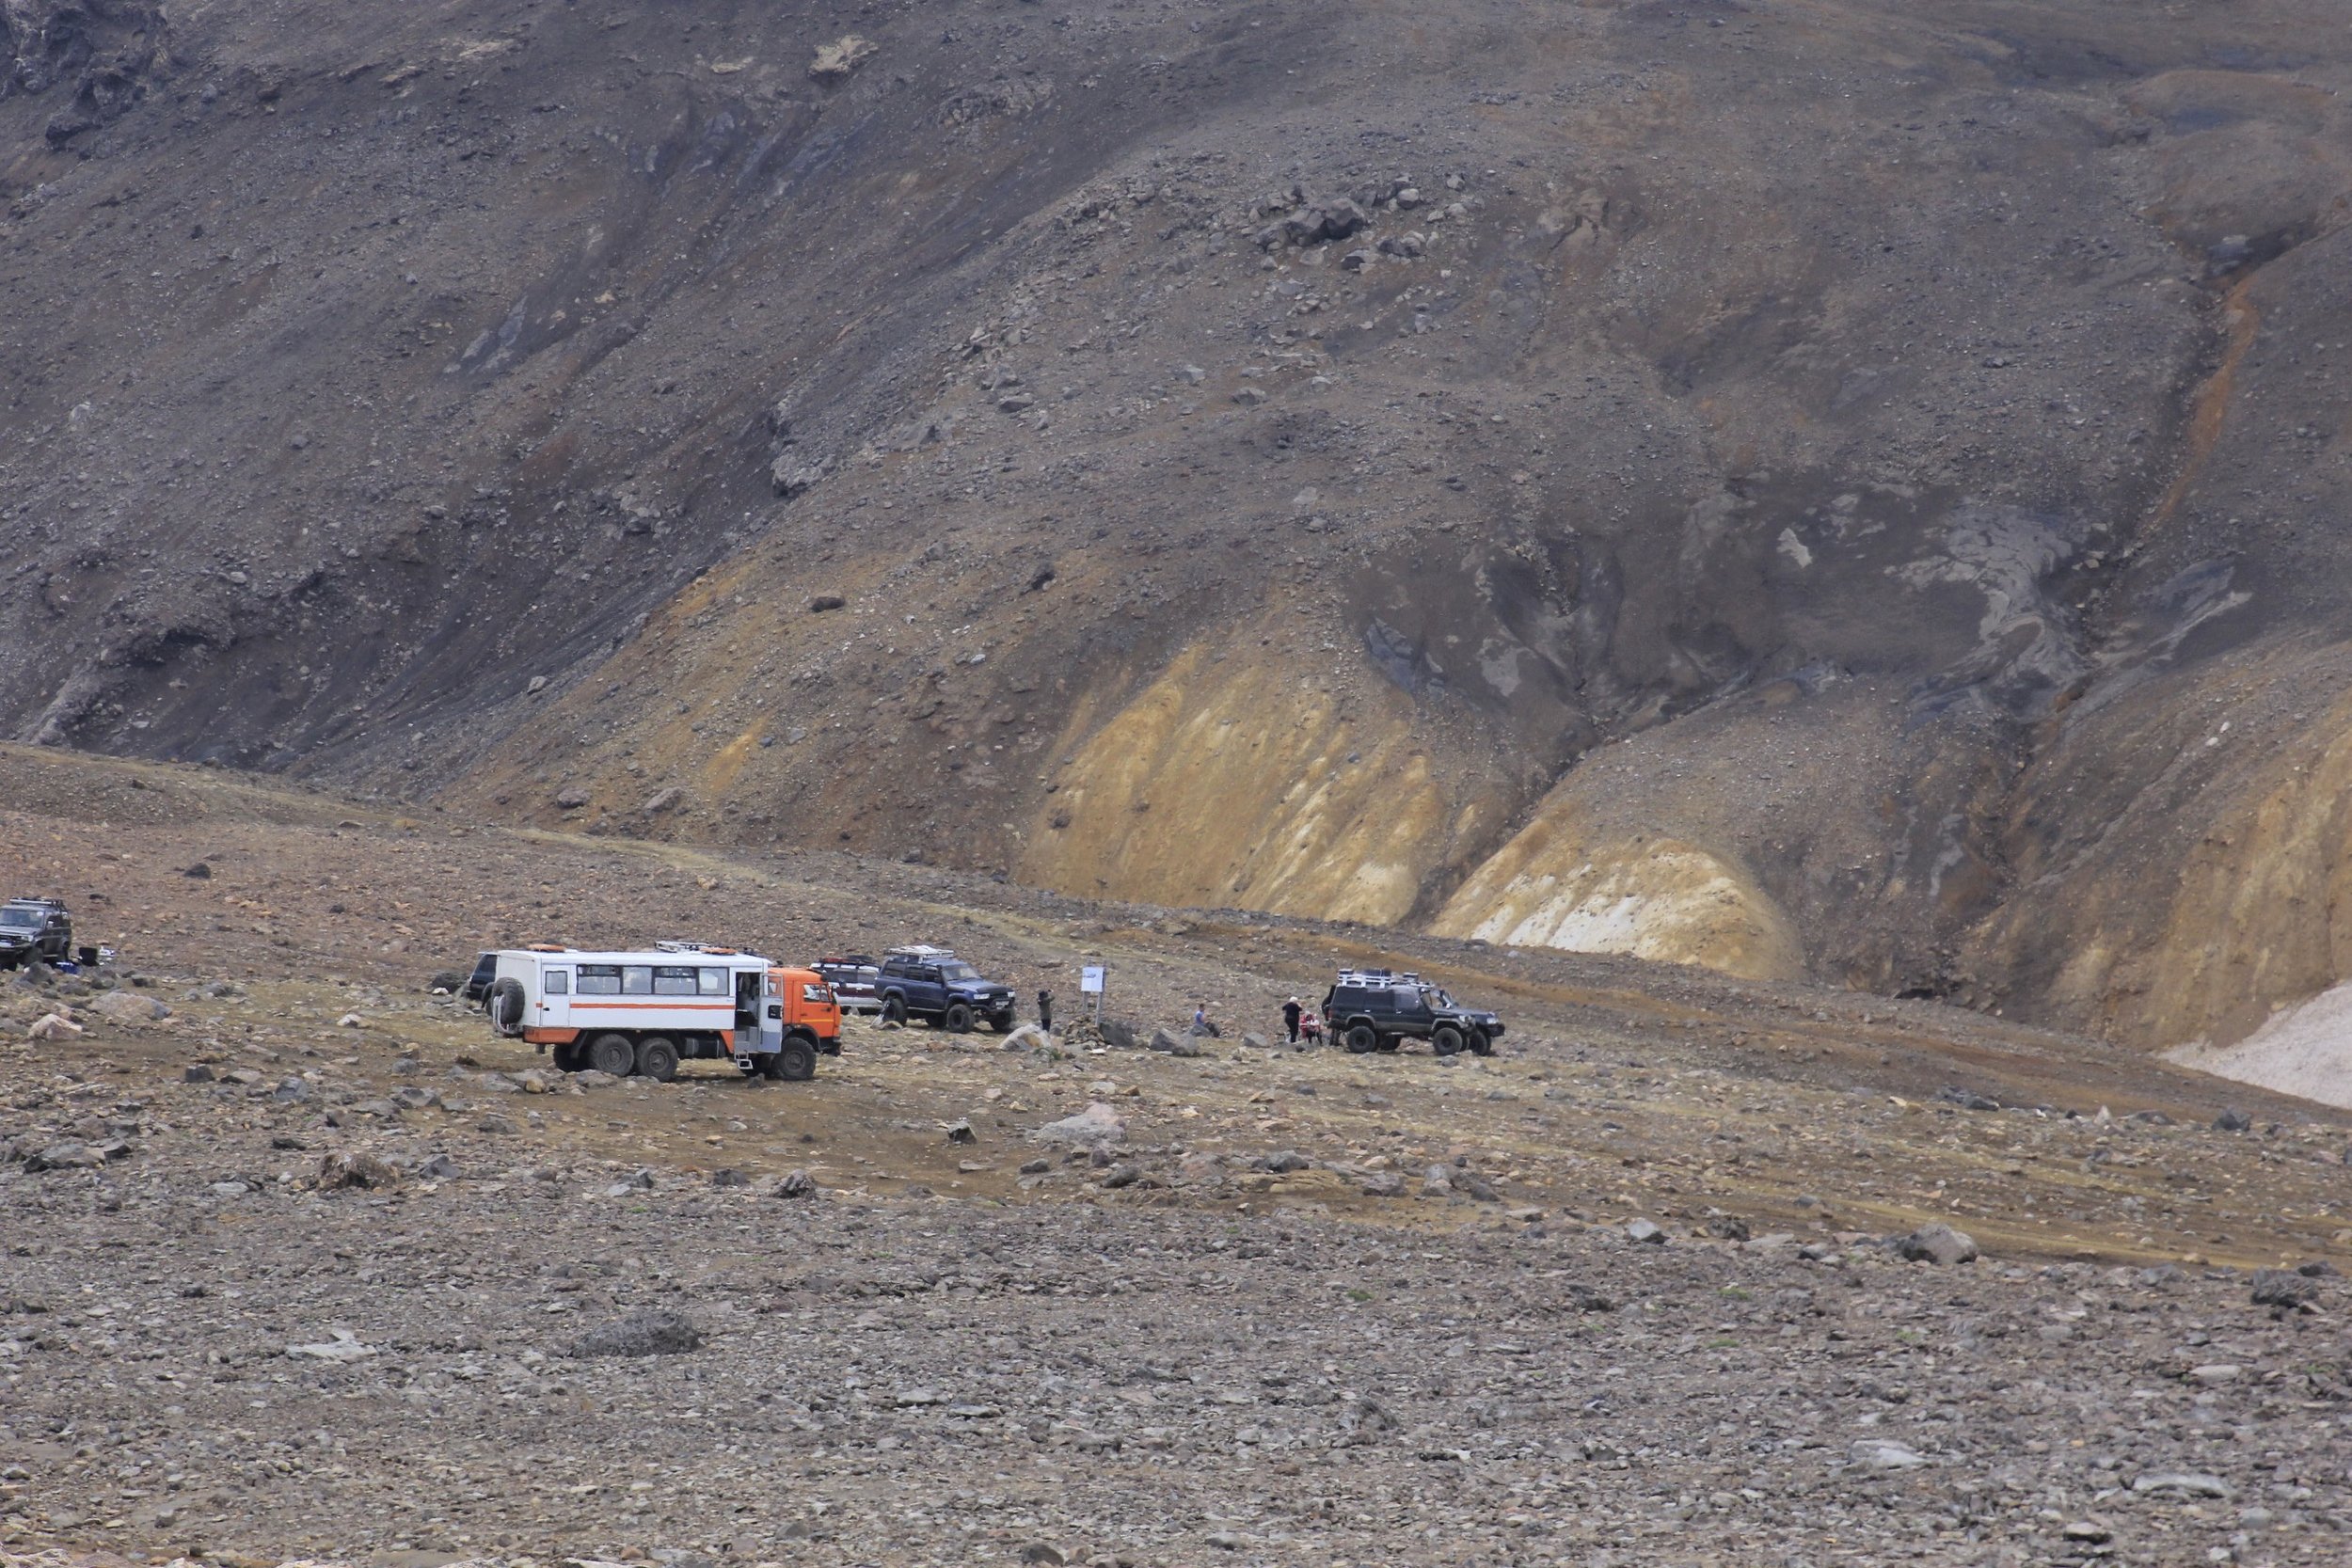
The local operators use these monster trucks to negotiate the rough road from PK to Mutnovsky. There seems to be a monster truck cult in PK as some of them were incredibly large.

The local operators use these monster trucks to negotiate the rough road from PK to Mutnovsky. There seems to be a monster truck cult in PK as some of them were incredibly large.

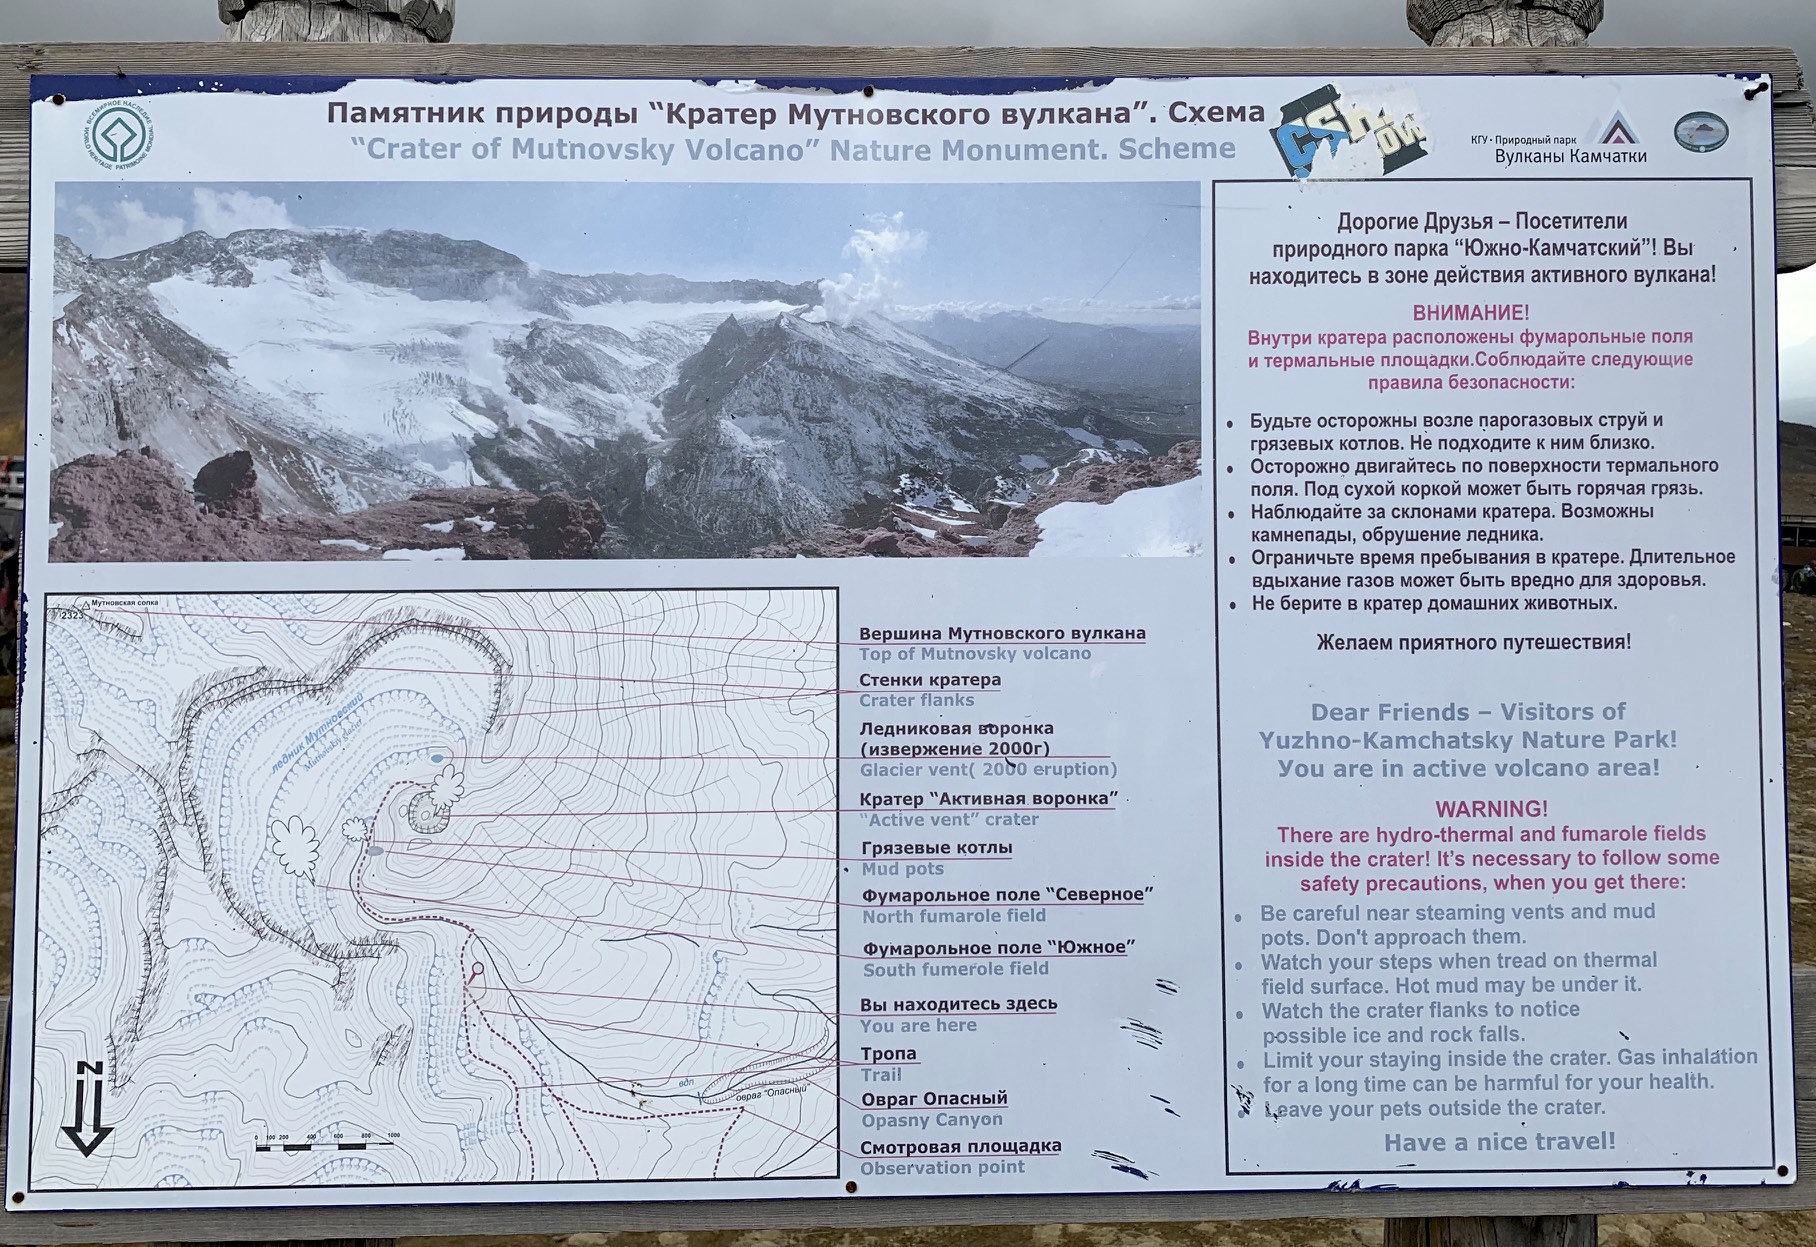
The general map of the Mutnovsky crater, Aside from this warning, there are no restrictions or barriers preventing a thorough exploration the crater. I am sure that in time, as the number of visitors grow, there will be walkways and barriers (like t…

The general map of the Mutnovsky crater, Aside from this warning, there are no restrictions or barriers preventing a thorough exploration the crater. I am sure that in time, as the number of visitors grow, there will be walkways and barriers (like the Yellowstone NP). It is good to be here before it happens!

Walking into the crater.

Walking into the crater.

As we got closer, it felt unreal to be here! It was hard to imagine that a place like this exists and that we can explore it freely.

As we got closer, it felt unreal to be here! It was hard to imagine that a place like this exists and that we can explore it freely.

Massive walls of the crater. It felt like we were inside a castle from the Lord of the Rings.

Massive walls of the crater. It felt like we were inside a castle from the Lord of the Rings.

A big glacier lies inside the crater stopping at two vast fumarole fields: Donnoye and Verkhneye. An active funnel over these fields emits powerful gas and steam jets, which rise up to 1.5km above the volcano.

A big glacier lies inside the crater stopping at two vast fumarole fields: Donnoye and Verkhneye. An active funnel over these fields emits powerful gas and steam jets, which rise up to 1.5km above the volcano.

The pano view of the fumarole fields.

The pano view of the fumarole fields.

Inside the active fumarole field.

Inside the active fumarole field.

IMG_E3288.jpg
The pano view of the active fumarole field inside the crater. The filed is full of gas vents, boiling mud, small geysers and other active formations.

The pano view of the active fumarole field inside the crater. The filed is full of gas vents, boiling mud, small geysers and other active formations.

Beautiful pool close to the active vents.

Beautiful pool close to the active vents.

The “Boiling River” Vulkannaya. There were some boiling water pools next to the river.

The “Boiling River” Vulkannaya. There were some boiling water pools next to the river.

Fumaroles rich in sulfurous gas create various domes of brimstone. I inhaled the gas accidentally and could not breathe as long as I was near it!

Fumaroles rich in sulfurous gas create various domes of brimstone. I inhaled the gas accidentally and could not breathe as long as I was near it!

Brimstone formations - loud and smelly

Brimstone formations - loud and smelly

Another brimstone dome emitting steam with a jet-like force.

Another brimstone dome emitting steam with a jet-like force.

Brimstone

Brimstone

The edge of one of the two active craters.

The edge of one of the two active craters.

Two active craters are visible.

Two active craters are visible.

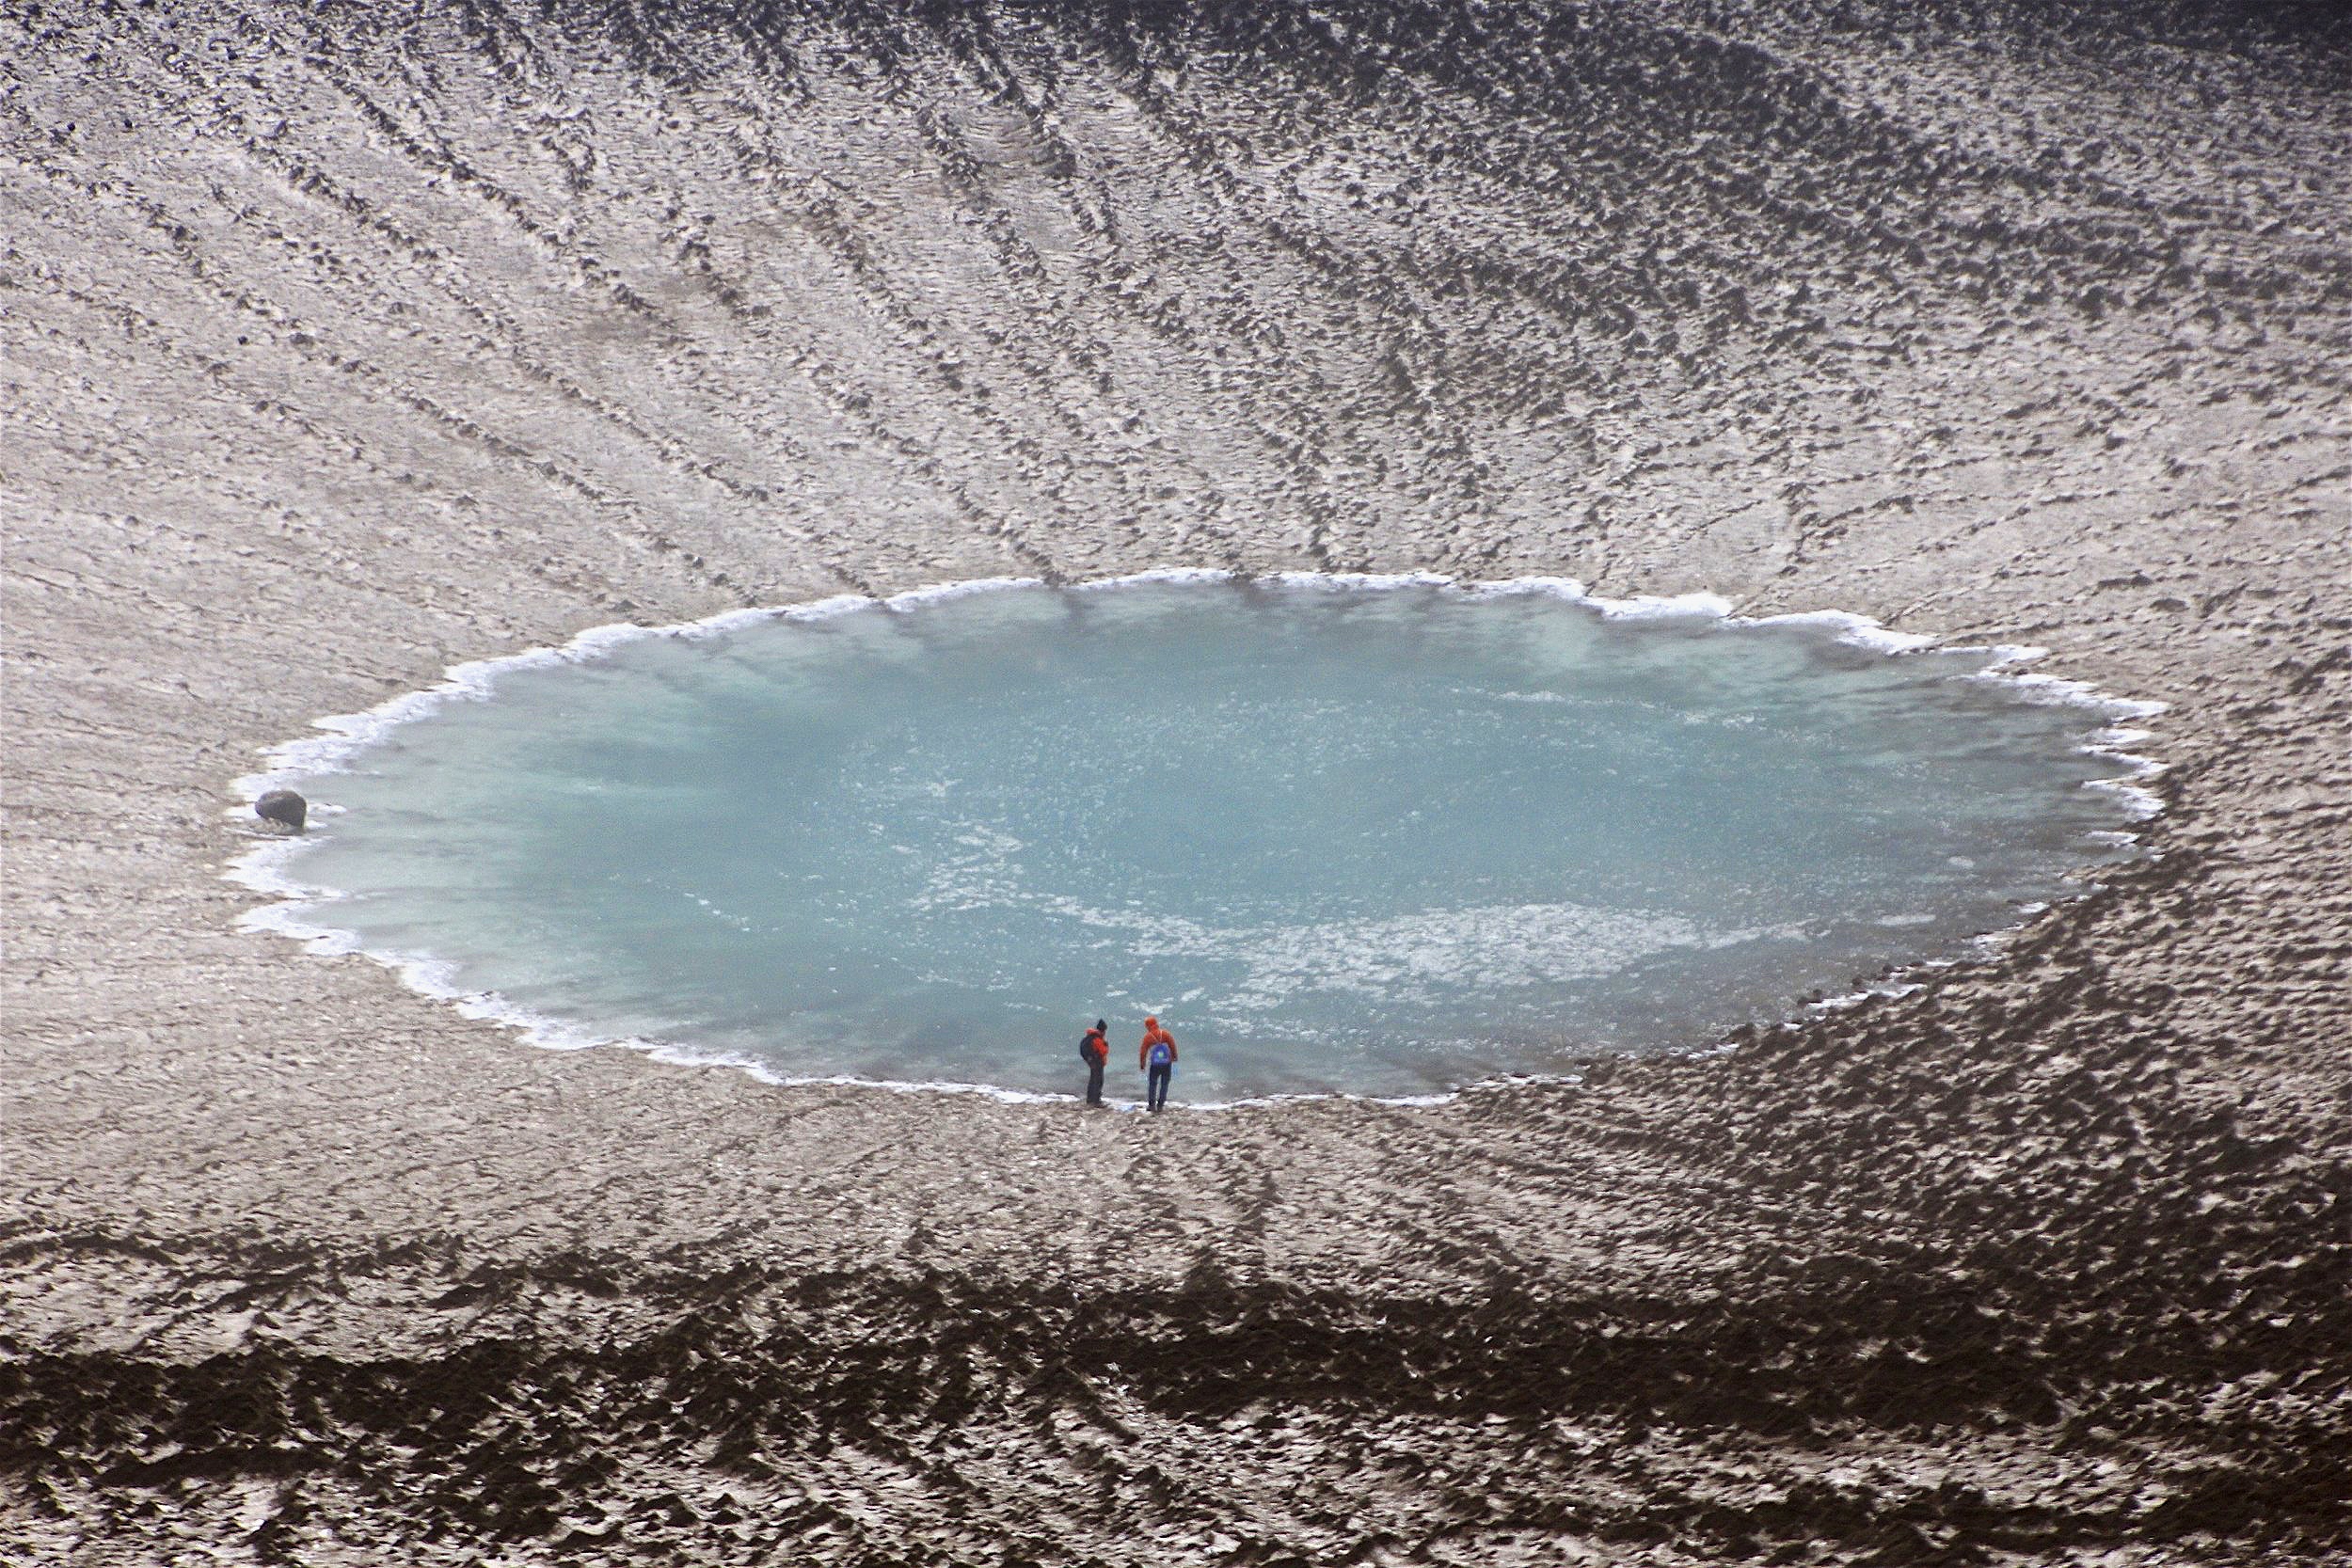
This is also an active crater. The much larger lake disappeared after 2003.

This is also an active crater. The much larger lake disappeared after 2003.

The glacier and the edge of the fumarole filed.

The glacier and the edge of the fumarole filed.

The active crater of the Mutnovsky Volcano.

The active crater of the Mutnovsky Volcano.

IMG_E3361.jpg
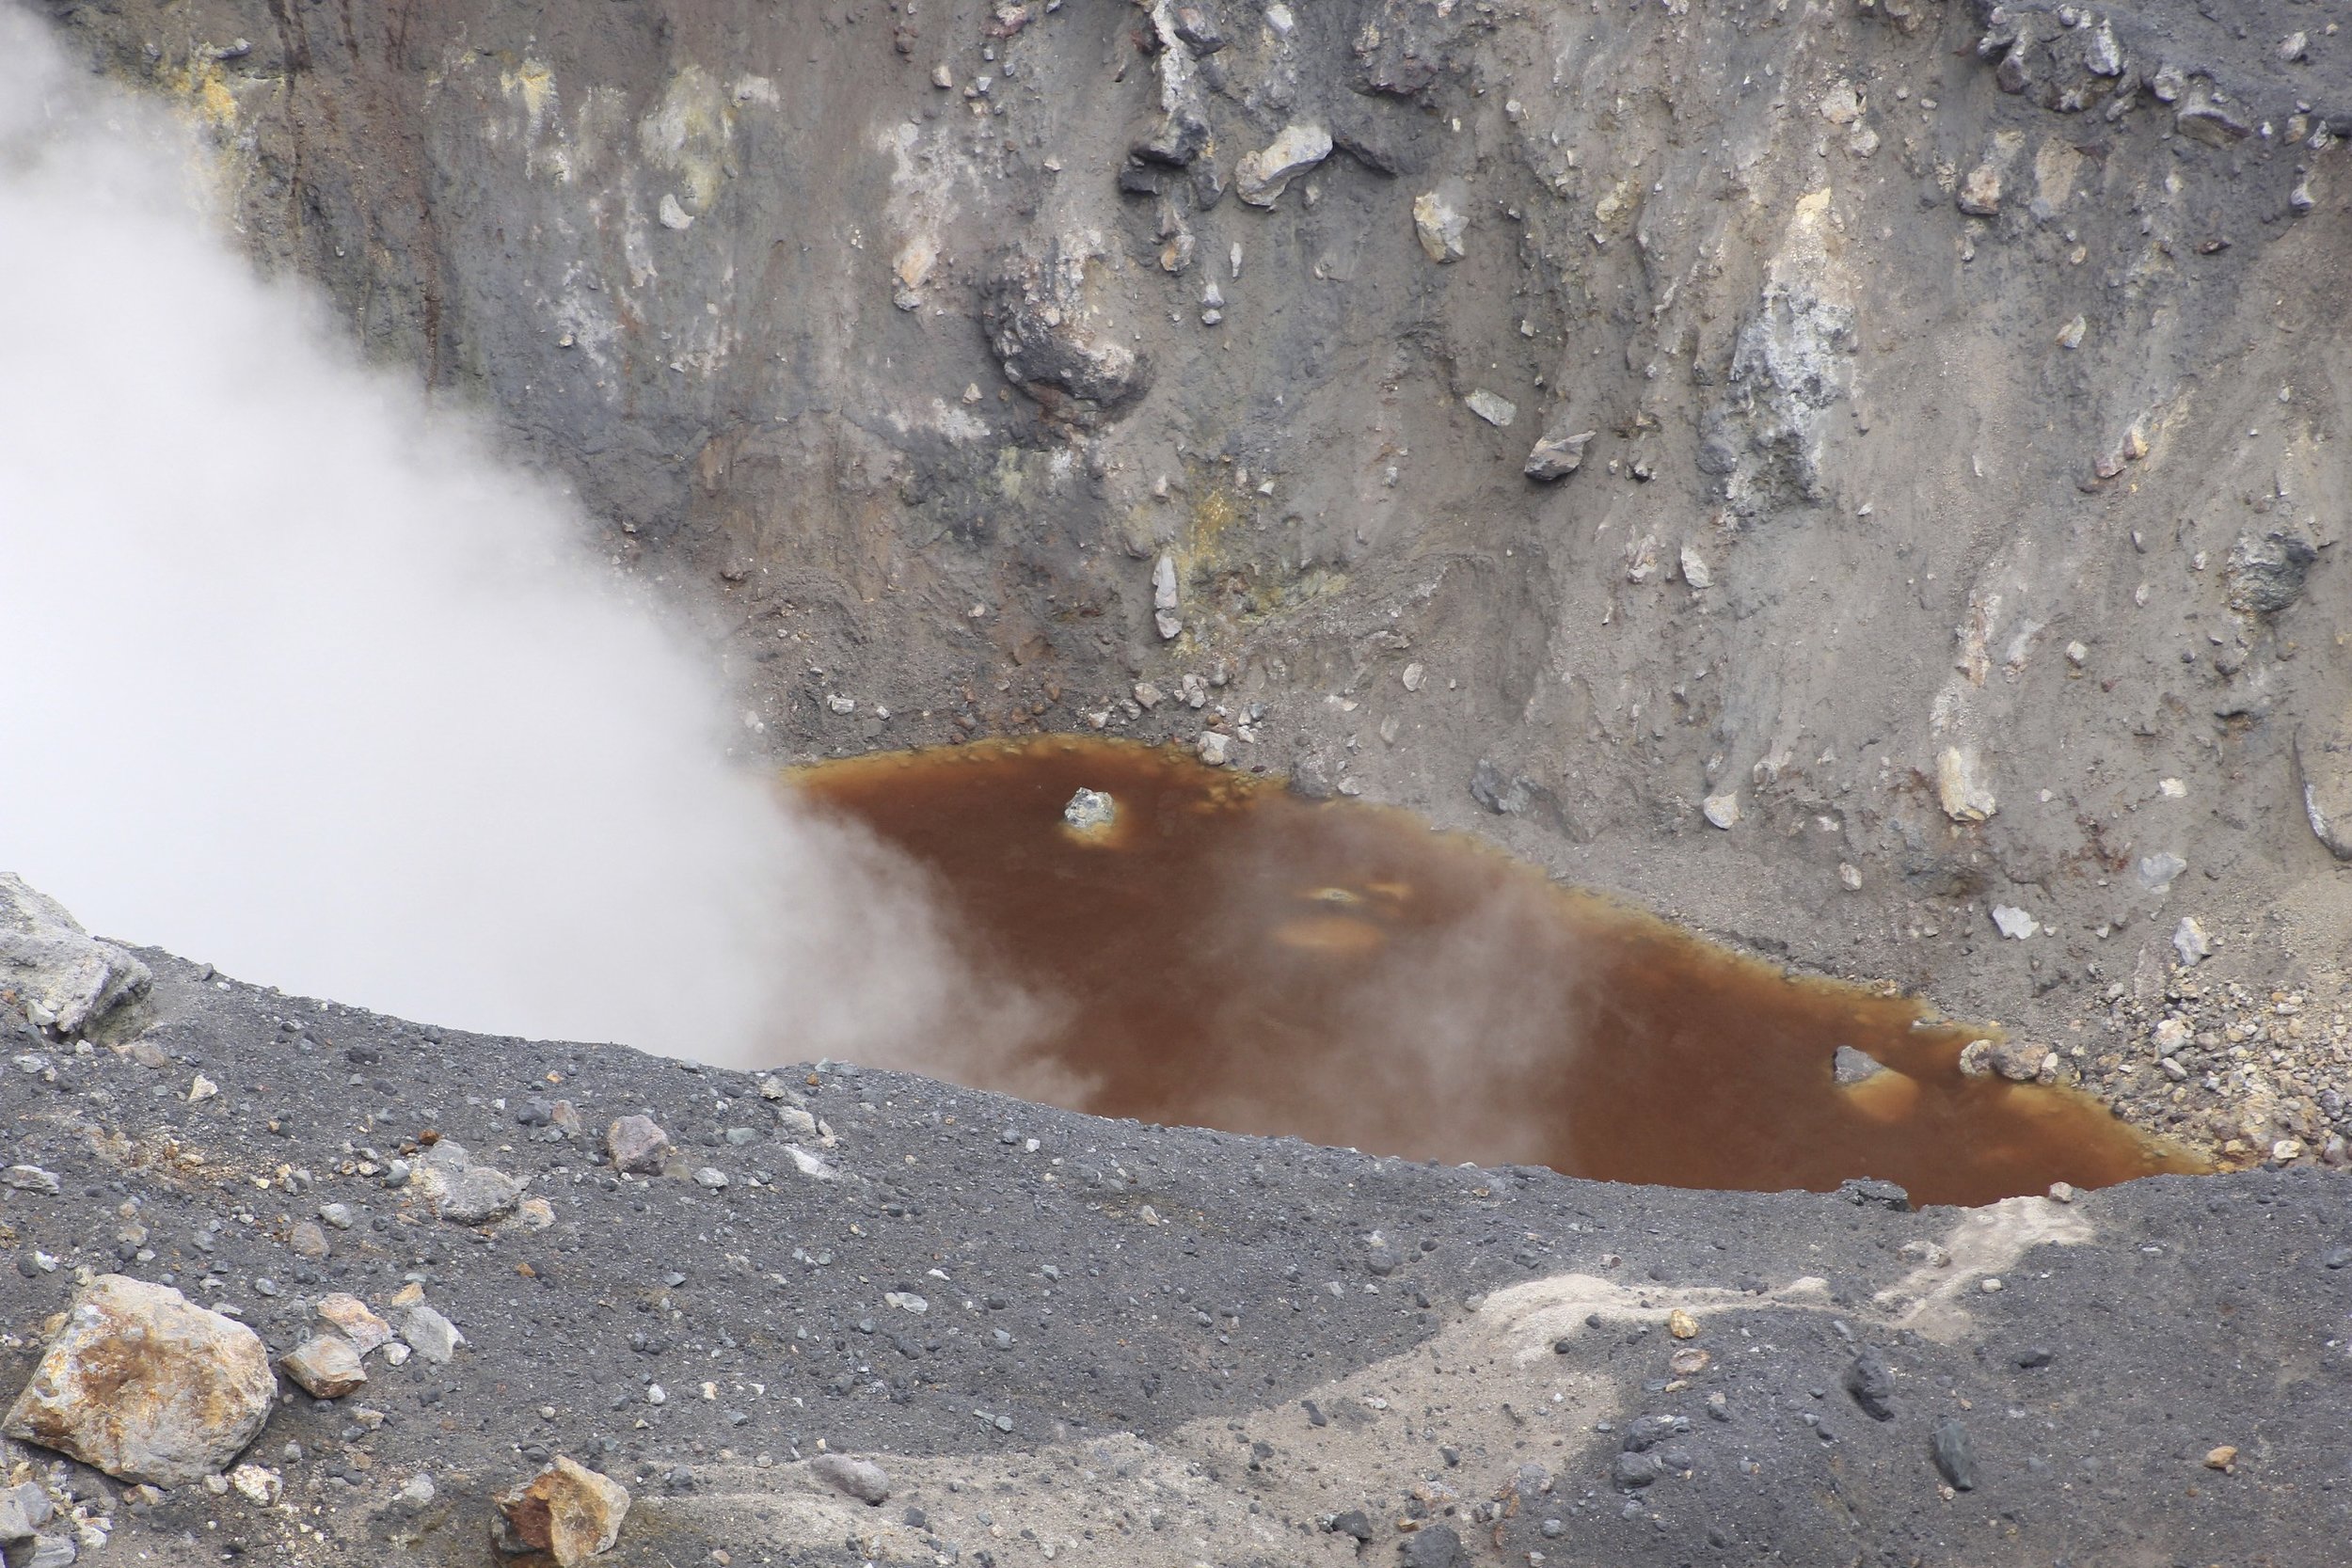
At the bottom of the 150 deep crater, there is a red lake.

At the bottom of the 150 deep crater, there is a red lake.

The red lake of the active crater.

The red lake of the active crater.

A large cloud of gas emanating from the active crater.

A large cloud of gas emanating from the active crater.

The active crater of the Mutnovsky. Notice the people in the gap. Drone photo by Evgeny Androssov

The active crater of the Mutnovsky. Notice the people in the gap. Drone photo by Evgeny Androssov

The active crater of the Mutnovsky and the fumarole field. drone photo by Evgeny Androssov

The active crater of the Mutnovsky and the fumarole field. drone photo by Evgeny Androssov

The small green lake is also the bottom of an active crater. Drone photo by Evgeny Androssov

The small green lake is also the bottom of an active crater. Drone photo by Evgeny Androssov

The 150m deep active crater of the Muntovsky. Drone photo by Evgeny Androssov

The 150m deep active crater of the Muntovsky. Drone photo by Evgeny Androssov

The double crater of the Muntovsky with two colored lakes! Drone photo by Evgeny Adnrossov

The double crater of the Muntovsky with two colored lakes! Drone photo by Evgeny Adnrossov

The large glacier and the fumarole field of the Muntovsky Volcano from the drone. Photo by Evgeny Androssov.

The large glacier and the fumarole field of the Muntovsky Volcano from the drone. Photo by Evgeny Androssov.

The fumarole fields of the Mutnovsky from the drone. Photo by Evgeny Androssov.

The fumarole fields of the Mutnovsky from the drone. Photo by Evgeny Androssov.

Hiking back! We leave the interesting Mutnovsky Volcano behind.

Hiking back! We leave the interesting Mutnovsky Volcano behind.

The north side of the Mutnovsky Volcano. We were lucky with the weather again. Low cloud and rain moved in as we left the area.

The north side of the Mutnovsky Volcano. We were lucky with the weather again. Low cloud and rain moved in as we left the area.

Hiking from the Mutnovsky Volcano to the Mutnovskaya Geothermal Station.

Hiking from the Mutnovsky Volcano to the Mutnovskaya Geothermal Station.

The Mutnovskaya Geothermal Station in the distance. The power plant uses the geothermal heat to produce electricity. The gas reserves provide power to the station. Numerous wells channeling hot steam to the station dot the landscape. The plant can w…

The Mutnovskaya Geothermal Station in the distance. The power plant uses the geothermal heat to produce electricity. The gas reserves provide power to the station. Numerous wells channeling hot steam to the station dot the landscape. The plant can withstand an earthquake up to magnitude 9!

The Mutnovka Electric Station. It produces 30% of all electricity in Kamchatka. The deepest well drilled for the purpose of extracting steam is 2.2km.

The Mutnovka Electric Station. It produces 30% of all electricity in Kamchatka. The deepest well drilled for the purpose of extracting steam is 2.2km.

Old part of the station

Old part of the station

One of the 90 wells of the station.

One of the 90 wells of the station.

IMG_3464.jpg
The Dachnye Hot Springs. There are numerous boiling and pulsating springs, fumaroles the temperature of which can reach up to 250C.

The Dachnye Hot Springs. There are numerous boiling and pulsating springs, fumaroles the temperature of which can reach up to 250C.

IMG_3445.jpg
IMG_3462.jpg
Nature’s steam room

Nature’s steam room

This wonderful campsite has hot springs nearby.

This wonderful campsite has hot springs nearby.

Some of the more exotic souvenirs in PK.

Some of the more exotic souvenirs in PK.

PK souvenirs…

PK souvenirs…

Камча́тка, Russia - The Tolbachik Volcano Circuit and Volcano Bezimienny

Great thanks to Evgeny Androssov, our guide who made this trip a reality for us! It was a pleasure (again) to share this experience with my long-time trekking buddy David.

In August of 2019, we traveled to explore the volcanic landscapes of Kamchatka in Eastern Russia. Volcanoes are not the only reason to go to Kamchatka. Many people go there for fishing and hunting as well. It is also known for its hot springs and senatoria.

Kamchatka is quite remote and it was closed to all tourists until 1992 due to militarily sensitive areas. The landscapes of this peninsula are very unique not only in Russia but the world. Volcanoes are Kamchatka’s biggest attraction and you can see them even before you land in Petropawlowsk-Kamchatsky, the capital city of the region. Since the region has only one main road, getting to some of the remote volcanoes requires planning and can get quite expensive.

Our primary goal was to explore the large Kluchewskaya Cluster National Park. The Park is located 600 km from Petropawlowsk-Kamchatsky and it takes around 10 hours of non-stop driving on progressively deteriorating roads to get there. The final stretch from the main road to the park is on old Soviet logging tracks (one of the primary industries of the region back in the USSR days). The experience of the driver and the quality of the 4x4 are very important as getting stuck in this remote region could basically put an end to the trip. Thanks to Evgeny, our industrious guide, we engaged the help of Sergey, a former hydrologist who worked in the region and knows the forest tracks very well.

Another minor annoyance are the mosquitos and very unpredictable weather (prolonged periods of rain and strong tent-damaging winds). One needs luck to be able to see the beautiful views that Kamchatka has to offer. We were very lucky indeed.

kamchatka map.jpg
On the Kamchatka Peninsula, there are over 200 volcanoes, 30 of which are active and erupt frequently.

On the Kamchatka Peninsula, there are over 200 volcanoes, 30 of which are active and erupt frequently.

There only one road on the Peninsula. Thankfully it takes you to some beautiful places!

There only one road on the Peninsula. Thankfully it takes you to some beautiful places!

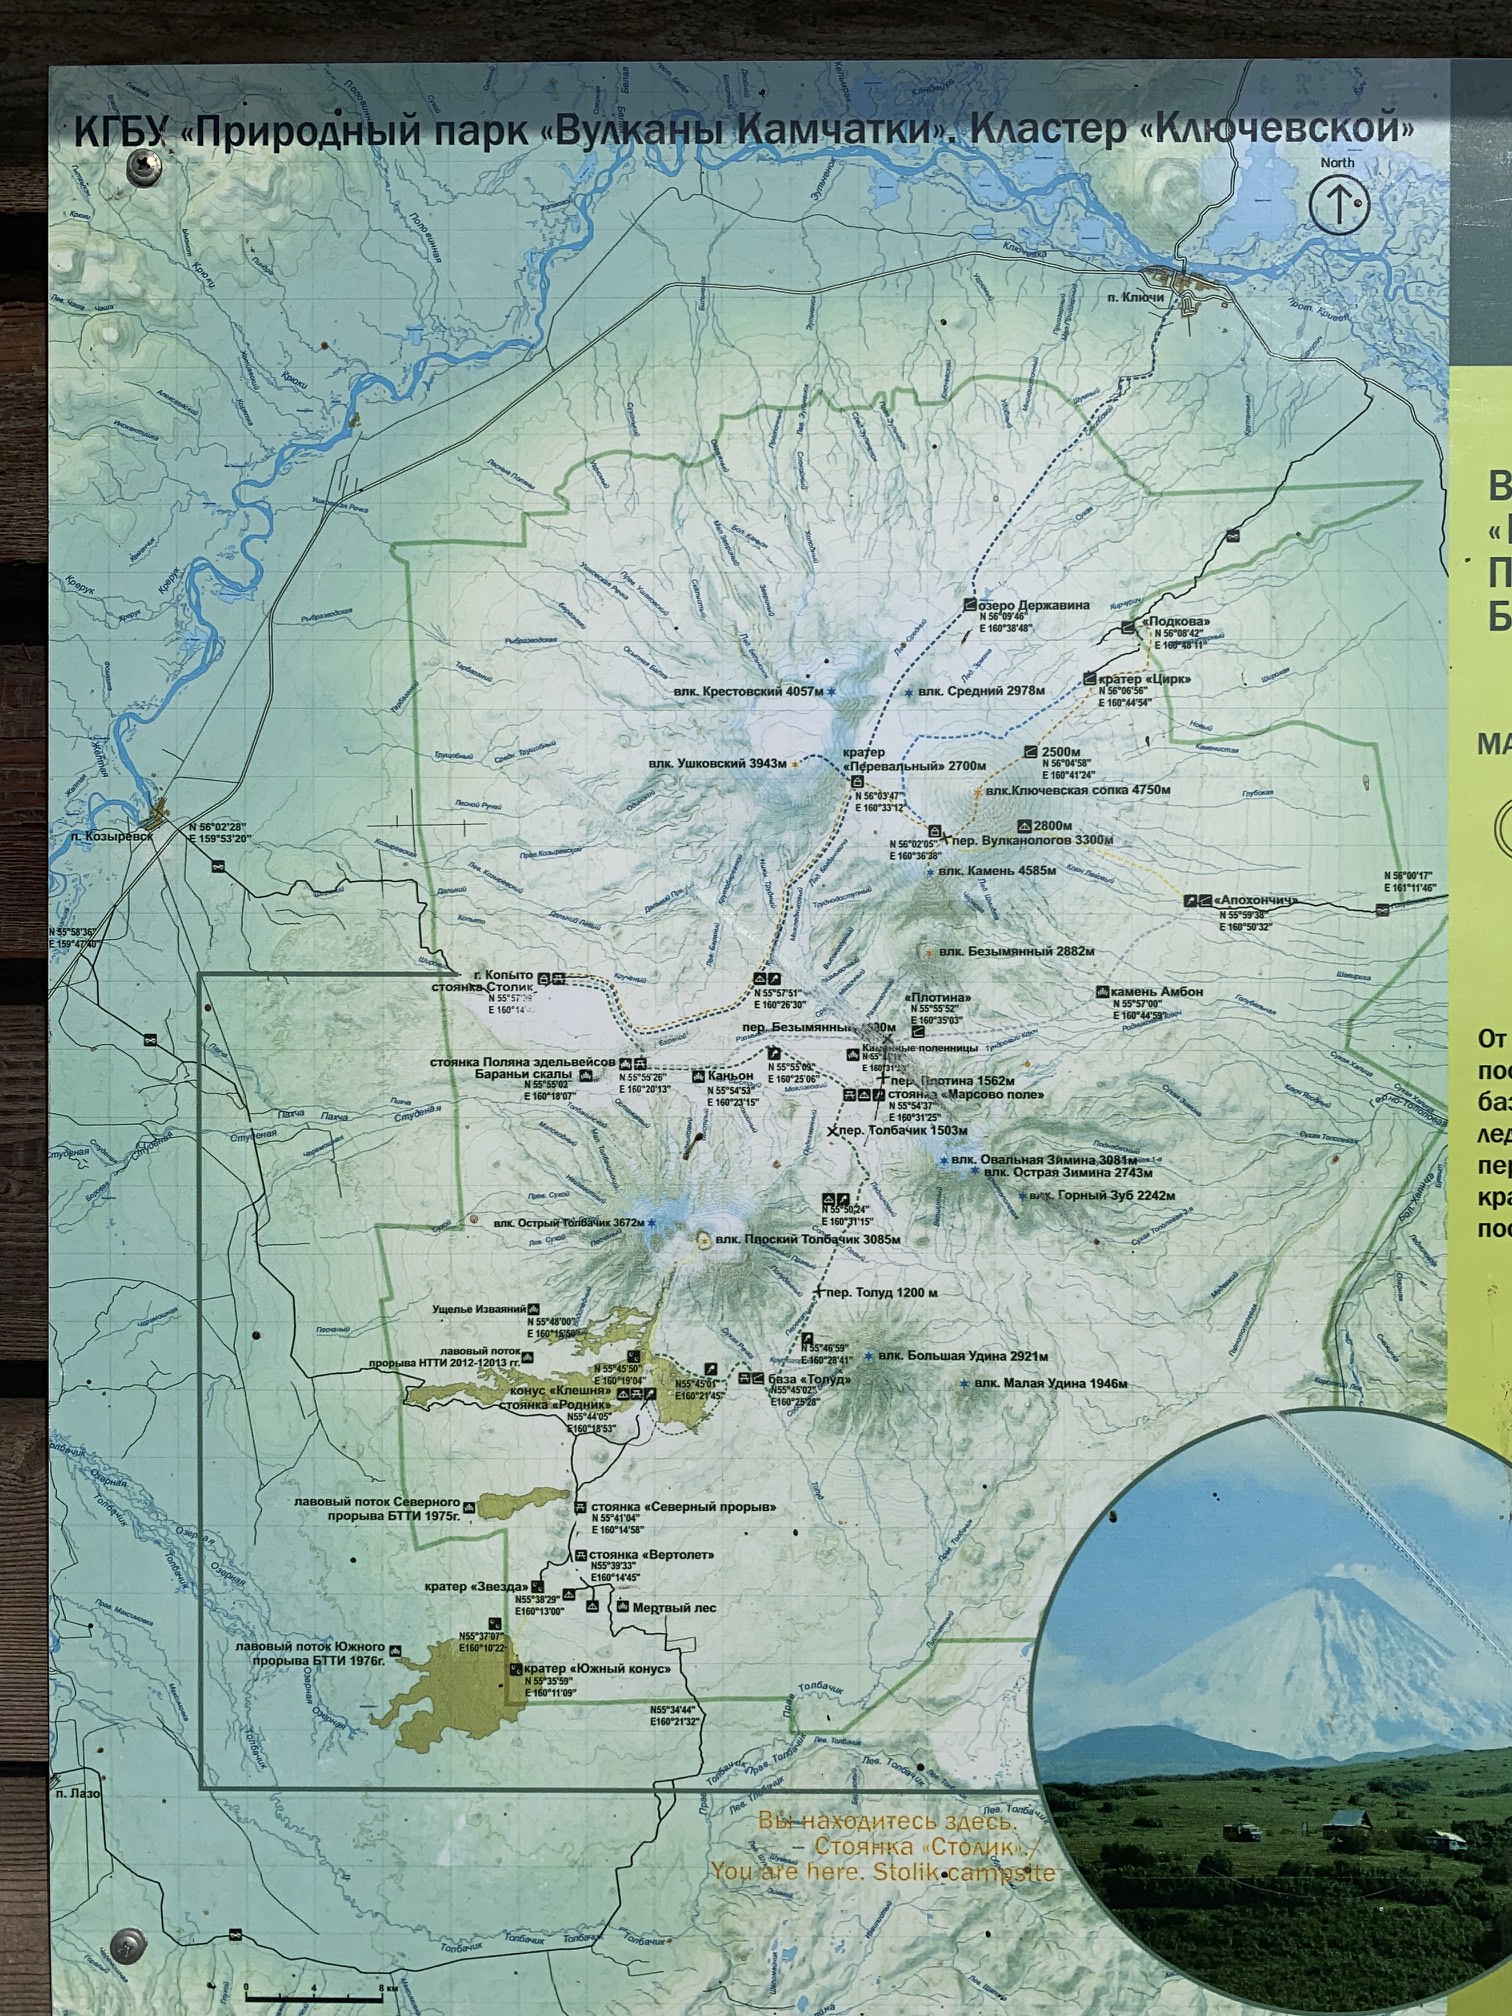
The map of the trails inside the Kluchevsky Cluster Park. Our journey was 120 km long, one of the longest in the park. One can also ascend most of the volcanic peaks without major difficulties except the weather.

The map of the trails inside the Kluchevsky Cluster Park. Our journey was 120 km long, one of the longest in the park. One can also ascend most of the volcanic peaks without major difficulties except the weather.

The summit cone of one of the volcanoes near Petropawlowsk-Kamchatsky from the landing airplane. I was so excited to be in this mysterious land!

The summit cone of one of the volcanoes near Petropawlowsk-Kamchatsky from the landing airplane. I was so excited to be in this mysterious land!

Kamchatka - wild and green - looks splendid!

Kamchatka - wild and green - looks splendid!

The modern airport of Petropawlowsk-Kamchatsky.

The modern airport of Petropawlowsk-Kamchatsky.

On the road from Petropawlowsk-Kamchatsky to the trail. It is a long drive through pristine tajga forests full of bears and mosquitoes.

On the road from Petropawlowsk-Kamchatsky to the trail. It is a long drive through pristine tajga forests full of bears and mosquitoes.

IMG_9419.jpg
The Kamchatka River is the largest river on the peninsula. You can see the Volcano Kameny above the tajga forest. It is at least 80 km away through the mosquito infested tajga.

The Kamchatka River is the largest river on the peninsula. You can see the Volcano Kameny above the tajga forest. It is at least 80 km away through the mosquito infested tajga.

The Kamchatka River

The Kamchatka River

The Kamchatka River and the Kluchewskaya group of volcanoes from the drone. Photo by Evgeny Androssov.

The Kamchatka River and the Kluchewskaya group of volcanoes from the drone. Photo by Evgeny Androssov.

The Kamchatka River from the drone. Photo by Evgeny Androssov.

The Kamchatka River from the drone. Photo by Evgeny Androssov.

The Kluchewskaya Sobka 4,750m Volcano and Krestowski Volcano 4,057m and the endless taiga forest from the drone. We had to drive through this forest first to get to the trails. Photo by Evgeny Androssov.

The Kluchewskaya Sobka 4,750m Volcano and Krestowski Volcano 4,057m and the endless taiga forest from the drone. We had to drive through this forest first to get to the trails. Photo by Evgeny Androssov.

Driving through the taiga - home to billions of mosquitoes!

Driving through the taiga - home to billions of mosquitoes!

The old Soviet logging roads can be quite challenging. We helped out the Nissan to get out of the mud. Some of the old tracks have been further damaged by the Tolbachik eruptions in 2012. The local drivers just cut alternative tracks through the thi…

The old Soviet logging roads can be quite challenging. We helped out the Nissan to get out of the mud. Some of the old tracks have been further damaged by the Tolbachik eruptions in 2012. The local drivers just cut alternative tracks through the thick bush. The roads are not maintained.

IMG_3105.jpg
Some larger groups charter these industrial KAMAZ trucks. A KAMAZ truck can take up to 20 passengers and it costs 3,500 Euro for the round trip from Petropawlowsk-Kamchatsky. We met a few large Russian groups that traveled this way. Some were overla…

Some larger groups charter these industrial KAMAZ trucks. A KAMAZ truck can take up to 20 passengers and it costs 3,500 Euro for the round trip from Petropawlowsk-Kamchatsky. We met a few large Russian groups that traveled this way. Some were overlanders and some were trekking in the park. The KAMAZ drivers deflate the tires to handle the tracks.

Our starting point. We started at the Stolnik hut. The forrest track ends here and it is walking from this point on. The large cone of the Ostry Tolbachik Volcano towers above the camp. See the ubiquitous mosquito in the photo frame!

Our starting point. We started at the Stolnik hut. The forrest track ends here and it is walking from this point on. The large cone of the Ostry Tolbachik Volcano towers above the camp. See the ubiquitous mosquito in the photo frame!

The simple shelters provide a welcome escape from the frequent and intense rain. The air temperature can vary by a lot in the matter of hours. The Ostry Tolbachik 3,672m dominates the view.

The simple shelters provide a welcome escape from the frequent and intense rain. The air temperature can vary by a lot in the matter of hours. The Ostry Tolbachik 3,672m dominates the view.

Our first view of the Ostry Tolbachik Volcano 3,672m.

Our first view of the Ostry Tolbachik Volcano 3,672m.

On the left is the distant Kluchewska Volcano 4,750m (the highest active volcano in Eurasia). On the right is Kamen Volcano 4,580m, more imposing and with permanent snow. The Kluchewskaya has no snow as it is active and hot.

On the left is the distant Kluchewska Volcano 4,750m (the highest active volcano in Eurasia). On the right is Kamen Volcano 4,580m, more imposing and with permanent snow. The Kluchewskaya has no snow as it is active and hot.

The beautiful tundra and the Ostry Tolbachik Volcano. The little cones in the photo are picked by the locals for medicinal purposes. They are boiled and often mixed with tea or alcohol to create a healing concoction.

The beautiful tundra and the Ostry Tolbachik Volcano. The little cones in the photo are picked by the locals for medicinal purposes. They are boiled and often mixed with tea or alcohol to create a healing concoction.

During our first day we had two bear encounters. We almost walked into one young bear (he run away promptly) and this old one came quite close to our camp checking us out. He lingered around eating berries but eventually left and went on. We have no…

During our first day we had two bear encounters. We almost walked into one young bear (he run away promptly) and this old one came quite close to our camp checking us out. He lingered around eating berries but eventually left and went on. We have not seen any other bears after that but they sure came close to our tents during the night.

IMG_8240.jpg
IMG_8243.jpg
Best seen from the distance!

Best seen from the distance!

Beautiful surroundings of the lower parts of the Kluchewskaya Park.

Beautiful surroundings of the lower parts of the Kluchewskaya Park.

Our first view of the Bezimienny Volcano.

Our first view of the Bezimienny Volcano.

Bezimienny Volcano in the distance

Bezimienny Volcano in the distance

Evgeny Androssov, our guide, is an outdoorsman from Moscow who works as a guide in Kamchatka and other interesting places in Russia.

Evgeny Androssov, our guide, is an outdoorsman from Moscow who works as a guide in Kamchatka and other interesting places in Russia.

That day, we trekked for 18 km along the Tolbachik massif. We walked through some beautiful old lava fields with bizarre formations. The contrast between black soil and green vegetation was very striking.

That day, we trekked for 18 km along the Tolbachik massif. We walked through some beautiful old lava fields with bizarre formations. The contrast between black soil and green vegetation was very striking.

Old lava fields and towers.

Old lava fields and towers.

Volcanic bombs from ancient eruptions The black soil seems to be very fertile for various kinds of mosses.

Volcanic bombs from ancient eruptions The black soil seems to be very fertile for various kinds of mosses.

The water made these deep channels and caverns in the soft volcanic rock. There is a narrow slot canyon that one can walk trough during the dry periods.

The water made these deep channels and caverns in the soft volcanic rock. There is a narrow slot canyon that one can walk trough during the dry periods.

This slot canyon is about 20m deep and quite narrow.

This slot canyon is about 20m deep and quite narrow.

Bizarre and high lava formations. This one was at least 10m high!

Bizarre and high lava formations. This one was at least 10m high!

IMG_8329.jpg
IMG_8330.jpg
Easy walking through beautiful surroundings. If the weather is good of course.

Easy walking through beautiful surroundings. If the weather is good of course.

IMG_8346.jpg
The vast land and a volcanic desert.

The vast land and a volcanic desert.

Lower slopes of the Tolbachik Volcano. The old lava fields stretch over wide area.

Lower slopes of the Tolbachik Volcano. The old lava fields stretch over wide area.

Ahead is the small mountain pass we need to cross to get to the base of the Bezimienny Volcano.

Ahead is the small mountain pass we need to cross to get to the base of the Bezimienny Volcano.

Rain and drizzle were our companions (photo by Evgeny Androssov). Good rain gear is essential.

Rain and drizzle were our companions (photo by Evgeny Androssov). Good rain gear is essential.

On our way to the base of the Bezimienny Volcano, we had to cross a small pass. We were carrying 50-60lb packs so any “up” was hard work.

On our way to the base of the Bezimienny Volcano, we had to cross a small pass. We were carrying 50-60lb packs so any “up” was hard work.

Old Soviet geo marker on top of the small pass that we had to cross.

Old Soviet geo marker on top of the small pass that we had to cross.

In some areas snow lingers all year round. The summers are very short here and it can snow at any time of the year. Walking on these snow fields was tricky as sometimes there was a hidden channel of melt water. It was easy to punch right through and…

In some areas snow lingers all year round. The summers are very short here and it can snow at any time of the year. Walking on these snow fields was tricky as sometimes there was a hidden channel of melt water. It was easy to punch right through and fall into a wet crevice.

The weather did not look good, and we were supposed to be going up a volcano the next day!

The weather did not look good, and we were supposed to be going up a volcano the next day!

Apparently there are volcanoes behind this cloud!

Apparently there are volcanoes behind this cloud!

Zimina Volcano is ahead. Often, the peaks were obscured by low clouds.

Zimina Volcano is ahead. Often, the peaks were obscured by low clouds.

The Volcano Zimina 3,081m seen from the basecamp of Bezimienny during the evening.

The Volcano Zimina 3,081m seen from the basecamp of Bezimienny during the evening.

Bezimienny Volcano exploded violently in 1956. It was very unexpected as the volcano was considered dormant. The explosion was extremely violent and the ash cloud circled the planet twice. After that event, the Soviet volcanologists started to study…

Bezimienny Volcano exploded violently in 1956. It was very unexpected as the volcano was considered dormant. The explosion was extremely violent and the ash cloud circled the planet twice. After that event, the Soviet volcanologists started to study the caldera. This hut belongs to the Volcanology Institute of the Russia Academy of Sciences. It is no longer in use and provides shelter for hikers and trekkers and serves as a basecamp for the Bezimienny Volcano.

Miraculously the weather cleared and we decided to ascend the Volcano Bezimienny 2,882m. It is active and the smoke is rising from the caldera. The ascent is quite steep in places and walking on sand and loose small rocks can be challenging.

Miraculously the weather cleared and we decided to ascend the Volcano Bezimienny 2,882m. It is active and the smoke is rising from the caldera. The ascent is quite steep in places and walking on sand and loose small rocks can be challenging.

Shiveluch Volcano, 3,283m is 80km away! It is the northernmost active volcano of Kamchatka that exploded quite recently in 2019. The volcano has the greatest edifice of all volcanos (70 x 40km). It consists of Old Shiveluch and New Shiveluch with ne…

Shiveluch Volcano, 3,283m is 80km away! It is the northernmost active volcano of Kamchatka that exploded quite recently in 2019. The volcano has the greatest edifice of all volcanos (70 x 40km). It consists of Old Shiveluch and New Shiveluch with newly formed lava dome 500m high. The wide caldera on the opposite side of the mountain is 9km wide. It erupts twice a year. It also has catastrophic eruptions every 100 years or so.

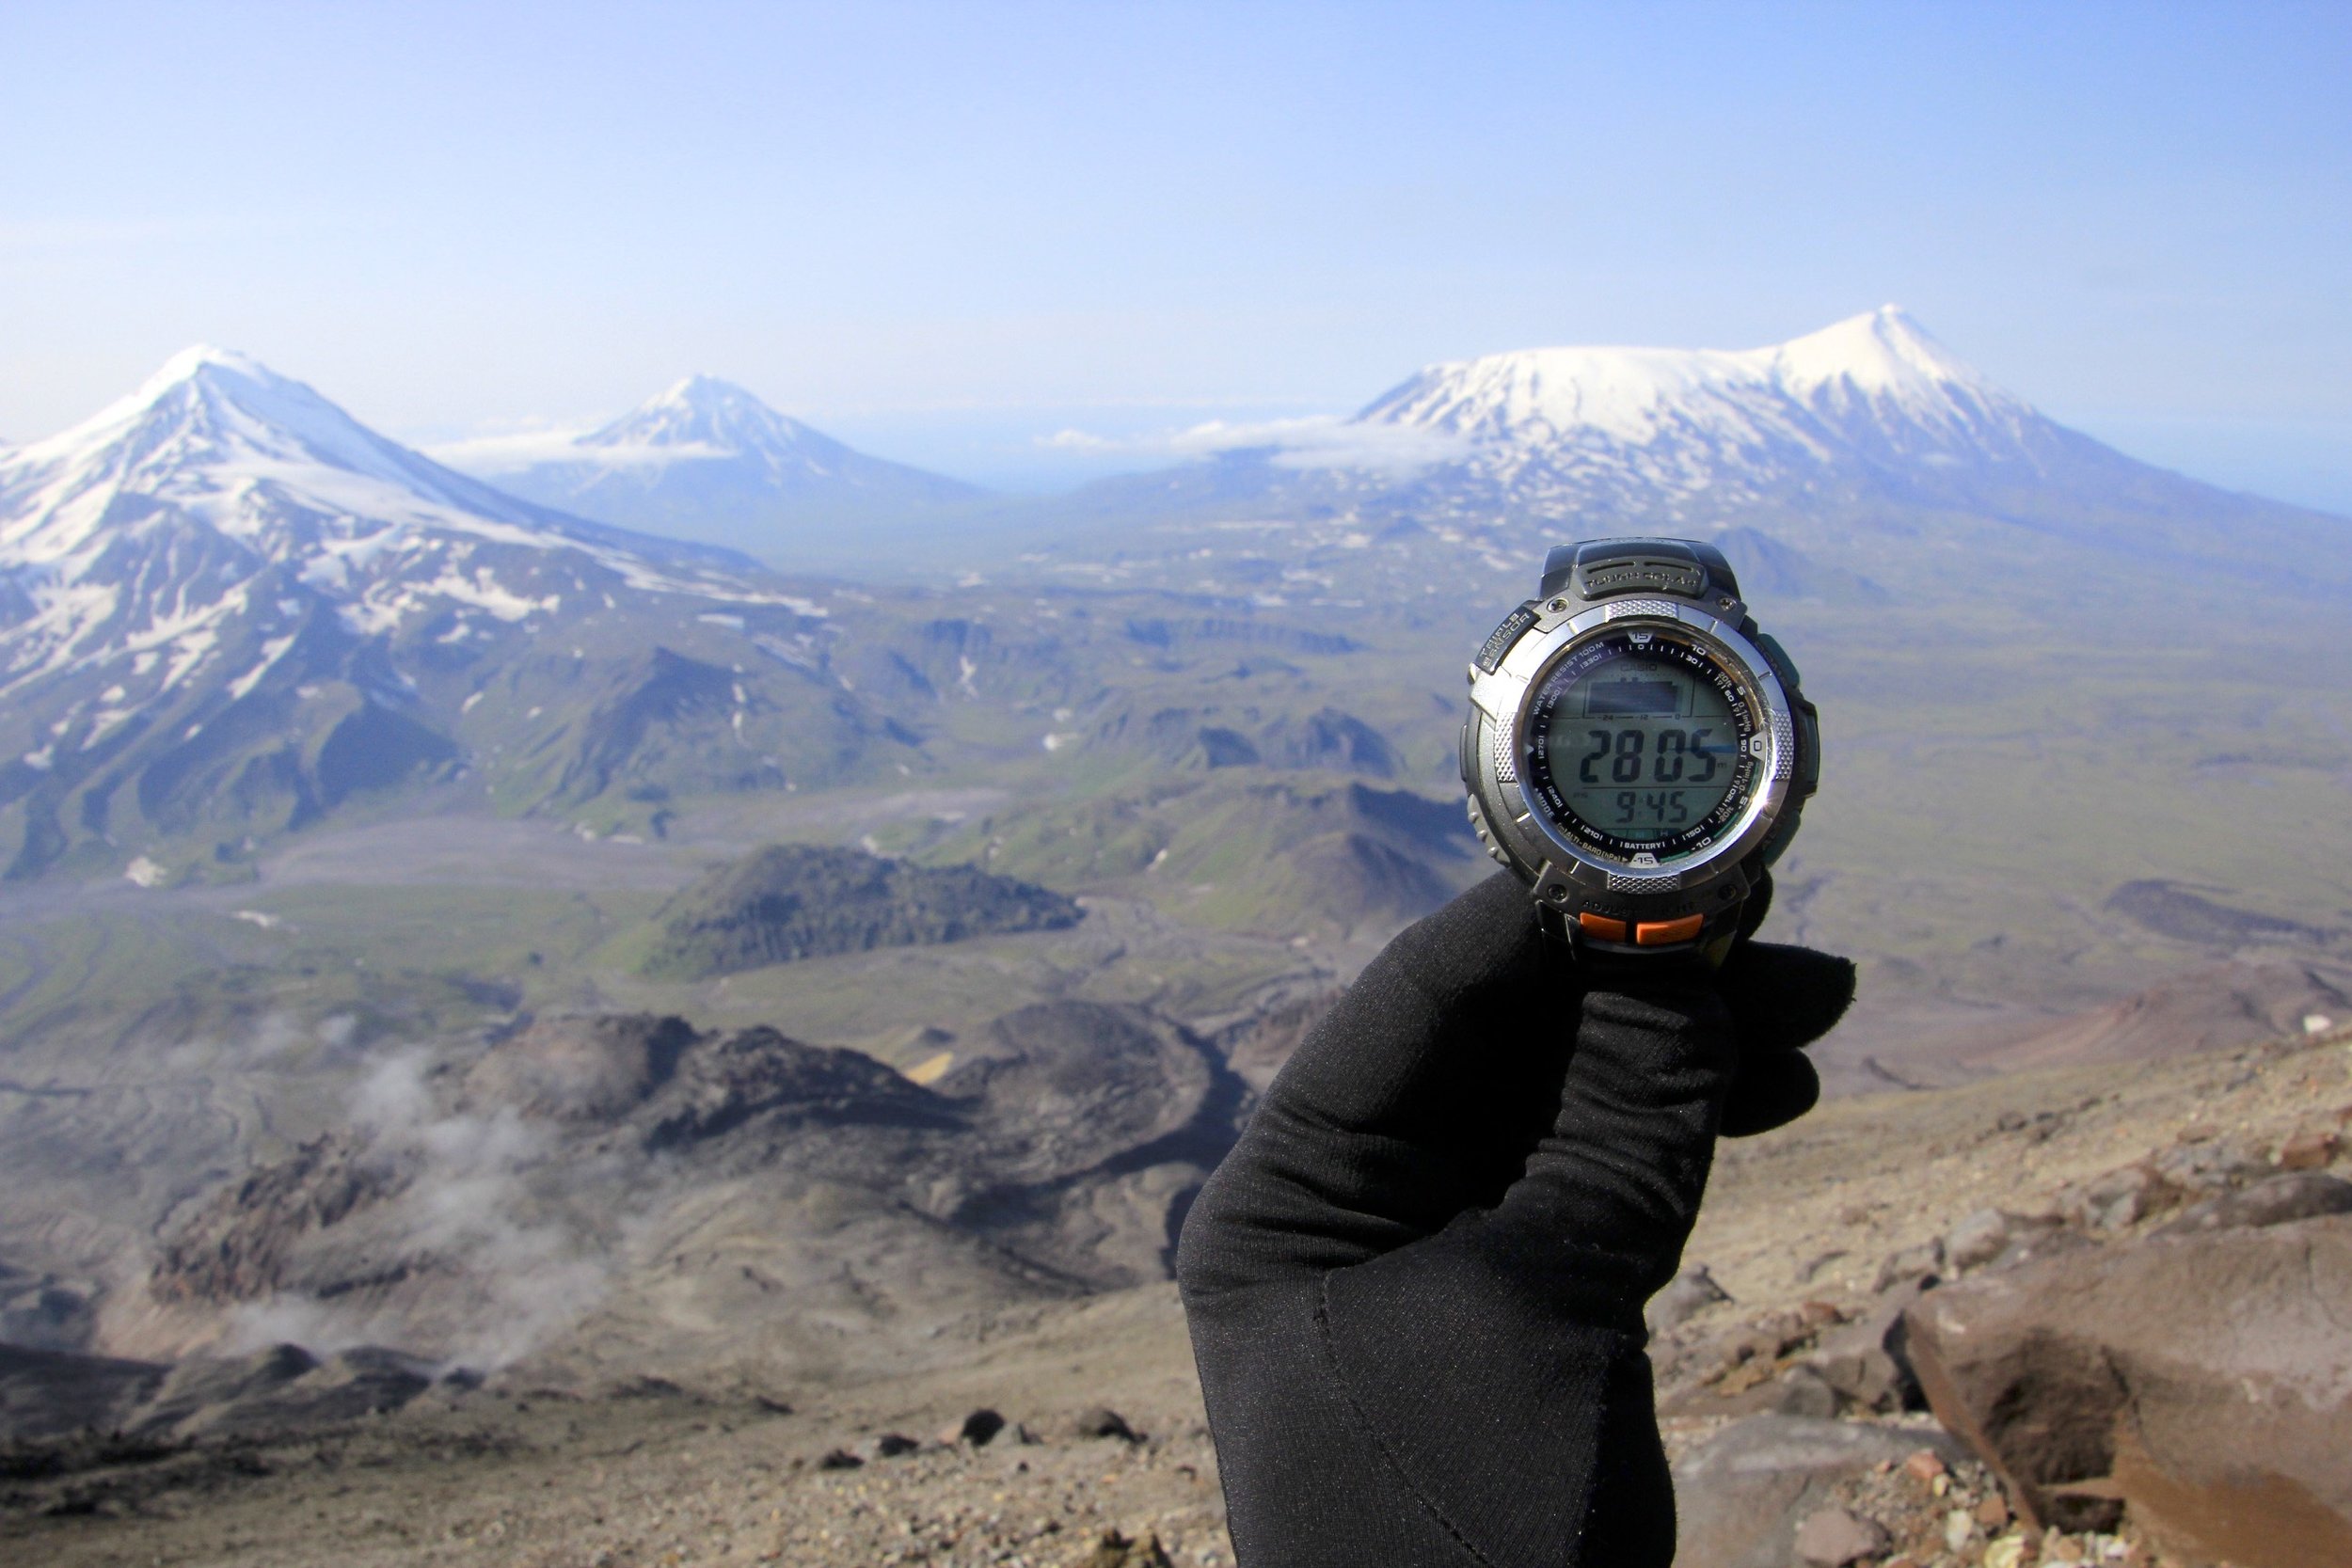
The fantastic views extending over the park. From let to right: Volcan Ostry Zimina 2,743m, Volcano Ovalny Zimina 3,081m, Volcano Udina 2,921m, Volcano Plotsky Tolbachik 3,085m and Volcano Ostry Tolbachik 3,672m.

The fantastic views extending over the park. From let to right: Volcan Ostry Zimina 2,743m, Volcano Ovalny Zimina 3,081m, Volcano Udina 2,921m, Volcano Plotsky Tolbachik 3,085m and Volcano Ostry Tolbachik 3,672m.

Ostra Zimina 2,743m and Ovalna Zimina 3,081m. In the distance, Udina 2,921m.

Ostra Zimina 2,743m and Ovalna Zimina 3,081m. In the distance, Udina 2,921m.

The Zimina Volcanoes

The Zimina Volcanoes

Ovalnaya Zimina 3,081m

Ovalnaya Zimina 3,081m

Ostry Tolbachik 3,672m

Ostry Tolbachik 3,672m

The edge of the active crater of the Bezimienny Volcano. The lava dome, 100m higher was steaming and seemed unstable to climb. Not worth the risk for another 100m of elevation gain. We had the drone to provide us with a peak into the crater, thanks …

The edge of the active crater of the Bezimienny Volcano. The lava dome, 100m higher was steaming and seemed unstable to climb. Not worth the risk for another 100m of elevation gain. We had the drone to provide us with a peak into the crater, thanks to Evgeny who carried it in a separate pack!

The view from the edge of the crater. The final 200m is steep and loose. We were very lucky to have such clear day!

The view from the edge of the crater. The final 200m is steep and loose. We were very lucky to have such clear day!

Our trekking route between the volcanoes.

Our trekking route between the volcanoes.

The height of the crater.

The height of the crater.

Evgeny and I from the drone (photo by Evgeny Androssov). We spent 3 hours on top taking in the incredible panorama!

Evgeny and I from the drone (photo by Evgeny Androssov). We spent 3 hours on top taking in the incredible panorama!

Evgeny’s drone - max height has been reached but the volcanoes still tower above!

Evgeny’s drone - max height has been reached but the volcanoes still tower above!

Drone photo by Evgeny Androssov. The Volcano Kamen 4,580m and active Kluchewskaya 4,750m, they are very impressive! Between these two volcanoes, there is a pass at an elevation of 3,000m from where an ascend can be made. The trick is to get there in…

Drone photo by Evgeny Androssov. The Volcano Kamen 4,580m and active Kluchewskaya 4,750m, they are very impressive! Between these two volcanoes, there is a pass at an elevation of 3,000m from where an ascend can be made. The trick is to get there in good weather.

The rim of the crater, this is as high as we could go without descending into the crater itself.

The rim of the crater, this is as high as we could go without descending into the crater itself.

Drone photo by Evgeny Androssov. This is the crater of the lava dome of the Bezimienny Volcano. It would be a tricky ascent given numerous active vents and ash.

Drone photo by Evgeny Androssov. This is the crater of the lava dome of the Bezimienny Volcano. It would be a tricky ascent given numerous active vents and ash.

Drone photo by Evgeny Androssov. Active crater of the Bezimienny Volcano. We could smell the smoke from the crater as we were hiking up the mountain.

Drone photo by Evgeny Androssov. Active crater of the Bezimienny Volcano. We could smell the smoke from the crater as we were hiking up the mountain.

Drone photo by Evgeny Androssov. The crater of the Bezimienny Volcano seen from the opposite side to us. The height of this “new” dome is 500m. It grew out of the larger crater formed by a large explosion in 1955. It is like a mountain giving birth …

Drone photo by Evgeny Androssov. The crater of the Bezimienny Volcano seen from the opposite side to us. The height of this “new” dome is 500m. It grew out of the larger crater formed by a large explosion in 1955. It is like a mountain giving birth to another mountain.

View over the park and half of our trekking route. We basically started on the extreme right and circled the Tolbachik Volcanoes (the mountain on the right).

View over the park and half of our trekking route. We basically started on the extreme right and circled the Tolbachik Volcanoes (the mountain on the right).

The smoking crater of the Bezimienny Volcano and the Kamienny Volcano towering above it. The Kamenny is obscured by volcanic ash.

The smoking crater of the Bezimienny Volcano and the Kamienny Volcano towering above it. The Kamenny is obscured by volcanic ash.

The upper part of the active crater of Bezimienny.

The upper part of the active crater of Bezimienny.

Kamienny Volcano 4,580m.

Kamienny Volcano 4,580m.

The active lava dome of the Bezimienny Volcano. The sulfur fumaroles were very active and smoke would come out with varied intensity.

The active lava dome of the Bezimienny Volcano. The sulfur fumaroles were very active and smoke would come out with varied intensity.

The outer shell of the volcanic dome of the Bezimienny Volcano with active sulphuric fumaroles.

The outer shell of the volcanic dome of the Bezimienny Volcano with active sulphuric fumaroles.

The old volcanic craters seen from the top of Bezimienny and the view of the small pass we had to cross the day before.

The old volcanic craters seen from the top of Bezimienny and the view of the small pass we had to cross the day before.

The Tolbachik Volcano. We were going to climb the Plotsky Tolbachik but decided not to due to inclement weather.

The Tolbachik Volcano. We were going to climb the Plotsky Tolbachik but decided not to due to inclement weather.

Evgeny is dwarfed by the walls of the crater.

Evgeny is dwarfed by the walls of the crater.

Evgeny inside the crater of the Bezimienny Volcano. The ground and the rocks were quite hot. There were a lot of fumaroles on the bottom of the crater.

Evgeny inside the crater of the Bezimienny Volcano. The ground and the rocks were quite hot. There were a lot of fumaroles on the bottom of the crater.

Interesting colors in the lower section of the Bezimienny Volcano.

Interesting colors in the lower section of the Bezimienny Volcano.

The lower slopes of the Tolbachik Volcano.

The lower slopes of the Tolbachik Volcano.

The beautiful camping spot on the Fields of Mars (Massive Pole)

The beautiful camping spot on the Fields of Mars (Massive Pole)

Bezimienny and Kamen seen from the campsite called The field of Mars (Marsove Pole).

Bezimienny and Kamen seen from the campsite called The field of Mars (Marsove Pole).

The view of the volcanic ash cloud from the crater of Bezimienny at sunrise.

The view of the volcanic ash cloud from the crater of Bezimienny at sunrise.

The campsite at the Marsove Pole. I think that this spot is the most beautiful of all the campsites in the park.

The campsite at the Marsove Pole. I think that this spot is the most beautiful of all the campsites in the park.

The park has these shelters at each campsite to provide an escape from the rain for cooking and warming up by the fire.

The park has these shelters at each campsite to provide an escape from the rain for cooking and warming up by the fire.

The Field of Mars and the high volcanoes of the Kluchewskaya Cluster.

The Field of Mars and the high volcanoes of the Kluchewskaya Cluster.

IMG_E2506.jpg
Ascending the Tolbachik Pass.

Ascending the Tolbachik Pass.

Tolbachik Pass with Kamen and Bezimienny behind.

Tolbachik Pass with Kamen and Bezimienny behind.

The Tolbachik Pass is an excellent view point from which all the major volcanoes of the park can be seen. From left to right: Ushkowsky Volcano 3,943, Krestowky Volcano 4,057m, Kamenny 4,580m, smoky Bezimienny 2,800m, Ziminna 3,081m, Udina 2,921m an…

The Tolbachik Pass is an excellent view point from which all the major volcanoes of the park can be seen. From left to right: Ushkowsky Volcano 3,943, Krestowky Volcano 4,057m, Kamenny 4,580m, smoky Bezimienny 2,800m, Ziminna 3,081m, Udina 2,921m and Plotsky and Ostry Tolbachik 3,085k and 3,672m.

Drone photo by Evgeny Androssov. Ushkowsky V 3,943m and Krestowsky V 4,057m (left). Kamenny V and Bezimienny V (right).

Drone photo by Evgeny Androssov. Ushkowsky V 3,943m and Krestowsky V 4,057m (left). Kamenny V and Bezimienny V (right).

The view of Plotsky and Ostry Tolbachik Volcano from the pass.

The view of Plotsky and Ostry Tolbachik Volcano from the pass.

Early morning on the Tolbachik Pass. We were lucky again to have such nice weather. The weather changed later that day and remained rainy and overcast for the rest of our stay in the park.

Early morning on the Tolbachik Pass. We were lucky again to have such nice weather. The weather changed later that day and remained rainy and overcast for the rest of our stay in the park.

Ushkovsky Volcano together with Krestovsky Volcano are the biggest volcanic massif in Kamchatka. It is 3,943m high and 4,057m high and the base is 70 x 40km.

Ushkovsky Volcano together with Krestovsky Volcano are the biggest volcanic massif in Kamchatka. It is 3,943m high and 4,057m high and the base is 70 x 40km.

I am standing on top of a small mound. The Udina Volcano towers in the distance. That day we hiked to its base some 15km away. The large open space had no water, yet it is covered with flowers and vegetation! We were looking for streams all day and …

I am standing on top of a small mound. The Udina Volcano towers in the distance. That day we hiked to its base some 15km away. The large open space had no water, yet it is covered with flowers and vegetation! We were looking for streams all day and could only find water from the snow melt at the base of the Udina Volcano. Apparently all water flows underground in the old lava channels. The porous volcanic rock is conducive to existence of underground rivers.

As we went further away from the large volcanoes, we could see them better in their full majesty. Kamenny, Kluchewskaya and Bezimienny. Notice the 500m high dome of the Bezimienny Volcano that grew from the crater after the 1955 explosion.

As we went further away from the large volcanoes, we could see them better in their full majesty. Kamenny, Kluchewskaya and Bezimienny. Notice the 500m high dome of the Bezimienny Volcano that grew from the crater after the 1955 explosion.

Hiking down from the Tolbachik Pass.

Hiking down from the Tolbachik Pass.

Going towards the Udina Volcano. Our plan was to go for 8km but we ended up doing twice as much due to lack of water and a suitable camping spot.

Going towards the Udina Volcano. Our plan was to go for 8km but we ended up doing twice as much due to lack of water and a suitable camping spot.

IMG_8854.jpg
Fellow trekkers camping at the base of the Zimina Volcano.

Fellow trekkers camping at the base of the Zimina Volcano.

The Kamenny Volcano and the active Kluchewskaya.

The Kamenny Volcano and the active Kluchewskaya.

Volcano Bezimienny that we climbed, looks so small in front of the 4,500+ giants! The Bezimienny Volcano is very similar in its nature to Mt. St. Helen in Washington State, USA. Both had very similar explosive eruptions and both have large lava dome…

Volcano Bezimienny that we climbed, looks so small in front of the 4,500+ giants! The Bezimienny Volcano is very similar in its nature to Mt. St. Helen in Washington State, USA. Both had very similar explosive eruptions and both have large lava domes forming inside their craters. Volcanologists study the behavior of Bezimienny to predict the explosions of Mt. St. Helen. Volcano Bezimienny exploded on March 30, 1955 submerging the entire area in darkness. The cloud of ash rose to 45km and burned all trees in the 25km radius. The blast created a 700m deep crater 1.3 x 2.8km large. Over the past decade, the dome inside the crater rose to the height of 500m.

The 4,750m high Kluchewskaya Volcano is the largest volcano in Eurasia. It is the most powerful and most productive in Kamchatka. It erupts 60 million tons of rock per year! Powerful eruptions occur every 25 years. The volcano started growing from 1…

The 4,750m high Kluchewskaya Volcano is the largest volcano in Eurasia. It is the most powerful and most productive in Kamchatka. It erupts 60 million tons of rock per year! Powerful eruptions occur every 25 years. The volcano started growing from 1,700m 3,000 years ago. Now it is 4,750m high.

Taking it all in!

Taking it all in!

A dwarf species of rhododendron flower during the short summer.

A dwarf species of rhododendron flower during the short summer.

The base of the Udina Volcano and our camping spot for the day!

The base of the Udina Volcano and our camping spot for the day!

Another hut built by the Soviet volcanologists. Sadly, the old Soviet books from the hut are used as a fire starter. The hut provides extremely rustic shelter from the wind and rain.

Another hut built by the Soviet volcanologists. Sadly, the old Soviet books from the hut are used as a fire starter. The hut provides extremely rustic shelter from the wind and rain.

IMG_8919.jpg
These ground squirrels were everywhere and were unafraid of people. They were very plump!

These ground squirrels were everywhere and were unafraid of people. They were very plump!

Distant Sredinny Range one of the two main mountain ranges of the Kamchatka Peninsula. It is rugged and remote with no road access.

Distant Sredinny Range one of the two main mountain ranges of the Kamchatka Peninsula. It is rugged and remote with no road access.

IMG_8934.jpg
There are extensive fresh lava fields on the opposite side of the Tolbachik Volcano from where we started. They were formed during the 2012-2013 eruptions. The Tolbachik Volcano is the only volcano outside Hawaii that erupts through fissures and not…

There are extensive fresh lava fields on the opposite side of the Tolbachik Volcano from where we started. They were formed during the 2012-2013 eruptions. The Tolbachik Volcano is the only volcano outside Hawaii that erupts through fissures and not from the main crater.

Small waterfall over red volcanic rock.

Small waterfall over red volcanic rock.

The exposed volcanic rock

The exposed volcanic rock

The Udina Volcano and the black soil of the Tolbachik lava fields.

The Udina Volcano and the black soil of the Tolbachik lava fields.

Hiking towards the Tolbachik Volcano.

Hiking towards the Tolbachik Volcano.

The basecamp of the Tolbachik Volcano is 100km away from the main road. It is accessible via an old logging track and many people come to climb the volcano. It is a desolate place without vegetation and is covered in volcanic dust and old lava. The …

The basecamp of the Tolbachik Volcano is 100km away from the main road. It is accessible via an old logging track and many people come to climb the volcano. It is a desolate place without vegetation and is covered in volcanic dust and old lava. The wind here was so strong that it damaged two of our tents (one completely). The basecamp is also home to the “Inspector” - the Park warden.

The Inspectos’s hut. One can obtain maps and commemorative pins. The inspector also collects fees for the use of the kitchen facilities by large groups.

The Inspectos’s hut. One can obtain maps and commemorative pins. The inspector also collects fees for the use of the kitchen facilities by large groups.

Our camp before the wind storm. The wind got so intense that I had to move my tent to a more sheltered spot. The small green tent got totally trashed by the wind.

Our camp before the wind storm. The wind got so intense that I had to move my tent to a more sheltered spot. The small green tent got totally trashed by the wind.

My tent taking a beating during the wind and rain storm. The lava rocks provided solid anchors as it was impossible to peg the tent in the volcanic sand. I was quite amazed that the tent withstood the onslaught while all the other tents got blown aw…

My tent taking a beating during the wind and rain storm. The lava rocks provided solid anchors as it was impossible to peg the tent in the volcanic sand. I was quite amazed that the tent withstood the onslaught while all the other tents got blown away or trashed. I was fully prepared for the poles to snap as the wind “flattened” the tent on top of me during the gusts.

We spent the day exploring the extensive lava fields and old volcanic craters. It was all very fascinating! The cooled lava made wonderful formations. Some looked like coiled rope or roots of trees. We walked through lava caves and lava tubes. Many …

We spent the day exploring the extensive lava fields and old volcanic craters. It was all very fascinating! The cooled lava made wonderful formations. Some looked like coiled rope or roots of trees. We walked through lava caves and lava tubes. Many areas are still active and, in some places, the ground temperature is in excess of 100C!

The edge of the lava flow. The lava moved very slowly and just “froze” once it cooled.

The edge of the lava flow. The lava moved very slowly and just “froze” once it cooled.

Wild lava formations

Wild lava formations

The volcanic plugs sticking from the field of ash.

The volcanic plugs sticking from the field of ash.

Fresh lava field. We were often walking on top of lava channels. I was concerned to break through. The lava is very sharp and hard and can cut through like a knife. It is also very easy to walk on as the surface is abrasive and provides excellent fo…

Fresh lava field. We were often walking on top of lava channels. I was concerned to break through. The lava is very sharp and hard and can cut through like a knife. It is also very easy to walk on as the surface is abrasive and provides excellent footing. The lava is black on top but has numerous shades of reds and browns underneath. It forms beautiful shapes like glass art. If placed in an art gallery, many people would not be able to guess what it was.

Negotiating the extensive lava fields. Photo by Evgeny Androssov.

Negotiating the extensive lava fields. Photo by Evgeny Androssov.

When the color of lava was yellowish, it usually indicated a hot and active area. The ground was more brittle in those spots.

When the color of lava was yellowish, it usually indicated a hot and active area. The ground was more brittle in those spots.

The ground was hot enough to warm up and dry our wet gloves.

The ground was hot enough to warm up and dry our wet gloves.

Incredible lava formations.

Incredible lava formations.

The distant hills are the active volcanic craters that were the epicenter of the most recent eruption in 2012-2013.

The distant hills are the active volcanic craters that were the epicenter of the most recent eruption in 2012-2013.

Frozen lava

Frozen lava

IMG_9020.jpg
As the lava cooled the carbon exposed to oxygen remained black. Underneath the lava has different colours.

As the lava cooled the carbon exposed to oxygen remained black. Underneath the lava has different colours.

IMG_9044.jpg
Inside a volcanic bomb the lava is like a frozen sticky glue but hard like a rock.

Inside a volcanic bomb the lava is like a frozen sticky glue but hard like a rock.

Incredible colours of the volcanic rock near an active area.

Incredible colours of the volcanic rock near an active area.

Exploring lava caves - huge caverns that held liquid magma during the 2012-2013 eruptions.

Exploring lava caves - huge caverns that held liquid magma during the 2012-2013 eruptions.

Inside the lava cave.

Inside the lava cave.

Evgeny marching to the top of the lava crater. Notice the basecamp on the left.

Evgeny marching to the top of the lava crater. Notice the basecamp on the left.

The pumice rock is very light but walking uphill on it can be hard as it slides from under the feet.

The pumice rock is very light but walking uphill on it can be hard as it slides from under the feet.

Brittle volcanic rock. Still hot.

Brittle volcanic rock. Still hot.

The slopes of a volcanic crater. What an incredible place!

The slopes of a volcanic crater. What an incredible place!

Fresh volcanic crater. It is still hot!

Fresh volcanic crater. It is still hot!

Despite the rain, we really enjoyed exploring this area; it was a kaleidoscope of colors.

Despite the rain, we really enjoyed exploring this area; it was a kaleidoscope of colors.

Drone photo by Evgeny Androssov

Drone photo by Evgeny Androssov

IMG_2805.jpg
Many craters of the recent Tolbachik eruption. Notice David in a red jacket standing above the crater. It gives the sense of scale of the vastness of this area. In the distance is the Udina Volcano.

Many craters of the recent Tolbachik eruption. Notice David in a red jacket standing above the crater. It gives the sense of scale of the vastness of this area. In the distance is the Udina Volcano.

One of the craters.

One of the craters.

IMG_E2877.jpg
IMG_E2901.jpg
The slopes of the Tolbachik Volcano obscured by the clouds. Poor weather and lack of visibility prevented us from going to the top although it was our plan.

The slopes of the Tolbachik Volcano obscured by the clouds. Poor weather and lack of visibility prevented us from going to the top although it was our plan.

The volcanic crater in front of the Tolbachik Volcano.

The volcanic crater in front of the Tolbachik Volcano.

Walking on ash created by the 2012-2013 eruptions.

Walking on ash created by the 2012-2013 eruptions.

Our final day of trekking. We walked through a volcanic desert. It truly felt as if we were on another planet. It was very desolate.

Our final day of trekking. We walked through a volcanic desert. It truly felt as if we were on another planet. It was very desolate.

IMG_9245.jpg
Like walking on another planet! This place of “nothing” went on for over 20km!

Like walking on another planet! This place of “nothing” went on for over 20km!

Just ash and volcanic sand - not a trace of vegetation is sight. This was completely different from the other side of the mountain.

Just ash and volcanic sand - not a trace of vegetation is sight. This was completely different from the other side of the mountain.

Massive volcanic bombs. Some of them were size of a small car! The crater above exploded in the 1970s. I hiked to the top of it and the crater is still active with smoke and hot areas.

Massive volcanic bombs. Some of them were size of a small car! The crater above exploded in the 1970s. I hiked to the top of it and the crater is still active with smoke and hot areas.

IMG_E3022.jpg
We were waiting for Sergei, our driver, and I hiked up to the top of a volcanic cone next to the shelter. From the top, the desolate landscape spreads out as far as the eye can see. I hiked to the top to warm up as we are getting really cold in the …

We were waiting for Sergei, our driver, and I hiked up to the top of a volcanic cone next to the shelter. From the top, the desolate landscape spreads out as far as the eye can see. I hiked to the top to warm up as we are getting really cold in the mist and rain.

Old Soviet “Zil” adapted to overland travel. According to the driver, there are not many original parts from the old truck left on it.

Old Soviet “Zil” adapted to overland travel. According to the driver, there are not many original parts from the old truck left on it.

Another volcanic lava flow from an old crater. This lava flow dates back to 1970s. It is old for us but very recent in geological terms.

Another volcanic lava flow from an old crater. This lava flow dates back to 1970s. It is old for us but very recent in geological terms.

Multitude of colours inside the volcanic crater.

Multitude of colours inside the volcanic crater.

A lava bomb

A lava bomb

Lava rocks and moss.

Lava rocks and moss.

Our final stop in the park was in the Dead Forest. The forest was killed by the volcanic eruption leaving only charred tree trunks. The life is returning though and the forest is regrowing.

Our final stop in the park was in the Dead Forest. The forest was killed by the volcanic eruption leaving only charred tree trunks. The life is returning though and the forest is regrowing.

IMG_3070.jpg
A wreck of a Soviet helicopter belonging to the Russian Academy of Science that crashed here in the 1970s.

A wreck of a Soviet helicopter belonging to the Russian Academy of Science that crashed here in the 1970s.

The Dead Forest

The Dead Forest

IMG_9293.jpg
IMG_9316.jpg
Sergiey, a true Kamchatka man. He met us after our 10 day hike with beer, home baked salmon, samogon and other goodies! He knows a lot about Kamchatka, the geology of the land, the history and the stories of the people of the region. He can also dri…

Sergiey, a true Kamchatka man. He met us after our 10 day hike with beer, home baked salmon, samogon and other goodies! He knows a lot about Kamchatka, the geology of the land, the history and the stories of the people of the region. He can also drive through some pretty remote and obscure tracks that are almost fully overgrown by the Tajga. He is equipped for all eventualities. He had a chainsaw in his truck and used it to clear fallen trees from barely visible forest roads. He provided us with some good tips and suggestions. Thanks to him we saw places that otherwise we would not have visited.

A wall of lava advancing through the tajga. The lava is higher than the trees!

A wall of lava advancing through the tajga. The lava is higher than the trees!

Marveling at the extensive lava flow.

Marveling at the extensive lava flow.

Massive lava field

Massive lava field

Massive lava field dwarfing the forest. The height and volume of the lava is staggering.

Massive lava field dwarfing the forest. The height and volume of the lava is staggering.

The lava mowing down the forest just “froze” in its tracks. The eruption happened during winter and because of this, the forest did not burn down.

The lava mowing down the forest just “froze” in its tracks. The eruption happened during winter and because of this, the forest did not burn down.

Drone photo by Evgeny Androssov of the massive lava field

Drone photo by Evgeny Androssov of the massive lava field

Drone photo by Evgeny Androssov - notice our car in the bottom centre

Drone photo by Evgeny Androssov - notice our car in the bottom centre

IMG_2695.jpg

Taiwan

taiwan.gif
The most prominent historical landmark in Taiwan, the CKS Memorial Hall was erected in honor and memory of Generalissimo Chiang Kai-shek, the former President of the Republic of China, and was opened in 1980 as part of a national park and gathering …

The most prominent historical landmark in Taiwan, the CKS Memorial Hall was erected in honor and memory of Generalissimo Chiang Kai-shek, the former President of the Republic of China, and was opened in 1980 as part of a national park and gathering area. The characters behind Chiang's statue read "Ethics", "Democracy", and "Science", and the inscriptions on the side read "The purpose of life is to improve the general life of humanity" and "The meaning of life is to create and sustain subsequent lives in the universe".

The name of the square is officially Liberty Square (自由廣場), as seen above the front gate, however the name change was politically motivated and most people in practice still refer to the entire complex as CKS Memorial Hall.

The name of the square is officially Liberty Square (自由廣場), as seen above the front gate, however the name change was politically motivated and most people in practice still refer to the entire complex as CKS Memorial Hall.

The name of the square is officially Liberty Square (自由廣場), as seen above the front gate, however the name change was politically motivated and most people in practice still refer to the entire complex as CKS Memorial Hall.

The name of the square is officially Liberty Square (自由廣場), as seen above the front gate, however the name change was politically motivated and most people in practice still refer to the entire complex as CKS Memorial Hall.

TWIB6962.jpg
The octagon-shaped white building rises 76 meters and is covered with blue tiles and red accents, echoing the flag of the Republic of China. The eight sides represent the Chinese cultural symbolism of the number eight which is traditionally associat…

The octagon-shaped white building rises 76 meters and is covered with blue tiles and red accents, echoing the flag of the Republic of China. The eight sides represent the Chinese cultural symbolism of the number eight which is traditionally associated with fortune and wealth. The two sets of 89 steps represent Chiang's age of death and lead up to main hall housing a large bronze statue of Chiang protected by military personnel which change hourly.

IMG_1545.jpg
IMG_7590.jpg
National Concert Hall

National Concert Hall

IMG_7587.jpg
Originally constructed in 1742 as a wooden shrine, the Bao'an Temple is a Taiwanese folk religion temple. Throughout Taiwan's history, the temple was renovated and reconstructed numerous times, leading to a 2003 induction into UNESCO for cultural he…

Originally constructed in 1742 as a wooden shrine, the Bao'an Temple is a Taiwanese folk religion temple. Throughout Taiwan's history, the temple was renovated and reconstructed numerous times, leading to a 2003 induction into UNESCO for cultural heritage conservation.

Dedicated to the Taoist saint Baosheng Dadi (保生大帝), the 900 SQ METRE large temple faces south, in line with Feng-Shui practices, and houses the front, main, and rear halls, along with the east and west halls. The buildings also run from tallest to shortest in that order, in observance of Confucian principles. The temple also houses a drum tower.

Important architectural elements around the temple grounds include stone carvings, stone lions, dragon columns, stone bamboo windows, and wood, stone, and clay carvings.

IMG_7526.jpg
IMG_7525.jpg
IMG_7531.jpg
IMG_7533.jpg
IMG_7538.jpg
IMG_1596.jpg
IMG_1557.jpg
JQJE1444.jpg
IMG_7602.jpg
IMG_7622.jpg
IMG_7619.jpg
IMG_7624.jpg
IMG_7626.jpg
IMG_1570.jpg
IMG_1571.jpg
IMG_1574.jpg
The Confucius Temple

The Confucius Temple

IMG_7508.jpg
IMG_7510.jpg
IMG_7513.jpg
IMG_7517.jpg
The Confucius Temple

The Confucius Temple

IMG_1466.jpg
IMG_1479.jpg
IMG_1482.jpg
IMG_1483.jpg
GEIH2312.jpg
IMG_1490.jpg
IMG_1495.jpg
IMG_1500.jpg
IMG_1504.jpg
IMG_1509.jpg
IMG_7550.jpg
IMG_7548.jpg
IMG_7553.jpg
IMG_7558.jpg
IMG_7564.jpg
IMG_7530.jpg
IMG_1522.jpg
IMG_1527.jpg
IMG_1422.jpg
IMG_7475.jpg
IMG_1408.jpg
IMG_7479.jpg
IMG_7480.jpg
IMG_7481.jpg
IMG_7485.jpg

Ancohuma 6,427M Bolivia

Ancohuma is the highest peak of the northern part of the Cordillera Real Range. It is 6,427m high. It was our main reason for coming on this trip. It is a six day round trip excursion from the town of Sorata (140km from La Paz). The route has 3 camps: at 4,000m, 5,100m and 5,450m. The climb is not technical (via normal route) but it is LONG! The glacier is also very crevassed and the hidden slots present a real danger so being roped up is a must. We had fantastic weather and very good conditions. We were stopped 150m from the summit by a large crevasse that was too dangerous to navigate for us. Never the less, it was a fabulous experience and a great adventure!

The locals believe that the gringoes go to the top to find gold. According to them, there is a little lake on top of Ancohuma with gold deposits in it and we are on the mission to get it. Why would anyone go up there otherwise?

Bolivia_0000_map_Cordillera_Real.jpg
Ancohuma.8.gif
central-andes-of-bolivia-1-1024.jpg
effective-amount-of-oxygen-at-different-altitudes1.jpg
The road from La Paz to Sorata. The town of Sorata is at an altitude of 2,800m. I was there in 2010 and always wanted to come back to climb Ancohuma.

The road from La Paz to Sorata. The town of Sorata is at an altitude of 2,800m. I was there in 2010 and always wanted to come back to climb Ancohuma.

The Illampu/Ancohuma massif. The beautiful Illampu towers over the road below.

The Illampu/Ancohuma massif. The beautiful Illampu towers over the road below.

Another view of the Ancohuma/Illampu massif. Ancohuma is the round summit on the left. The massif consists of many sub peaks and many glaciers.

Another view of the Ancohuma/Illampu massif. Ancohuma is the round summit on the left. The massif consists of many sub peaks and many glaciers.

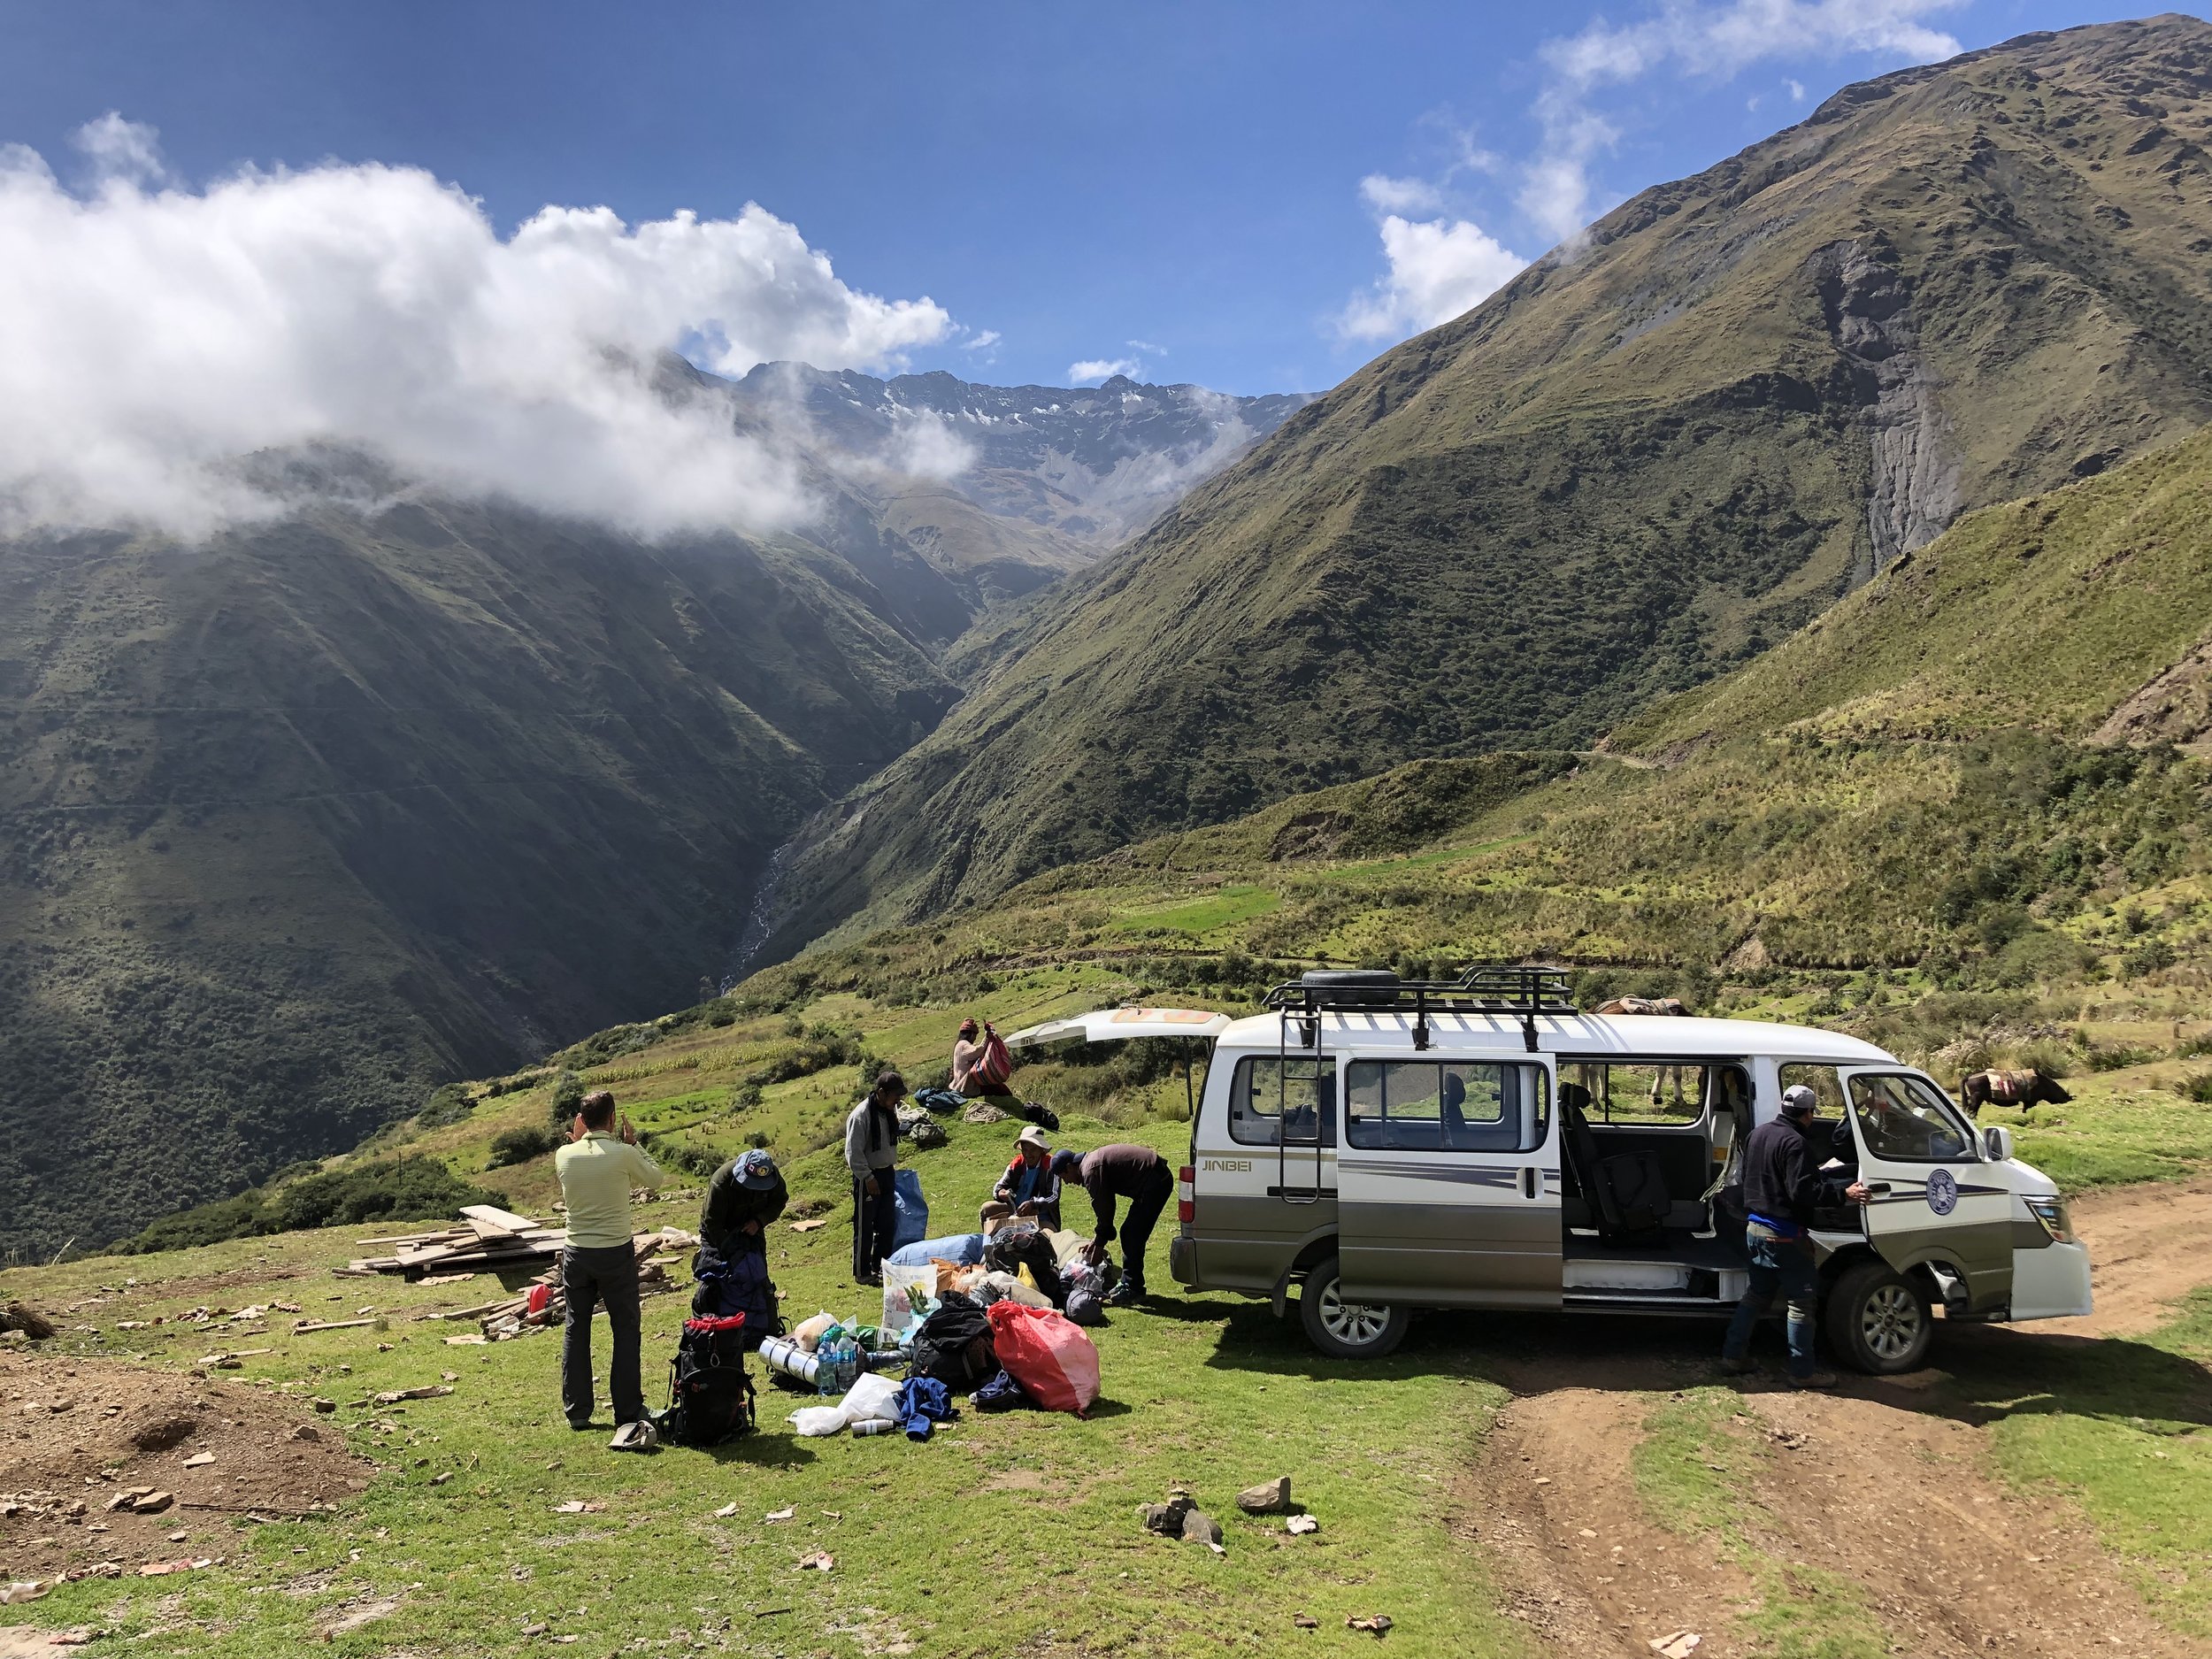
The road ends and the walking starts. We had mules help carry our stuff to the first camp.

The road ends and the walking starts. We had mules help carry our stuff to the first camp.

The first camp at Laguna Chillata at 4000m. It is a beautiful and clear lake which is sacred to the local people.

The first camp at Laguna Chillata at 4000m. It is a beautiful and clear lake which is sacred to the local people.

Our camp at Laguna Chillata.

Our camp at Laguna Chillata.

Then the clouds rolled in and we did not see anything until the morning.

Then the clouds rolled in and we did not see anything until the morning.

The fantastic panorama at sunset from Laguna Glaciar. You are standing literally at the edge of the world looking over the Altiplano and the Lake Titikaka.

The fantastic panorama at sunset from Laguna Glaciar. You are standing literally at the edge of the world looking over the Altiplano and the Lake Titikaka.

IMG_E1883.JPG
Looking over the Royal Range from Laguna Glaciar.

Looking over the Royal Range from Laguna Glaciar.

IMG_1895.JPG
The trail between camp 1 and camp 2. We could not use mules on this section and had to rely on porters.

The trail between camp 1 and camp 2. We could not use mules on this section and had to rely on porters.

These are the trail sections impassible for the animals.

These are the trail sections impassible for the animals.

A small pass at 4,300m.

A small pass at 4,300m.

Approaching Laguna Glaciar. Pico Schultze towers above. We are now entering the world of glaciers and moraines.

Approaching Laguna Glaciar. Pico Schultze towers above. We are now entering the world of glaciers and moraines.

Beautiful Pico Schultze is right in front. We saw a few condors circling above and checking us out.

Beautiful Pico Schultze is right in front. We saw a few condors circling above and checking us out.

Our camp at Laguna Glaciar at 5,100m. This is a very beautiful spot with high Andes all around. This is how far we made it in 2010. I always wanted to come back and explore more of this fantastic corner of the Cordillera Real.

Our camp at Laguna Glaciar at 5,100m. This is a very beautiful spot with high Andes all around. This is how far we made it in 2010. I always wanted to come back and explore more of this fantastic corner of the Cordillera Real.

Laguna Glaciar and Illampu. Illampu is the most difficult mountain to climb in the entire range. The standard climbing route is on the opposite side of the mountain.

Laguna Glaciar and Illampu. Illampu is the most difficult mountain to climb in the entire range. The standard climbing route is on the opposite side of the mountain.

Compare the glacial retreat to my photo from 2010 (click)! The icefall between Illampu and Ancohuma. In a decade, the glacier moved back considerably. The melting of the glaciers makes the climbing more difficult as crevasses open up making routes i…

Compare the glacial retreat to my photo from 2010 (click)! The icefall between Illampu and Ancohuma. In a decade, the glacier moved back considerably. The melting of the glaciers makes the climbing more difficult as crevasses open up making routes impassible.

The upper section of Illampu. The glacial changes make the climbing more challenging,

The upper section of Illampu. The glacial changes make the climbing more challenging,

Sunset on Illampu. This is the star mountain of the entire area.

Sunset on Illampu. This is the star mountain of the entire area.

Drone photo of the Laguna Glaciar and Illampu.

Drone photo of the Laguna Glaciar and Illampu.

Laguna Glaciar

Laguna Glaciar

IMG_1848.JPG
IMG_1864.jpg
Ancohuma from the moraines around the basecamp

Ancohuma from the moraines around the basecamp

The trail from Laguna Glaciar to the High Camp at 5,450m. We are now on permanent snow/ice.

The trail from Laguna Glaciar to the High Camp at 5,450m. We are now on permanent snow/ice.

The views were getting quite spectacular as we approached the high camp.

The views were getting quite spectacular as we approached the high camp.

One of our porters approaching the high camp. Illampu is in the distance.

One of our porters approaching the high camp. Illampu is in the distance.

IMG_1408.jpg
The high camp is on the edge of the high moraine. It is a fantastic spot with great views. There are a few flat platforms for tents.

The high camp is on the edge of the high moraine. It is a fantastic spot with great views. There are a few flat platforms for tents.

Looking down to the Altiplano from 5,350m near the high camp.

Looking down to the Altiplano from 5,350m near the high camp.

Panoramic view from the door of our tent.

Panoramic view from the door of our tent.

The altitude of the high camp. My altimiter is off by 180m so it is really 5,465m.

The altitude of the high camp. My altimiter is off by 180m so it is really 5,465m.

The high camp.

The high camp.

Our camp! What a view!

Our camp! What a view!

Illampu

Illampu

We would soon be well above this peak on the way to Ancohuma.

We would soon be well above this peak on the way to Ancohuma.

We had to negotiate this maze of ice - not too difficult as you could see the obstacles. The real challenge was higher up where everything was flat and snow covered!

We had to negotiate this maze of ice - not too difficult as you could see the obstacles. The real challenge was higher up where everything was flat and snow covered!

IMG_1431.jpg
Gregorio scouting the route for the following night. We wanted to follow our own trail and not wander in the dark.

Gregorio scouting the route for the following night. We wanted to follow our own trail and not wander in the dark.

IMG_1457.jpg
At sunrise we were above the ice maze and on the large plateau. This part was the most dangerous for the hidden crevasses.

At sunrise we were above the ice maze and on the large plateau. This part was the most dangerous for the hidden crevasses.

Illampu at sunrise.

Illampu at sunrise.

Plodding up. It was so very cold! My water froze in my pack. We were waiting for the sun to come out but it would be a long time. Once the sun came out, the temperature shift was 50C! It became unbearably hot and the glacial radiation was very inten…

Plodding up. It was so very cold! My water froze in my pack. We were waiting for the sun to come out but it would be a long time. Once the sun came out, the temperature shift was 50C! It became unbearably hot and the glacial radiation was very intense.

Well above 6,000m. Approaching the final section fo the climb. the summit is just above us.

Well above 6,000m. Approaching the final section fo the climb. the summit is just above us.

MVGN1664.JPG
The summit part of the mountain. We are 150m below the summit.

The summit part of the mountain. We are 150m below the summit.

Looking down to where we came from.

Looking down to where we came from.

Coming close the the summit ridge.

Coming close the the summit ridge.

This is where we encountered the impassible crevasse. We made the decision to bail.

This is where we encountered the impassible crevasse. We made the decision to bail.

IMG_2109.JPG
Looking down to our route. The camp is well below!

Looking down to our route. The camp is well below!

IMG_2121.JPG
The rocky summit that towers over the Laguna Glaciar is now very small and well below us.

The rocky summit that towers over the Laguna Glaciar is now very small and well below us.

Add 180m - our approximate high point.

Add 180m - our approximate high point.

One of the hidden crevasses… Rope is an absolute must!

One of the hidden crevasses… Rope is an absolute must!

Working our way across one of the crevices with the summit bulk of Ancohuma behind.

Working our way across one of the crevices with the summit bulk of Ancohuma behind.

IMG_2199.JPG
IMG_2164.JPG
IMG_1492.jpg
IMG_2208.jpg
IMG_1501.jpg
IMG_1496.jpg
IMG_1502.jpg
IMG_2185.jpg
IMG_1506.jpg
Illampu

Illampu

IMG_2207.jpg
IMG_1510.jpg
IMG_2218.jpg
IMG_1487.jpg
Our camp is on the lower left by the last rocky outcrop

Our camp is on the lower left by the last rocky outcrop

Illampu

Illampu

Our camp from the glacier

Our camp from the glacier

IMG_1525.jpg
Going back to Laguna Glaciar

Going back to Laguna Glaciar

Above Laguna Glaciar

Above Laguna Glaciar

IMG_2252.jpg
Our small team; Gregorio, Ricardo, Gilles and I

Our small team; Gregorio, Ricardo, Gilles and I

IMG_2260.JPG
Lake Titikaka from 5,000m

Lake Titikaka from 5,000m

IMG_2275.JPG
Back where the plants grow!

Back where the plants grow!

And just like that, it is all over! Until the next time! It was a fabulous adventure yet again.

And just like that, it is all over! Until the next time! It was a fabulous adventure yet again.

Huayna Potosi 6,088m Bolivia

Huayna Potosi was our second acclimatization step on the road to Ancohuma. You will see the name “Huayna Potosi” on the window of every agency in La Paz offering a 3 day climb to a 6,000m mountain for novices. It is a surprisingly beautiful experience. The mountain is not technical but it is high. On our way up we saw quite a few people turning around due to altitude problems some of those people could barely walk. Some of the people did not even leave the high camp. The agencies in La Paz claim that the climb is not a big deal just to sell the trip. The altitude makes it a big deal though and if you are not acclimatized it can be an experience you will not forget for a long time, but for the very wrong reason.

The mountain towers over El Alto and it is only a short distance from the city. It has a good basecamp at 4,700m and a high camp at 5,150m. Both camps are permanent structures offering bunk beds and meal service. The climb is really just a high altitude hike with crevices being the main danger. Unfortunately for us we picked a day with high winds (65km/hr) and upon reaching the final ridge at the top, we decided to turn around. The wind was just too strong and it was almost knocking us over. It was a fun climb though and we enjoyed the experience very much.

central-andes-of-bolivia-1-1024.jpg
Bolivia_0000_map_Cordillera_Real.jpg
Huayna-Potosi.8.gif
We followed the combination of (2) and (5)

We followed the combination of (2) and (5)

effective-amount-of-oxygen-at-different-altitudes1.jpg

Crazy wind near the summit part of the mountain

Our objective from the road. The route is on the opposite side of the mountain.

Our objective from the road. The route is on the opposite side of the mountain.

IMG_1427.jpg
The accommodation at the base camp at 4,700m.

The accommodation at the base camp at 4,700m.

En route from the basecamp to the high camp. The main summit is in the cloud.

En route from the basecamp to the high camp. The main summit is in the cloud.

The trail to the high camp.

The trail to the high camp.

IMG_1252.jpg
IMG_1013.jpg
The high camp at 5,150m, the views are quite spectacular!

The high camp at 5,150m, the views are quite spectacular!

The view from the high camp.

The view from the high camp.

We started at 5 am and by the time it started to get light we were quite high at 5,700m.

We started at 5 am and by the time it started to get light we were quite high at 5,700m.

The rope is required for potential danger with hidden crevices.

The rope is required for potential danger with hidden crevices.

The final push to the summit is ahed. We are now close to 6,000m and the wind is picking up!

The final push to the summit is ahed. We are now close to 6,000m and the wind is picking up!

IMG_1293.JPG
The final section leading to the summit. The wind became too much for us here.

The final section leading to the summit. The wind became too much for us here.

Illimani, the highest peak in the Royal Range, from the upper slopes of Huayna Potosi.

Illimani, the highest peak in the Royal Range, from the upper slopes of Huayna Potosi.

Upper section of the mountain dissected by many crevices.

Upper section of the mountain dissected by many crevices.

Panoramic view of the upper part of the mountain with the summit visible on the right.

Panoramic view of the upper part of the mountain with the summit visible on the right.

Coming up to 6,000m

Coming up to 6,000m

XZYT1884.JPG
Looking towards the Jungas and the Amazon basin.

Looking towards the Jungas and the Amazon basin.

We are now well above the clouds!

We are now well above the clouds!

Big glaciers at the upper part of the mountain and Illimani in the distance.

Big glaciers at the upper part of the mountain and Illimani in the distance.

IMG_1083.jpg
IMG_1089.jpg
Illimani, the highest peak in the Royal Range.

Illimani, the highest peak in the Royal Range.

IMG_1095.jpg
IMG_1109.jpg
IMG_1117.jpg
El Alto from the upper mountain.

El Alto from the upper mountain.

We had to negotiate one steeper slope and some crevices along the way.

We had to negotiate one steeper slope and some crevices along the way.

IMG_1145.jpg
Beautiful views to the countless peaks below.

Beautiful views to the countless peaks below.

The view of the lower part of the glacier from near the high camp. It is quite a long way to the top from here! The main summit is in the cloud. We had lousy weather with high winds and the cloud obstructing the summit.

The view of the lower part of the glacier from near the high camp. It is quite a long way to the top from here! The main summit is in the cloud. We had lousy weather with high winds and the cloud obstructing the summit.

High camp at 5,100m

High camp at 5,100m

This small section just before the high camp was the most treacherous. The rocks were covered with ice and it would be an easy slip.

This small section just before the high camp was the most treacherous. The rocks were covered with ice and it would be an easy slip.

Happy to be down: Gregorio and Gilles.

Happy to be down: Gregorio and Gilles.

Ausangate Trek Peru

The Ausangate trek is a “little” gem among the attractions of the Cusco region of Peru. It is not very popular among millions of tourists that visit the more famous Inca Trail and Machu Picchu. The full circuit (“la vuelta” in Spanish), is a six day affair although it can be done in a shorter time. There are a few variations of the trak, one ends at the Rainbow Mountain, another cuts across the front of the range. There is also a longer varsion that traverses the entire range of Cordillera Vilcanota.

Our main objective was to acclimatize to the altitude of 6,000 in order to climb Ancohuma in Bolivia. This trek gave us a perfect combination of climbing to high passes and sleeping at lower elevations. We did not see many other hikers along the way and for the most part, we had the entire place to ourselves. Action Treks Peru from Cusco organized the support for us. The service provided to us was first class. We had a fantastic guide, Odon who told us many interesting things about the region, culture, history and customs of the local people. Yes, one can do the trek without the help of the local guide but, it is nice to give back to the people of the region that we visit and, it is a great opportunity to learn a lot about many interesting aspects of the life on the Altiplano.

ausangateperu.gif
map-ausangate.jpg
ausangate altitude.png
The entire Ausangate Range. The large mountain on the right is Apu Ausangate 6,372m.

The entire Ausangate Range. The large mountain on the right is Apu Ausangate 6,372m.

In order to get to the trek, we needed to travel on the Interoceanic Highway connecting the Pacific and Atlantic Oceans.

In order to get to the trek, we needed to travel on the Interoceanic Highway connecting the Pacific and Atlantic Oceans.

The lower slopes of the Vilcanota Range are inhabited by the Quechua people. Their traditions are very colourful and lively. They live in communes consisting of many villages. Each commune has its own laws and rules. The members do not own land or p…
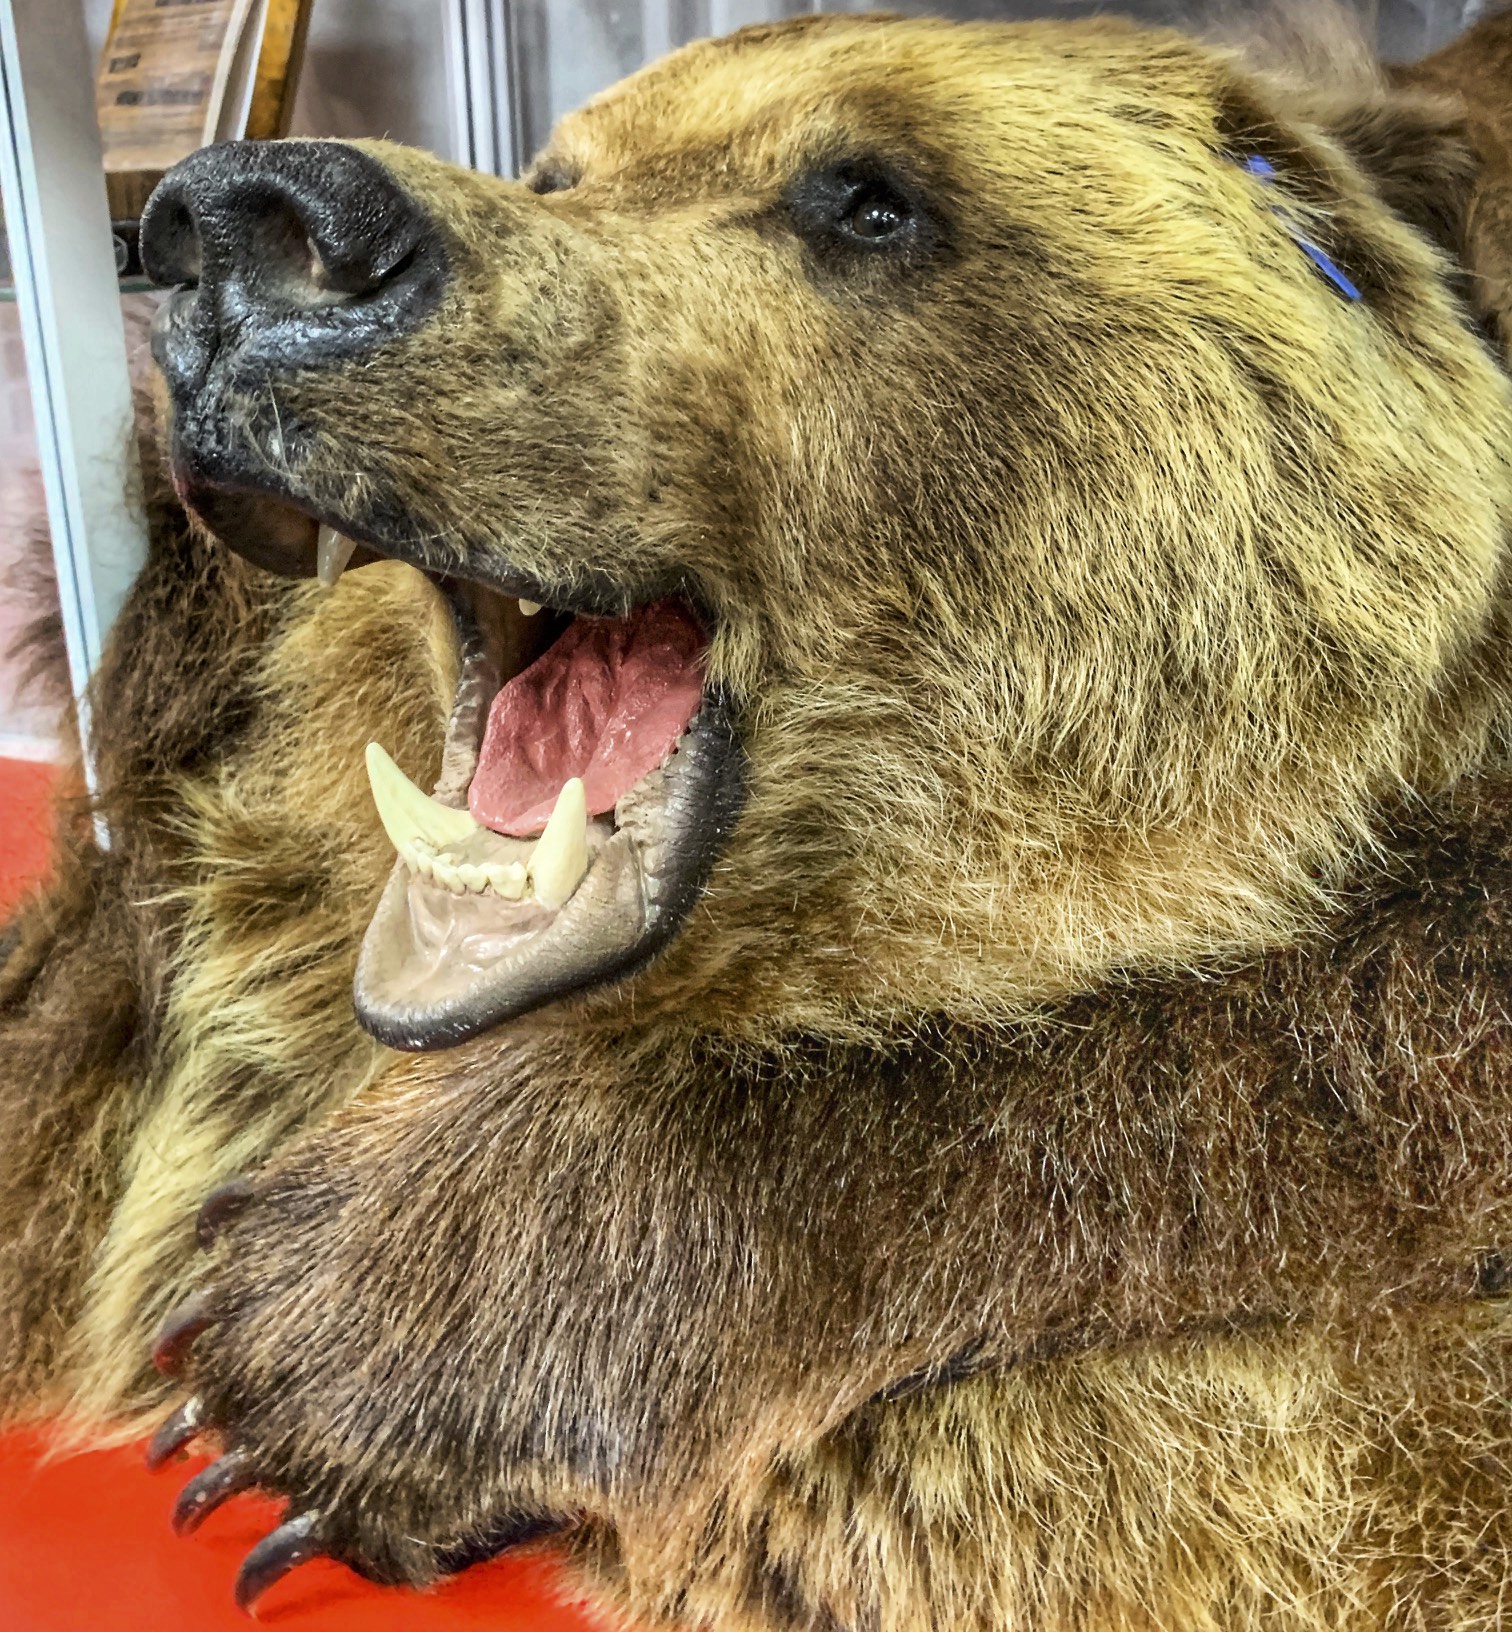
The lower slopes of the Vilcanota Range are inhabited by the Quechua people. Their traditions are very colourful and lively. They live in communes consisting of many villages. Each commune has its own laws and rules. The members do not own land or property and all the income from work or trade is shared among the people from the commune.

Our first day with Mt. Ausangate right in front of us. It was a nice short hike to our first campsite at 4.400m in Upis.

Our first day with Mt. Ausangate right in front of us. It was a nice short hike to our first campsite at 4.400m in Upis.

Alpaca and Mt. Ausangate

Alpaca and Mt. Ausangate

Our first campsite at Upis at 4,400m

Our first campsite at Upis at 4,400m

Ausangate at sunset from the hills above Upis.

Ausangate at sunset from the hills above Upis.

Mt. Jatunpunta that we would pass by on our 5th day.

Mt. Jatunpunta that we would pass by on our 5th day.

From Upis it was a gentle climb to the first pass at 4,800m - Abra Pass

From Upis it was a gentle climb to the first pass at 4,800m - Abra Pass

Abra Pass

Abra Pass

At Abra Pass, the scenery changed to colourful mountain rich in mineral deposits.

At Abra Pass, the scenery changed to colourful mountain rich in mineral deposits.

Ausangate from the Abra Pass

Ausangate from the Abra Pass

Dry hills around the Abra Pass, a photo from a drone.

Dry hills around the Abra Pass, a photo from a drone.

The Abra Pass at 4,800m

The Abra Pass at 4,800m

IMG_0409.jpg
From the Abra Pass we passed by many beautiful lakes and many local families tending to their llamas and alpacas.

From the Abra Pass we passed by many beautiful lakes and many local families tending to their llamas and alpacas.

IMG_0429.jpg
IMG_0431.jpg
Lake Pucacocha and the spot for our second night’s camp at 4,800m. From here the trail divides: one continues around Ausangate and the other leads to the Rainbow Mountain.

Lake Pucacocha and the spot for our second night’s camp at 4,800m. From here the trail divides: one continues around Ausangate and the other leads to the Rainbow Mountain.

The impressive icefall of Ausangate. The same face of Ausangate is visible from the Rainbow Mountain.

The impressive icefall of Ausangate. The same face of Ausangate is visible from the Rainbow Mountain.

IMG_0571.JPG
Our second camp

Our second camp

IMG_0626.JPG
OYQH2433.JPG
IMG_0638.JPG
IMG_0651.jpg
IMG_0664.JPG
En route to the second high pass Apacheta Pass 4,850m

En route to the second high pass Apacheta Pass 4,850m

The mountains are becoming more mineral rich. The kaleidoscopic colours are out of this world!

The mountains are becoming more mineral rich. The kaleidoscopic colours are out of this world!

From the Apacheta Pass we had to descend 500m only to re-climb 800m to Palomani Pass 5,080m.

From the Apacheta Pass we had to descend 500m only to re-climb 800m to Palomani Pass 5,080m.

Hiking up to Palomani Pass with fantastic views.

Hiking up to Palomani Pass with fantastic views.

Almost at Palomani Pass looking back from the valley we came from.

Almost at Palomani Pass looking back from the valley we came from.

IMG_0717.JPG
IMG_0729.jpg
Finally, the Palomani Pass - our first time at 5,000m!

Finally, the Palomani Pass - our first time at 5,000m!

IMG_0548.jpg
The view from Palomani Pass

The view from Palomani Pass

The Palomani Pass and the mini Rainbow Mountain

The Palomani Pass and the mini Rainbow Mountain

The hills of Palomani Pass

The hills of Palomani Pass

From Palomani Pass we could see this unusual red lake with icebergs. It was very beautiful! The mountain above the lake is Nevado Santa Catalina.

From Palomani Pass we could see this unusual red lake with icebergs. It was very beautiful! The mountain above the lake is Nevado Santa Catalina.

IMG_0566.jpg
IMG_0581.jpg
Drone photo of us and Nevado Santa Catalina

Drone photo of us and Nevado Santa Catalina

Nevado Santa Catalina 5,808m

Nevado Santa Catalina 5,808m

More views from the Palomani Pass

More views from the Palomani Pass

Mineral rich mountains around the Palomani Pass. In 2016 we hiked by the Rainbow Mountain and the Red Valley. A spectacular hike!

Mineral rich mountains around the Palomani Pass. In 2016 we hiked by the Rainbow Mountain and the Red Valley. A spectacular hike!

Ausangate from the Palomani Pass

Ausangate from the Palomani Pass

The wild snow formations on the summit of Ausangate at 6,372m

The wild snow formations on the summit of Ausangate at 6,372m

Ausangate

Ausangate

Ausangate from the descent trail from the Palomani Pass to out third camp at Pampakancha

Ausangate from the descent trail from the Palomani Pass to out third camp at Pampakancha

Descending from the Palomani Pass

Descending from the Palomani Pass

Alpaca and Ausangate

Alpaca and Ausangate

From Pampakancha camp, the trail leads to the fourth high pass Jampa Pass at 5,050m

From Pampakancha camp, the trail leads to the fourth high pass Jampa Pass at 5,050m

Nevado Puca Punta on the way to Jampa Pass

Nevado Puca Punta on the way to Jampa Pass

The fantastic Jampa Mountain

The fantastic Jampa Mountain

IMG_0717.jpg
IMG_0738.jpg
Approaching Jampa Pass at 5,000m and the scenery changed yet again. Every day on this trek we had different scenery!

Approaching Jampa Pass at 5,000m and the scenery changed yet again. Every day on this trek we had different scenery!

IMG_0920.JPG
Finally at Jampa Pass - a wonderful view and beautiful mountains. We had such great weather!

Finally at Jampa Pass - a wonderful view and beautiful mountains. We had such great weather!

Juampa Pass at 5,050m

Juampa Pass at 5,050m

IMG_0777.jpg
IMG_0838.jpg
IMG_0958.jpg
Jampa Pass 5,050m

Jampa Pass 5,050m

IMG_0966.jpg
From Jampa Pass, we descended to our fourth camp at Pucacocha.

From Jampa Pass, we descended to our fourth camp at Pucacocha.

IMG_0843.jpg
The Action Treks Peru team. Note our Chef in a very formal outfit. His meals were of restaurant quality and I can honestly say that I have never had better meals on any treks in the past 20 years!

The Action Treks Peru team. Note our Chef in a very formal outfit. His meals were of restaurant quality and I can honestly say that I have never had better meals on any treks in the past 20 years!

The beautiful sacred lakes surrounding our last camp. The locals revere the mountain (“Apu” means God - Apu Ausangate) and the lakes. Some of the lakes can only be touched by the local shamans.

The beautiful sacred lakes surrounding our last camp. The locals revere the mountain (“Apu” means God - Apu Ausangate) and the lakes. Some of the lakes can only be touched by the local shamans.

IMG_0999.jpg
Salkantay mountain on the horizon (left) - another popular hike on the way to Machu Picchu.

Salkantay mountain on the horizon (left) - another popular hike on the way to Machu Picchu.

IMG_0851.jpg
On our way to Pacchanta and the hot springs! More beautiful lakes and no people! Everyone is on the Inca Trail!

On our way to Pacchanta and the hot springs! More beautiful lakes and no people! Everyone is on the Inca Trail!

IMG_0857.jpg
Beautiful lakes and Ausangate

Beautiful lakes and Ausangate

IMG_0888.jpg
Crystal clear lakes at the foot of Ausangate

Crystal clear lakes at the foot of Ausangate

IMG_0911.jpg
Sacred lake at the foot of Ausangate. Most likely the source of the water is from an underground spring. The glacial meltoff would not be so crystal clear. This lake remineded me of the Yellowstone NP.

Sacred lake at the foot of Ausangate. Most likely the source of the water is from an underground spring. The glacial meltoff would not be so crystal clear. This lake remineded me of the Yellowstone NP.

Beautiful scenery of the front ranges of Ausangate

Beautiful scenery of the front ranges of Ausangate

Glacial lake at the foot of Ausangate

Glacial lake at the foot of Ausangate

Ausangate and Cerro Wamanticaya

Ausangate and Cerro Wamanticaya

Ausangate

Ausangate

Ausangate from Pacchanta at sunset. We had this magnificent view while soaking in the hot spring. It does not get any better than that!

Ausangate from Pacchanta at sunset. We had this magnificent view while soaking in the hot spring. It does not get any better than that!

The wonderful hot springs at Pacchanta - the temperature was perfect for lingering and soaking in the views. The local lady even sells cold drinks. The hot pool belongs to the community. Different family looks after the pool each week. Earlier in th…

The wonderful hot springs at Pacchanta - the temperature was perfect for lingering and soaking in the views. The local lady even sells cold drinks. The hot pool belongs to the community. Different family looks after the pool each week. Earlier in the day, the pool was full of local people who come to the nearby warm river to bathe.

The small village of Pacchanta. Cold Coke and Beer is available!

The small village of Pacchanta. Cold Coke and Beer is available!

Local ladies selling their creations at our last camp. The ladies weave the cloth and make various things from it. The quality is high and the prices are very fair. This was a wonderful trek and a perfect way for us to acclimatize to altitude. And, …

Local ladies selling their creations at our last camp. The ladies weave the cloth and make various things from it. The quality is high and the prices are very fair. This was a wonderful trek and a perfect way for us to acclimatize to altitude. And, it is only 4 hours away from Cusco! Another fabulous experience in Peru!

Yellowstone National Park in Winter 2019

In January of 2019 we went cross country skiing to Yellowstone National Park in Wyoming, USA. The park is closed to vehicles and the only way to get in is via a snowcoach or snowmobile. A snowcoach is a large van or a small bus with huge inflated tyres that allow it to travel in deep snow. There are very few people in the park and even less on ski trails. The animals are close to the thermal pools and easy to spot. It was a beautiful experience and I concluded that the park is more beautiful in winter than during any other season of the year. You get a sense of how difficult it is for the animals to survive in the extreme winter conditions. Yet they preserver in this game of survival. This was my fifth time in the park but my first time during winter and I left with a renewed sense of appreciation for this unique corner of the world.

yellowstone-map.jpg
IMG_9457.jpg
IMG_9266.JPG
IMG_8149.jpg
IMG_8150.jpg
IMG_8151.jpg
IMG_7528.jpg
IMG_7605.jpg
IMG_7624.jpg
IMG_7640.jpg
IMG_7653.jpg
IMG_8027.jpg
IMG_8028.jpg
IMG_7331.jpg
IMG_7225.jpg
IMG_7243.jpg
IMG_7950.jpg
IMG_7602.jpg
IMG_7597.jpg
IMG_7706.jpg
IMG_7989.jpg
IMG_7723.jpg
IMG_7388.jpg
IMG_7447.jpg
IMG_7464.jpg
IMG_7497.jpg
IMG_7510.jpg
IMG_7521.jpg
IMG_7530.jpg
IMG_7544.jpg
IMG_7539.jpg
IMG_7546.jpg
IMG_7556.jpg
IMG_7558.jpg
IMG_7590.jpg
IMG_7745.jpg
IMG_7833.jpg
IMG_7852.jpg
IMG_7871.jpg
IMG_7926.jpg
IMG_7948.jpg
IMG_7924.jpg
IMG_7919.jpg
IMG_7964.jpg
IMG_7783.jpg
IMG_8002.jpg
IMG_8009.jpg
IMG_8063.jpg
IMG_8250.jpg
IMG_7586.jpg
IMG_8132.jpg
IMG_8169.jpg
IMG_8257.jpg
IMG_8294.jpg
IMG_8344.jpg
IMG_8312.jpg
IMG_8369.jpg
IMG_8367.jpg

Langtang, Tilman Pass and Ganjala Trip Report

Nepal Tilman Pass and Ganja La Pass

October 16, 2018 – November 11, 2018

Participants:  Derek and David.  Shyam (the guide), Niranjan (#2), Milan, Roshan, Santosh and Sanchaman.  We could not have done it without those great guys! 

 October 18, 2018 Kathmandu  

I am back in Kathmandu, Nepal after a long, long flight. The visa process on arrival was as chaotic as ever.  I am not sure how is Nepal going to double the number of visitors, as already the authorities have a tough time coping with the traffic as is? 2 hours aver arriving in Kathmandu, I am finally out of the airport.

Raj, the owner of Mountain Sun Valley Trekking (organizing our trip) met me at the gate and we went to his house for dhal bat and some good cheer. I know his family and they are so very nice and great.  I appreciate very much being treated as a friend and not only as a customer.  While at Raj’s house, Shyam our guide on this trek, came over.  He brought his brother Niranjan with him.  I like Niranjan very much, he is tough, very competent and always smiling. He is one of the few people that I would not hesitate to take with me on any trip!  After greetings and some beer, we reviewed our gear and checked the tents. There will be 8 of us all together and it is unlikely that we will come across many trekkers on this trip.  

After a good lunch, Raj took me to Hotel Nirvana.  I checked in, dropped my stuff, and went for a walk around Thamel, the tourist district of Kathmandu.  A lot of shops were closed due to the festival of Dashan.  I was tired from all the flying and went back to Nirvana Hotel for a 2-hour nap before David’s arrival.  After David arrived, we went for some Tibetan momos (dumplings) and then off to bed by 8.30pm.  

Early morning in Kathmandu

Early morning in Kathmandu

Thamel, Kathmandu

Thamel, Kathmandu

October 19, 2018 Okhrani 2,400m

We left Kathmandu at 8am on a road leading north.  The state of infrastructure in Kathmandu is falling further and further behind.  I am frankly not sure how the residents of this city can put up with the state of roads? The entire way out of Kathmandu was through a torn up track full of holes, dust and mud. I would not even call it a road. It was more of a track.  

On the way to the trailhead, we drove through the village of Malamchi where we had lunch in a local establishment.  The 70km distance took up the entire day.  From Malamchi the road climbed up and it was in even worse shape (if this is possible!) than earlier in the day.   We were rocking and jolting all the way from Malamchi to Okhreni. One really needs a good 4x4 with high clearance and good traction.   I would imagine that during the monsoon season these tracks are not passable.   Some of the ruts were over two feet deep!

We arrived in Okhreni, our starting point for the trek, which is in the middle of nowhere and has a deserted feel to it.  Once we arrived and unpacked, we realized that along the way we lost some of our provisions, as our load was not tied up properly to the roof railings.  The road was so bumpy that the packages containing, most importantly, a month supply of porridge was lost!  David was unimpressed but soldiered through with gusto.   It was very un-British of him to let the porridge dream go so easily.  

IMG_8603.jpg

Initially, our general plan was to hire a porter in Kathmandu who would know the route to the Tilman Pass. Unfortunately, the elusive porter could not make it due to some nebulous reason and we were left without any idea where we were going except to follow a ridge to Panch Pokhari (a popular Hindu holy site in the foothills of the Langtang Range of the Himalaya). One would assume that following a ridge should be intuitive but there are many tracks along the way and it is actually quite easy to lose one’s way.  The biggest problem that we were anticipating was finding the way later on among glaciers and moraines in the high mountains.  Not knowing the way gave me some anxiety.  The non-existent gear of the porters compounded this.  We would be faced with far simpler but equally serious problems sooner than that…

After we arrived in Okhreni, Shyam set out on a mission to find out which way to go?  Some serious looking locals congregated around our map and offered some very serious suggestions.  I was a little apprehensive about going on a multi day trek without knowing how to get to the destination.  I guess this would be more of an exploratory trek.  

Okhreni is located on a beautiful ridge overlooking other ridges descending from the Langtang Range.  The village consists of 5 houses. The Langtang Range dominates the horizon and glows beautifully at sunrise and sunset.  It was not cloudy but the humidity provided ample condensation for freezing, and it actually felt as if it rained at night (it did not) making everything wet.  

IMG_4959.jpg

Today we start the walk.  I am not yet “into it” and it will take me some time to warm up both mentally and physically.  It usually takes me a few days to switch from the city mode to the hill mode.  

October 21, 2018 3,450m

I totally missed my birthday on October 21.  It was the first day of the hike.  We started at 2,400m on a well-camouflaged trail through a thick forest.  After a few hours of forest walking we reached a clearing where we had lunch.   We had a tough time finding water (this would continue to be our most serious issue on the way up and down the ridges). The guys would set out looking for water and it would take a long time before they could locate even a small stream or seepage among some well hidden rocks.  

After lunch we continued for another 2 hours mostly uphill to a prominent treeless ridge.  At the top of the ridge, at 3,400m, there were chortens and a cluster of prayer flags flapping in the wind indicating a pass.  From this point, we had some great views to the valley below with cumulus clouds milling about.  The view was almost the same as from an airplane flying above the clouds.  We descended from the pass to a treeless meadow where we set up our camp for the night.  We had extensive views from the edge of the meadow to the Langtang Range in the northwest and the valley below.  It looked like we were following the correct ridge to Panch Pokhari and the Tilman Pass beyond.  

So far, we have not come across any villages, people or even animals.  We cannot ask for directions and have to rely on our intuition (and a general map).  So far so good though!  We had good dinner in a stone kharka that provided nice shelter from the wind and cold.  Off to bed at 7 pm.

October 22, 2018 Hille Banjang 3,545m

In the morning I took a walk to the top of a ridge looming over our camp.  As I neared the crest of the ridge, the sun just came up from behind the Himalayan range in the east iluminating the landscape in early morning glow.  It was very beautiful and I felt on top of the world with the Himalayan Range stretched before me and the valleys below.  The rising sun illuminated the entire Langtang and Jugal Ranges.  It was stunning.  After taking some photos, I hiked back to the tent.  The tent was in the shade so it remained wet and covered with frost throughout the morning.  The sun would not hit it until much later so we had to pack the wet tent and damp sleeping bags “as is”.  

The Langtang Range

The Langtang Range

The Jugal Range in the morning glow

The Jugal Range in the morning glow

We started walking north and rounded the end of a ridge to some much welcome sunshine. After a short while though, a thick layer of clouds obscured all the views that we were so much enjoying and dropped the temperature by several degrees.  The clouds stayed with us for the remainder of the day.   As we progressed north and higher, the clouds got thicker and at some point we were walking in the fog with the ends of our boots providing the only view.  

The trail dropped down 300m to a nice spot where we could find water and have lunch. Again, availability of water dictated our lunch and camping spots.  After lunch, we ascended to 3,750m then down to 3,500m.  A true rollercoaster. 

It seems that along this route, each campsite was full of trash and was in general state of disrepair.  Mainly Hindu pilgrims on the walk to the 5 holy lakes called Panch Pokhari use this trail each summer. They seem to just throw things around without any regard for others.  At some spots we felt as we were camping in the middle of a garbage dump. 

So far, we did not meet anyone along the trail (animals or people).  The place has a very remote feel to it.  Today, the porters were quite tired as it was a long day with many ups and downs (maybe 18km).  They are also carrying double loads to make more money.  A double load was 40 to 50 kg! Shyam had to run back and help one of the porters bring the loads to the camp. It was just too much for the young porter.  It was very nice of Shyam to help.   

October 24, 2018 Nashimpati 3,680m

Today we had a clear sky and good visibility all day.  We started in the shade again, cold and dark, but soon emerged onto the sunny side of the track.  David and I climbed to the top of a small ridge for some fine views of the Jugal Himal in China and Gauri Sankar in the Rowaling region that we traversed in 2010.  We were walking parallel to the Friendship Highway in Tibet. Neylam (a town in Tibet and the starting point for the approach to Mt. Shishapangma) is somewhere below from where we were.   After a short break in the sun, we started to climb up on a good trail with some steep drop offs.  At one point, wood planks hanging above a 50m drop reinforced the trail.  

Notice the wood planks on the trail!

Notice the wood planks on the trail!

After a 3-hour hike we arrived at Nashimpati, a spectacular spot. There was a teahouse there run by a family with 4 kids and a friendly dog.  The views in all directions were absolutely spectacular.  As the day progressed, the views got better and better and reached a crescendo at sunset when all shades of orange were projected on the snowy peaks that we would soon be crossing.  This was the best sunset spot I have ever been to in the entire Himalaya.  The light on Mt. Dorje Lakpa to the north was fabulous.  As the sun was setting in the west, a full moon rose over the Himalaya to the northeast. 

Moonrise over TIbet

Moonrise over TIbet

Mt. Dorje Lakpa in the last rays of the setting sun.

Mt. Dorje Lakpa in the last rays of the setting sun.

We had a good dinner and a cold evening.  I was concerned that the night would be freezing in my 3-season MSR tent but it was quite fine.  The hot water bottle in my sleeping bag sure made the difference.  

I had a light headache due to the altitude or dehydration.  I was starting to adjust to the rhythm of the trek and go with the flow of things.  

October 25, 2018 Panch Pokhari 4,050m

We had a short day today.  The walk from Nashimpati to Panch Pokhari was only 2 hours long with a 500m-elevation gain.  After following a well defined trail along a side of a mountain, we crossed the Lubrina Pass (4,000m). The climb to the pass required some climbing but going slow and steady made the effort negligible.

Once we arrived at Panch Pokhari we met a group of 4 Korean ladies with 14 porters who were also going over the Tilman Pass.  This was such luck for us considering my anxiety about not knowing the way!  The ladies were doing the Great Himalaya Trail in 2-month long sections at a time.  They were slow but methodical and seemed determined.   They arrived from Lukla after crossing the Teshi Laptsa Pass. During this 2-moth long trip, their plan was to walk all the way to the Larkya Pass in the Manaslu region.  Most importantly for us though, they had porters with gear and someone in their group that apparently knew the way.  I thought that we were in luck and I told Shyam that under no circumstances should we part company with them until we cross the pass!  Given that we did not know the way, had no gear and relied on luck for most of our success, this seemed like quite a serendipitous encounter.  

Panch Pokhari

Panch Pokhari

Our crew had no proper clothing, no boots, and no crampons. Basically nothing. Our porters were dressed for a beer party in Kathmandu and not for the Himalayan trek. We needed good weather to be in luck yet again!  I hate to leave everything to chance and luck but I just go with the flow (as I have no choice really – a metaphor for life in a condensed format).   It seems that on every trek, luck plays the first fiddle.  

During our approach, I was not looking forward to being on the trek where the porters would be climbing ice in tennis shoes and torn jeans, using baby blankets for warmth and bamboo sticks for ice axes.  However, having the Koreans gave us strength in numbers and, with their help, our motley crew would stand a chance of success.  In retrospect, if we had poor weather, we would have had no chance of success on our own.   LUCK or KARMA was on our side though!  

Panch Pokhari was a dumpy place full of trash situated in a shaded bowl with no views. The resident limping goat provided limited entertainment.  The toilets were disgusting and filled up to the rim.  We could shit and pee everywhere except the holy lakes.   I guess the trash is fine, just not the pee.   

A short walk from the camp, one can ascend a ridge with splendid panorama of the now closer Langtang and Jugal Ranges.  From the ridge we could see the trail leading to our next camp closer to the Tilman Pass. The pass itself was hidden behind the high mountains.  From our vantage point, the trail looked like a rollercoaster:  up and down for the entire way.  The view extended to all high peaks of the Langtang Range including Dorje Lakpa (a 7,000m mountain with a 4,000 relief) and Jugal Range.  The viewpoint was marked with numerous prayer flags and few chortens.   We spent a short while on the ridge admiring the view until the clouds moved in and obscured the panorama.   

It gets dark at 6 pm making the night long and cold.  We go to bed at 7 or 7.30 pm and get up at 5 am.  It is cold at night and frost covers the inside of the tent by morning.  I sleep in my down jacket, hat and a hot water bottle in my sleeping bag for warmth.  

Beautiful view from the ridge above Panch Pokhari. The Langtang and Jugal Ranges are on the horizon 30km away.

Beautiful view from the ridge above Panch Pokhari. The Langtang and Jugal Ranges are on the horizon 30km away.

October 26, 2018 Tin Pokhari 4,200m

I felt like saying: Thank you God for the Koreans!  We left Panch Pokhari in brilliant sunshine under a blue sky following the Koreans like a homeless Himalayan dog.  We quickly ascended the ridge and stopped to admire the spectacular panorama of the Langtang and the Jugal Himals.  After taking many photos, we descended on a good trail that we saw the day before.  

Around 11am we stopped for a 2-hour lunch.  We noticed very dark clouds moving in our direction from the lowlands.  The clouds were thicker and darker than those of previous afternoons and looked ominous.  Sure enough, it soon started to snow! As we moved on after lunch (north and up), the snow increased in intensity until it was full on winter.   Now we could not see the trail and, with minimal visibility, we had no idea of the location of our final destination for the day. Everything was white and we could not see ahead of us or around.  Thanks to the Koreans though, one of their men knew the trail and the general location of the camp at Tin Pokhari.   This gave us the confidence to push on and not stop in some random spot.  Without his help we would be guessing and wasting time. Perhaps not the end of the world, but it would make us unsure of what was ahead.   

I we plodded through the deep and wet snow, I noticed that some of the Korean porters had no shoes and were wearing flip-flops!  By now the snow was 5 inches deep and I felt cold just looking at the porters with their bare and wet feet in the snow.  This added a sense of urgency for the porters and we did not linger. Obviously no one expected the snow or the wide out.  It turned out to be a long and quite cold day and we covered quite a distance to get to the Tin Pokhari camp.  We arrived at our destination at around 4 pm sliding down a slippery slope without being able to see any of the surroundings.  It was getting dark and we were tired, wet and cold.  I was concerned that we would have snow on the pass making it harder to navigate for our crew. We pitched our tents and crashed right after dinner at 7pm.  We shared one tent and it was quite a cold night.  

Frosty morning at Tin Pokhari

Frosty morning at Tin Pokhari

October 27, 2018 – Attempt to get to the high camp 4,600m

We woke up to a winter wonderland.  Everything around us was covered in white and it was very pretty.  The mountains were white and snow plumes were being blown off their tops by the wind.  It was also cold!  We had breakfast in a cold shade.  After breakfast, we packed up and left for the Tilman Pass high camp, or so we thought. We followed the trail and trail markers put up by the Nepal Mountaineering Association. Unbeknownst to us, one of the markers was turned 90o in the wrong direction and we veered off towards the Tilman Pass East, up the wrong valley and towards the wrong glacier.   We ascended for a few hours to 4,600m and hiked 10km before we realized our error.   We basically hit a dead end.  We reached a crest of a near-vertical moraine that did not have a way of letting us descend 100m down to the stone-covered glacier.  The guys realized that something was not right and we consulted the map.  So much for the Koreans knowing the way!  On the flip side though, this provided us with a good opportunity to explore a beautiful valley and have a good look at the approach to the Tilman Pass East.  We could see the large icefall descending from Mt. Dorje Lakpa across the glacier from our high point.  We retreated down the glacier and came back to the sign that caused the confusion. We decided to camp nearby as it was getting late.   This is such a beautiful area.  Any opportunity to hike and explore it is great! 

IMG_5420.jpg

We set up camp and had a great fire and nice evening.  We were now confident of the correct route to the Tilman Pass.   

October 28, 2018 Tilman Pass High Camp 4,820m

We woke up to a brilliant and sunny day.  The sun dried the tent and the sleeping bag before we left the camp. After breakfast we started to ascend the moraine to the correct glacier. After two hours of following the lateral moraine, we came to a spot where we could “safely” descend to the glacier itself.  The descent was quite tricky with loose rocks and not much to hold on to.  The exit point was marked with cairns but it would be easy to miss. It was actually quite dangerous as the moraines are unstable and rock fall was a real hazard.  

IMG_5491.jpg

We then followed the glacier covered in loose and unstable boulders for few more hours. It seemed endless.  We walked on wobbly rocks and among great boulders all the way up to 4,800m.  The route required concentration not to slip or break a leg.  Our group split into two with each team ascending the opposite sides of the glacier.  We finally arrived at the high camp consisting of some flat rocks on top of an ice crest.  It was easy to miss.  Shyam found it as the Koreans had no idea where the camp was.  The scenery was spectacular and reminiscent of Pakistan. From the high camp we had a direct look at the Tilman Pass.  

Tilman Pass high camp

Tilman Pass high camp

So far, it is not an easy trek and it feels more like a mountaineering expedition than a hike.   There are no teahouses or resupply points.  It feels remote and far away from anywhere.  We did not run into any other trekkers other than the Koreans.

David was very tired today, mainly to the problems with ascending the moraine.  He collapsed into the tent after arriving at the high camp and did not re-emerge until dinner.  The high camp is surrounded by high mountains very close by and has a very alpine feel to it.  In the evening Shyam and some of the Korean guides went for a reconnaissance of the pass.  I think that the Korean porters are as poorly equipped as ours and it turns out that they also do not know the way very well either… Strength in numbers and good Karma though.

October 29, 2018 crossing the Tilman Pass 5,330m

We had a very cold night in the high camp.  As soon as the sun went down behind the nearby ridge, it got progressively colder.  The camp is like a bird’s nest situated high at the head of the glacier at an altitude of 4,800m.  The view from the camp extends down the glacier to the south and directly to the Tilman Pass’ icefall to the north.  High rocky ridges on the east and west surround the camp.  It is very beautiful but rocky and barren.  

We got up at 4 am to cross the pass.  It was dark and very cold.  We had something to eat and departed at 5.30 am at dawn.  The walk to the bottom of the icefall was short.  It was mainly through a boulder field.  We ascended to the right of the icefall on a steep boulder slope for approximately 200m of elevation gain.  We then took a sharp turn to the left (north) and gained the dry glacier at around 5,100m.  The sun was still hidden behind the mountain to our east, making it a cold ascent. For that reason, we did not stop and linger.  There was no wind though and we had a clear blue sky.  How lucky considering our memories of the ferocious winter storm on the Dhampus pass in 2017 (see the 2017 Dhaulagiri Trip Report).

Ascending the Tilman Pass

Ascending the Tilman Pass

We continued our ascent for another 200 vertical meters between two steep mountains. We could see the crevasses and easily walked around them.  After a short time we arrived at the pass located in a narrow cleft.  To the north, the glacier opened up a lot more and the view was grander than to the south (where we came from).  We were now at 5,300m, directly on the backside of Mount Ganchempo (6,387m).  The view was not as grand as other passes we crossed.  We were surrounded by rock and ice on all sides.  Regardless, we did enjoy every minute of the windless time we spent on the pass. We took photos of the surroundings and the distant peaks of the Langtang Range.  The most impressive though were the mountains immediately next to the pass.  The icefall flowing from Mt. Urkinmang (6,151m) next to us was most impressive.  The summits seemed so close, less than 1,000m of vertical gain from the pass.  

To the north, the main glacier flowing from the pass dropped down steeply.  There was a fixed rope placed by the Koreans and another one placed by us, to descend on.  The porters had no crampons and a slip would result in a 500 m slide to the bottom of the glacier.  Shyam had a rope but no anchors apart from our ice axes. He found a piece of old rope under a rock and tied that around his boot for some very limited purchase on the ice. The descent was pretty straight forward and after we had some tea, we were walking on the flat part of the glacier.   The glacier gave way to rocky and icy boulders and the descent became more tricky. We could now see a large green frozen lake below.   The north high camp was located by that lake and was our destination for the day. We had to down climb a tricky boulder field and steep slopes in order to get to the lake.  The going was not easy and I had to concentrate to avoid slipping. 

The frozen green lake - the site of our camp.

The frozen green lake - the site of our camp.

Our campsite was located on the edge of the frozen lake.  It was a beautiful spot.  The lake was surrounded by high and glaciated mountains on three sides and the moraine of the Langshisa Glacier on the north side.   It was the High Himalaya at the finest. 

Almost there! Approaching the Tilman Pass north camp site.

Almost there! Approaching the Tilman Pass north camp site.

After lunch I took a long walk to the top of the moraine of the Langshisa Glacier. I had a fantastic view up and down the glacier and to the surrounding peaks at the head of the valley.  Down below, to the north and across the Langtang River, I was looking directly up the Shalbachum Glacier and the Shalbachum Mountain (6,707).  To the left of the Shalbachum Glacier I could see the Yala Peak and the ridge leading to Dangpache Mountain (6,567m).   I ascended the Yala Peak in 2010 with David.   The visibility was great; the weather was superb but windy.  At sunset, there was quite a lightshow.  Various shades of orange light from the setting sun projected onto the clouds and glaciers surrounding the camp.   I took many fabulous photos of the reflections of the Langtang peaks in the small tarns near our camp.  

The surrounding landscape was very grand, dramatic and beautiful.  Massive moraines, 7,000m peaks all around us with steep glaciers dropping down precipitously.   We were in the middle of high Himalayan peaks in the heart of the Langtang Range! The sun soon hid behind the steep mountain to the west of our camp and it became quite cold.  The wind also picked up.  

Tilman Pass high camp on the north side of the pass

Tilman Pass high camp on the north side of the pass

Langshisa Glacier

Langshisa Glacier

We had a long and cold night.  I was very happy to have crossed the Tilman Pass and be in this beautiful spot.  I could stay here for a few days and explore the surrounding valleys and peaks.  This was the last of the high and technical passes of the Great Himalaya Trail proper for me.   I have basically finished all the interesting and alpine sections of the GHT between Kangchendzonga and Dhaulagiri (including the Dhaulagiri circuit that is not part of the GHT).   I have not done the section between Gunsa (Kangchendzonga) and the Arun Valley (Makalu), the section between Rowaling and the Panch Pokhari Ridge (Langtang) – a low altitude hill slog, and the section from Syabrubesi to Arugat in the Ganesh region – another low altitude slog.   I do not want to spend the time and money walking for the sake of connecting dots without any interesting or challenging objectives along the way.   

Langshisa Ri

Langshisa Ri

October 30, 2018 Langshisa Kharka

We left early to go down to Langshisa Kharka where David and I were in 2009. The descent down was the most dangerous part of the Tilman trek, down a steep and very loose moraine.  The entire moraine consisted of consolidated mud with rocks and huge boulders protruding from it.  They seemed ready and waiting to roll on top of us at any moment.  We went down fast to avoid any accidents. We then walked down the Langshisa Glacier on a conveyer belt of rocks and boulders.  Finally we arrived at the snout of the glacier with a cool ice cave spitting a rushing glacial stream.  

Looking for safe descent to Langshisa Glacier. Langtang River Valley is below.

Looking for safe descent to Langshisa Glacier. Langtang River Valley is below.

Departing the north Tilman Pass high camp

Departing the north Tilman Pass high camp

Langhisa Glacier - we descended the steep moraine on the right

Langhisa Glacier - we descended the steep moraine on the right

Rounding the corner revealed the Langtang Valley and the terminal moraine of the Langtang Glacier to the north of us.  We were now in the familiar terrain.  To my surprise, there was a bridge across the Langtang River, which enabled us to cross without having to ford the cold rushing water.  It was windy.  Numerous prayer flags at Langshisa Kharka welcomed us by flapping loudly in the afternoon sun.  Nothing changed at the Langshisa Kharka campsite from 10 years ago.  We set up our camp in one of the stone huts to shelter us from the increasing afternoon wind.  The boys built a roaring fire and were looking forward to the first day off since we started.  The Koreans left us and moved on to complete the Manaslu section of the GHT.

Half of our fantastic crew!

Half of our fantastic crew!

October 31, 2018 Langtang Glacier 4,600m

One of my objectives on this trip was to explore the Langtang Glacier.  I remember David and I going to the glacier in 2009. I regretted that we did not have enough time to explore further.  

Shyam and I left the Langshisa Kharka camp in the morning (David took a day off).  Along the way, we noticed a few landslides that were caused by the 2014 earthquake.  We had cold and strong wind blowing at us from the north.  We ascended to the terminal moraine of the Langtang Glacier and then got onto the glacier itself.  We were going up and down high and loose mounds of ice covered by rocks.  The going was tedious and slow.  It soon became apparent that we would not be able to advance very far this way.  We saw another trail along the lateral moraine of the Langtang Glacier in the distance.  We decided to retrace our steps and gain the moraine to continue up the Langtang Valley as far as we could.  We passed the Morimoto basecamp at 4,600 with a threatening herd of big yaks checking us out and continued further up the moraine.  

On the Langtang Glacier - the wall of 6,000m is blocking the view of Mt. Shishapangma hiding right behind them.

On the Langtang Glacier - the wall of 6,000m is blocking the view of Mt. Shishapangma hiding right behind them.

Langshisa Ri’s north aspect from the Langtang Glacier

Langshisa Ri’s north aspect from the Langtang Glacier

The rocky wall of Pemthang Karpo Ri was directly ahead, close and imposing.  We wanted to see around the corner, around the spot where the Langtang Glacier takes the turn to the northwest.   I was hoping to catch a glimpse of Mt. Langtang Ri and perhaps the 8,000m Mt. Shishapangma itself!  The closer we got to the corner the higher and more imposing the Pemphang Karpo Ri wall appeared.   The glacier was curving gently and there was no view.  We were standing directly across the 1,500m high wall of huge mountains looming above us. We have walked very far and were getting quite tired.  The wind was also increasing and we were running out of water.   We walked for at least 10km up the valley. We learned later that the Langtang Glacier continues for another 15 km from that point!  It apparently takes 3 days to get to the end of the glacier (and the basecamp of Langtang Ri).  I had to admit defeat and leave the quest for another time.  We turned around and headed down the valley to arrive back at the Langshisa Kharka camp around 3pm.  

I was quite tired but very satisfied with our effort.  We did not have any days off since the start of the trek on October 20th.  While Shyam and I were on the glacier, Milan, one of the young porters, took a 6-hour hike to Kianjing Gompa to recharge his phone!  He did not even bring any beer with him on the way back.  Obviously we were quite disappointed! 

November 1, 2018 Kianjing Gompa 3,825 

Looking towards Langtang Glacier from Langshisa Kharka. We went all the way to the distant ridge 10-15km away! Pemthang Karpo Ri is on the right.

Looking towards Langtang Glacier from Langshisa Kharka. We went all the way to the distant ridge 10-15km away! Pemthang Karpo Ri is on the right.

Our objective was to get to Kinjang Gompa. We were looking forward to a warm shower and a cold beer. We walked down the Langtang River Valley retracing our steps from 2009.  We crossed remnants of massive landslides caused by the 2014 earthquake.   The walk was fast and very scenic.  After 3 hours, we rounded the final corner and the massive bulk of Langtang Lirung appeared before us.  It is such a beautiful and massive mountain.  We could not see the village of Kianjing Gompa until we were almost there.  

Approaching Kinjang Gompa with Langtang Lirung looming above

Approaching Kinjang Gompa with Langtang Lirung looming above

Surprisingly, the village of Kinjang Gompa has expanded considerably since the 2014 earthquake! The foreign aid money allowed the locals to build big hotels and coffee shops.  The western not-for-profit was turned into a big profit!  The village was very expensive and one enterprising gold-toothed fellow appropriately fleeced us.  The prices in the village are shockingly high especially for food and beer!  He is a sneaky one and managed to cheat us at every turn with a big smile and proclamations of his unconditional friendship. He looked shifty from the moment I met him and my initial suspicion was confirmed by the time we left the village. One good thing about our association with the shifty entrepreneur was the helicopter ride we managed to arrange through him (although he cheated us in that transaction as well).  

In Kianjing Gompa village we heard that many groups attempting the Tilman Pass from the Langtang Valley side turn around, as they cannot cross the moraine of the Langshisa Glacier.  This is the moraine that we also found to be the most challenging and dangerous part of the entire Tilman Pass route.  

From the dining room of the hotel we were staying at, we had a fantastic view of Mt. Langtang Lirung. 

November 2, 2018 Langtang Lirung Basecamp 4,350m

Today I decided to go to the base camp of Langtang Lirung.  Although the option of sitting and doing nothing for a day seemed like a great idea, the FOMO got better of me.  I was quite tired climbing the hill from Kianjing Gompa village to the basecamp. It looked much closer than the 5 km each way.  Along the way, Shyam and I passed a Buddhist shrine located in a small cave.  We also ran into our young porters picking up cow patties as a side gig for some quick money on their day off.  

At the Langtang Lirung (LL) base camp (BC) I was looking for the memorial to Tomas Humar who died there in 2009.  The BC is located by the moraine of the LL Glacier.  It is surrounded by LL (7,227m), Changbu (6,251m), Kinshung (6,781m), Langtang Yubra (6,048m) and Yubra (6,264m).  It is all very impressive and grand.  The view down the LL glacier to the Kanjala Himal is also quite beautiful.  From the LL BC we could see the ascent route to the Yala Peak.  To my surprise, the glacier we climbed 10 years ago is almost completely gone!   We had a windless and sunny day.  At times it was even hot!  I would have loved to climb higher to maybe 5,000/5,500m but I had no energy left in me. My legs hurt and my lungs hurt as well. The following day, we were going still higher to the Ganjala Pass at 5,130m.  Being conscious of that, I decided to conserve my energy.  

Langtang Lirung looming over the basecamp

Langtang Lirung looming over the basecamp

Langtang Lirung Glacier as seen from the drone

Langtang Lirung Glacier as seen from the drone

Back in Kianjing Gompa, over a beer, David implied that perhaps we should go down the valley but I thought that since we were already here we should at least try to cross the Ganjala Pass.  David agreed at the end as we concluded that the chance of us returning to the Langtang valley any time soon was pretty slim.  

November 2, 2018 Ganjala Pass Basecamp 4,300m

Thanks to our enterprising local “friend” and some hard cash, we managed to get a helicopter ride up the Langtang Valley.  Some tourists were flying from Kianjing Gompa to Kathmandu (KTM) and we asked for the helicopter to bring more fuel and give us a 20-minute ride up the Langtang Valley over the Langtang Glacier.  I wanted to see the Langtang Glacier that I did not get to see by walking to its end a few days prior.   I knew that this would be a spectacular experience based on my memory from the Annapurna flight in 2017.  Luckily, the day was sunny with no wind, making the conditions for flying perfect.  

The helicopter was supposed to come by 8am but it showed up at 10am due to air traffic congestion at the KTM airport.  The helicopter pilot was from Australia and had limited experience with flying beyond the Kianjing Gompa village. There was some confusion regarding the amount of flight time we paid for (of course the Kianjing man making the arrangements was trying to cheat us).   Finally we sorted out the confusion and off we went.  Flying in helicopters is the ultimate ride and an exhilarating experience. Flying in the Himalaya is the ultimate!  

The machine started up and we lifted off and flew north.  We gained altitude as we went further.  We could see Mt. Morimoto, Shalbachum, Langshisa Ri, Penthang Karpo Ri, many glaciers and deep valleys below.   We were flying at 19,000 feet.  Soon the bulk of Shishapangma in Tibet rose majestically from behind the ridges of Goldum (6,447m), Peri (6,174m) and Risum (7,050m) – the very wall that blocked our view during the exploration of the Langtang Glacier.  Mt. Shishapangma (8,013m) towered above all other Langtang peaks. Beyond Shishapangma, we could see the brown flats of the Tibetan Plateau.  We could see the entire Langtang Glacier with Langtang Ri at its end.  We had great visibility and there was very little wind. As we reached 19,000 ft of altitude, the helicopter was struggling a little.  As we turned, we flew directly towards Pemthang Karpo Ri. The pilot was surprised that although he was at 19,000 feet, the top of the peak was still way above him.  The summit is at 22,522 feet or 6,865m (another 1,000m or 3,500 feet higher). The pilot took a 180 degree turn at Pemthang Karpo Ri, approximately 10km from Shishapangma, and flew back.  On the way back, we flew in front of the Langshisa Glacier with the entire Tilman Pass trekking route visible below.  We could see the pass we crossed, the frozen lake where we camped, and the entire route we walked on just a few days before.  The flight was very impressive and David and I were both very satisfied!  I wish it could had been longer!

Ready to fly!

Ready to fly!

The Langtang Glacier, Mt. Shishapangma far away (on the left) and Mt. Pemthang Karpo Ri (22,500ft) on the right.

The Langtang Glacier, Mt. Shishapangma far away (on the left) and Mt. Pemthang Karpo Ri (22,500ft) on the right.

Looking northwest from 19,000 feet. The point peak is Mt. Chusmdo 6,508 in Tibet (China).

Looking northwest from 19,000 feet. The point peak is Mt. Chusmdo 6,508 in Tibet (China).

Mt. Lanshisa Ri (left) and Naya Kanga (right)

Mt. Lanshisa Ri (left) and Naya Kanga (right)

Mt. Dorje Pahad 6,979m at the end of the glacier. The wall of Mt. Langhisa Ri on the right.

Mt. Dorje Pahad 6,979m at the end of the glacier. The wall of Mt. Langhisa Ri on the right.

After landing back in Kianjing, we had another overpriced coffee and dry apple pie before we took off for the Ganjala Pass.

The Ganjala Pass basecamp is 1,300m vertical climb from Kianjing Gompa.  The going was easy on a well-established trail with fantastic views to the Langtang Lirung and all mountains surrounding it.  The basecamp sits on a promontory overlooking the beautiful Langtang Valley and the high peaks.  It was a great day with little wind and great visibility.  The evening was cool and there was no wood for a fire so we all drank hot tea to stay warm. 

Hiking to the Ganjala Pass with Kinjang Gompa below.

Hiking to the Ganjala Pass with Kinjang Gompa below.

We intended going further to the high camp at 4,800m but this was not possible owing to the lateness of the hour and the reported absence of water at that camp.

Looking up the Langtang Valley.

Looking up the Langtang Valley.

November 3, 2018 Ganjala Pass 5,130m

We got up at 5 am and left the camp at 6am.  We had a 1,000m vertical ascent right ahead of us straight from the camp.  I was a little tired from the continuous 16 days of adventuring with no rest days.  Right out of the gate we climbed steeply for about 500 meters before the trail levelled off.  The higher we ascended the better the views got. We could now see all the way to Shishapangma and above the ridges of the Langtang Himal.  It was another beautiful day with great visibility and sunshine. The climb to the pass over a glacier was long and it felt tedious, more glacier rock and moraines.  The moraines were all dry though and we did not have any snow to worry about.  The pass became visible early on and we just gradually ascended the long valley to get closer to it.  The pass itself was very steep on the north side, basically a vertical drop of 100 m or so.  In order to get to the pass it was necessary to skirt the ridge that forms part of the pass and approach it from the left side via a rocky shelf with some great exposure.  There was a long ladder for the porters and a steel rope on the shelf for safety.  I could just imagine the increased degree of seriousness if there was snow and ice on this route.  Again, our poorly equipped crew would struggle in case of poor weather.  

Climbing to the Ganjala Pass with the Langtang Velley below.

Climbing to the Ganjala Pass with the Langtang Velley below.

The Ganjala Pass is situated at 5,150m.  It is a fantastic viewpoint for the entire Langtang Range.  Mt. Shishapangma, the highest mountain of the range, dominates the skyline.  The pass is quite narrow and marked with numerous prayer flags.   The Ganjala Pass reminded me a little of the Renjo La Pass in the Khumbu Region.  The Ganjala Pass is steeper though and more remote than the Renjo La Pass.  

On the Ganjala Pass

On the Ganjala Pass

The descent from the pass to the south was also steep but not long.  We descended on some loose scree and rocks to the bottom of the glacier at 5,000m.  Surprisingly, there was a good trail not too far from the bottom of the descent gully. I refilled the water bottle with some glacial melt water.  We were all very tired, including the porters.  When we reached the bottom of the descent slope, we were still about two hours away from the camp.  The trail was quite easy but long.  It was down, down, down to 4,400m where we camped by a stream.  At the end it was a 10-hour day with 1,000m up and 700m down over challenging terrain and high altitude.  A good workout.  

November 4 and 5, 2018 Descent from Ganjala Pass from 4,400m to 3,780m to Tarkeghyang

The descent from Ganjala Pass high camp was quite long.  Basically, we descended back into the clouds (like the ascent to the Tilman Pass two weeks before).  This made for a cold and grey experience without any views.  The descent was not gradual but had many long and steep climbs. I am not sure how many meters we climbed that day but it was easily close to 1,000m.  So much for descending! 

On the second day of our descent we could not find any water and we were forced to go much further than we intended (we hiked for over 17 km) to a place named Dorjeling.  In order to get water, Shyam and the boys went from the ridge down to the river at the bottom of the valley (a 700m down climb) and then all the way back up with the heavy jugs of water.  They sure deserved a medal for that!  Without water, no one eats.  The porters were very tired and hungry after the long day.  

Looking for a shortcut to the village below. Our crew and Dhalbat the dog.

Looking for a shortcut to the village below. Our crew and Dhalbat the dog.

The waterless campsite was beautiful and had a fantastic view of the sunrise.  The rising sun dried our tents and sleeping bags. From the campsite, we ascended another few hundred meters, then down, up and down.  Finally, we just went down all the way to the village in the valley far below to the “Tourist Paradise” teahouse.  

At this point, David and I were basically done with the trip as we were just going back to the road.  There was nothing else left to see.  At the “Tourist Paradise” we washed our clothes, took a hot shower and just relaxed in the hot sun.  We were definitely back on the main trekking route as quite a few trekkers arrived later in the afternoon.  

This trek has been quite epic.  We both agreed that it was one of the finest in Nepal (I say the same about every one of them, but this one really was one of the finest).  This route was wild and remote, yet close to Kathmandu.  We saw hardly any other trekkers or locals for that matter.  It was also COLD! We had some really cold nights and, since the sun disappeared by the afternoon almost every day, we had cold days too.  The altitude was consistently above 4,000m for most of the trek.  I did not have any days off and each day I walked for more than 10km,

I had no altitude or health issues at all.  I felt fit and strong all the way.  I was tired but not to the point of slowing me down.  I found it difficult to sleep mainly due to the cold.  I would wake up just about the time my water bottle cooled down (usually at 2am; we would go to bed at 7.30) and I had hard time falling asleep again.  I would then wake up at 4 or 5 am and the day would then start.  We could not linger in the kitchen tent in the evenings or mornings, as the boys needed it to sleep and eat in.  This forced us to retire to our sleeping bags early.  

This trip was also marked by some incredible luck.  No one from our crew knew the way or had proper gear.  It was almost a miracle that we ran into the Koreans given how infrequently the Tilman Pass is crossed.  This strength in numbers gave us the confidence and made the experience more enjoyable.  We would have struggled with finding the key points along the way:  the descent point to the glacier, the ascent route to the pass and the descent gully to the Langshisa Glacier.   We were also very lucky to find the helicopter in the right spot and on the right day.  Also, on the flight day, the weather was perfect.  Although the gold-toothed man from Kianjing is a shifty bastard, the flight was worth it.  We were also lucky with the great weather we enjoyed.  Had we had any snow on any of the two passes, the experience would have been epic but in the wrong way.  

IMG_8598.jpg

The trip reinforced by conviction that David is the best company for me. We really are a perfect team for such endeavours.  He is mentally and physically strong although this trip did tire him out a bit.  I think that he was close to his limit a few times but pulled through with gusto and a smile.  

November 6, 2018 Kokani 2,045m

Today we walked on a nice trail for the final 15km from Tarkeghyang to Kokani.  We had lunch in Semartang at a nicely appointed house of a local lady.  We also attracted a local mutt.  I named him Dhalbat and he dry humped me to show me his love.   Then he followed us for some distance and hung around until we left the following day.  I was glad that we were done but also sad that we were going back to the chaos of the valleys.  

Almost done and still smiling!

Almost done and still smiling!

The drive from Kokani to Kathmandu was tiring and long although the distance is only 70km.  The state of roads in Nepal is beyond basic as I mentioned.  We stopped for lunch in a town called Zero Kilo and had probably the best dhal bat in Nepal so far.  Then onto the Arniko Highway (the road connecting Nepal and Tibet) and back to dusty and polluted Kathmandu.  And just like that, it all ended in the Hotel Vaishali. In the lobby we were greeted by an exhibit of photographs from the golden era of Polish Himalayan climbing.  We had a nice couple of days decompressing in Kathmandu and enjoying Raj’s hospitality again for which we are very grateful! Yes, we will return!


Distance traveled:  200km

Elevation climbed:  7.5 km or more 


David, Derek and Dhalbat! I wished that I could take the dog with me!

David, Derek and Dhalbat! I wished that I could take the dog with me!


Langtang Trek - Tilman Pass

In October of 2018, we traveled to Nepal to complete the Tillman Pass and Ganjala Pass trek. We approached the Tillman Pass from the south side via the Panch Pokari Ridge. We then descended to the Langtang Valley, explored the Langtang Glacier and exited the Valley via the Ganjala Pass. We also managed to take a helicopter tour of the Langtang Valley north of Kyanjing Gomba. All in all, it was a wild and challenging trek through a wild and remote area of the Langtang Himal.

Thanks again to mountainsunvalley.com for all the support and help with putting this together.

See the wonderful page HERE with detailed annotations of various mountains in the Langtang and Jugal Ranges from this trek.

Also, see the page HERE with detailed annotated photos from our helicopter flight in the Langtang Range.

For photos from the Yala trekking peak see the page HERE. It is one of the best spots for the panoramic views of the Langtang Range because of its central location.

IMG_8416 (1).jpg

See the Link for the Annotated photos of the Langtang Himal from Helicopter

See the Link for the Annotated photos from Yala Peak - a trekking peak in the Langtang

The Langtang Range.  Langtang Lirung is on the right and Shishapangma is on the right.

The Langtang Range. Langtang Lirung is on the left and Shishapangma is on the right.

The Langtang Range

The Langtang Range. Shishapangma is the tallest mountain in the photo.

West side of the Langtang Himal

Langtang Lirung

Langtang Himal

Langtang Himal

Langtang Himal

Langtang and Jugal Himal

Jugal Himal

Tilman Pass is on the top right and the Langshisa Glacier is in the middle - our route down from the Tilman Pass.

Tilman Pass is on the top right and the Langshisa Glacier is in the middle - our route down from the Tilman Pass.

Tilman Pass and the high camp (by the frozen green lake).

Tilman Pass and the high camp (by the frozen green lake).

Closeup of the Tilman Pass from the helicopter.

Closeup of the Tilman Pass from the helicopter.

IMG_4794.jpeg
IMG_4827.jpeg
Second day of the approach to the Tilman Pass. We were in thick clouds during the day on this section of the trek.

Second day of the approach to the Tilman Pass. We were in thick clouds during the day on this section of the trek.

Beautiful sunrise over foothills of the Himalaya. This region is called Helambu.

Beautiful sunrise over foothills of the Himalaya. This region is called Helambu.

Looking to the Ganja La Pass and Langtang Lirung

Looking to the Ganja La Pass and Langtang Lirung

Another campsite with a fantastic view and no water

Another campsite with a fantastic view and no water

Gur Karpo Ri, Dorje Lakpa and Jugal Himal from the south. These mountains are located in China.

Gur Karpo Ri, Dorje Lakpa and Jugal Himal from the south. These mountains are located in China.

Shishapangma peaking from behind the ridges of the Langtang Himal as seen from the south, still a long way away from where we were!

Shishapangma peaking from behind the ridges of the Langtang Himal as seen from the south, still a long way away from where we were!

Langtang Lirung and Ganjala Pass (on the left) from the south.

Langtang Lirung and Ganjala Pass (on the left) from the south.

Looking at the Jugal Himal in Tibet

Looking at the Jugal Himal in Tibet

IMG_5111.jpeg
A funky trail over some steep terrain.

A funky trail over some steep terrain.

Our final camp before Panch Pokhari. This was one of the most scenic campsites on this trek.

Our final camp before Panch Pokhari. This was one of the most scenic campsites on this trek.

Our Chef in action! It is quite unbelievable what can be made in these conditions.

Our Chef in action! It is quite unbelievable what can be made in these conditions.

One of many spectacular campsites.

One of many spectacular campsites.

High on the ridge near Panch Pokari during a spectacular sunsent.

High on the ridge near Panch Pokari during a spectacular sunsent.

A mani wall and Buddhist prayer flags. Mani walls are walls built by followers of Buddhism. The walls consist of hand-crafted tablets inscribed with Buddhist prayers and images of the Lord Buddha.

A mani wall and Buddhist prayer flags. Mani walls are walls built by followers of Buddhism. The walls consist of hand-crafted tablets inscribed with Buddhist prayers and images of the Lord Buddha.

Amazing sunset from our camp.

Amazing sunset from our camp.

IMG_5187.jpg
Langtang and Jugal Himals the sunset.

Langtang and Jugal Himals the sunset.

Langtang Himal

Langtang Himal

Tilman-Pass S 4240 Panch Pokhari nach NO (1).jpg
The view of the Langtang Himal (the high peak is Dorje Lakpa) from far away. We approached the pass on a long ridge with very little water available along the way. The lack of water was a big problem in finding suitable spots for camping.

The view of the Langtang Himal (the high peak is Dorje Lakpa) from far away. We approached the pass on the long ridge in the centre of this photo, with very little water available along the way. The lack of water was a big problem in finding suitable spots for camping.

IMG_5305.jpeg
The Langtang and Jugal Himals from the south. The ridge we followed offered spectacular views in the morning and evening. During the day, massive clouds obscured all views. On the left is Gurkarpo Ri 6,889m, to its right is Dorje Lakpa 6,966m and th…

The Langtang and Jugal Himals from the south. The ridge we followed offered spectacular views in the morning and evening. During the day, massive clouds obscured all views. On the left is Gurkarpo Ri 6,889m, to its right is Dorje Lakpa 6,966m and then the unnamed sister peak 6,563m.

Jugal Himal from the south (the mountains in this photo are located in Tibet).

Jugal Himal from the south (the mountains in this photo are located in Tibet).

IMG_5299.jpeg
IMG_5330.jpeg
Unnamed Mountain with an altitude of 6,563m - a sister peak to Dorje Lakpa

Unnamed Mountain with an altitude of 6,563m - a sister peak to Dorje Lakpa

Phurbi Chyachu 6,637m

Phurbi Chyachu 6,637m

Our entire crew in front of the magnificent panorama of the Jugal Himal from Panch Pokari at 4,250m.

Our entire crew in front of the magnificent panorama of the Jugal Himal from Panch Pokari at 4,250m.

Panch Pokari - a pilgrimage site for the Hindus

Panch Pokari - a pilgrimage site for the Hindus

IMG_5287 copy.jpeg
IMG_5351.jpeg
IMG_5336.jpeg
Mt. Dorje Lakpa

Mt. Dorje Lakpa

Our campsite at Tin Pokhari. We had one but very intense snow storm. Thankfully, it did not extend beyond Tin Pokari.

Our campsite at Tin Pokhari. We had one but very intense snow storm. Thankfully, the snow did not extend beyond Tin Pokari.

IMG_8139.jpeg
Cold night! -10C inside the tent.

Cold night! -10C inside the tent.

The approach glacier to Tilman Pass from Tin Pokari. The pass is hidden behind the mountain in the forefront.

The approach glacier to Tilman Pass from Tin Pokari. The pass is hidden behind the mountain in the forefront.

The approach glacier to Tilman East Pass from Tin Pokari. It looked like a spectacular route. We walked to the end of the moraine int he photo by accident. It was an exploratory trip half way up to the East Tilman Pass.

The approach glacier to Tilman East Pass from Tin Pokari. It looked like a spectacular route. We walked to the end of the moraine int he photo by accident. It was an exploratory trip half way up to the East Tilman Pass.

Looking back at Tin Pokhari en route to the Tillman Pass East. We ascended the wrong glacier and did not realize our mistake until we were 10km in and at 4,600m! It did however give us an opportunity to explore the approach to the Tilman Pass East. …

Looking back at Tin Pokhari en route to the Tillman Pass East. We ascended the wrong glacier and did not realize our mistake until we were 10km in and at 4,600m! It did however give us an opportunity to explore the approach to the Tilman Pass East. This basically took up the entire day.

The glacier leading to Tilman Pass East. We went all the way to the end of the moraine before we realized our mistake! The flat top mountain is Gur Karpo Ri 6,892m. The large mountain on the right is Dorje Lakpa 6,966m.

The glacier leading to Tilman Pass East. We went all the way to the end of the moraine before we realized our mistake! The flat top mountain is Gur Karpo Ri 6,892m. The large mountain on the right is Dorje Lakpa 6,966m.

Gur Karpo Ri 6,892m and the Tilman Pass East - close up of the pass. It looks very doable!

Gur Karpo Ri 6,892m and the Tilman Pass East - close up of the pass. It looks very doable!

The final stretch to the Tilman Pass East from the high point of our sortie. Dorje Lakpa Glacier with Mt. Dorje Lakpa on the left.

The final stretch to the Tilman Pass East from the high point of our sortie. Dorje Lakpa Glacier with Mt. Dorje Lakpa on the left.

The glacier leading to the Tilman Pass - now we are on the right path!

The glacier leading to the Tilman Pass - now we are on the right path!

IMG_5437.jpeg
IMG_5471 2.jpeg
Ascending the long moraine before gaining the glacier to approach the Tilman Pass.

Ascending the long moraine before gaining the glacier to approach the Tilman Pass.

Looking back towards the Jugal Himal in China. We came from behind the ridges in the centre of the photo.

Looking back towards the Jugal Himal in China. We came from behind the ridges in the centre of the photo.

We needed to get to the end of this glacier. The pass is the little white speck at the very end of the glacier on the left side of the photo.

We needed to get to the end of this glacier. The pass is the little white speck at the very end of the glacier on the left side of the photo.

Half way up the glacier. The Tilman Pass, now clearly visible, is still a few hours away.

Half way up the glacier. The Tilman Pass, now clearly visible, is still a few hours away.

Descending from the moraine to the glacier was steep and tricky. We were concerned about possible rockfall.

Descending from the moraine to the glacier was steep and tricky. We were concerned about possible rockfall.

Shyam, our guide and fearless leader - facing the unknown with a smile!

Shyam, our guide and fearless leader - facing the unknown with a smile!

Approaching the Tilman Pass high camp. The camp is located between the pass and the the white lip of the glacier.

Approaching the Tilman Pass high camp. The camp is located between the pass and the the white lip of the glacier.

Tilman Pass high camp - looking south.

Tilman Pass high camp - looking south.

The Tilman Pass - south high camp with the pass ahead.

The Tilman Pass - south high camp with the pass ahead.

The high camp for the Tilman Pass.

The high camp for the Tilman Pass.

The Tilman Pass high camp

The Tilman Pass high camp

Scouting the route trough the Tilman Pass. We were lucky with the right weather conditions. For the sense of scale, spot the people on the right above the rock shelf.

Scouting the route trough the Tilman Pass. We were lucky with the right weather conditions. For the sense of scale, spot the people on the right above the rock shelf.

Ascending the Tilman Pass at 7am.

Ascending the Tilman Pass at 7am.

tillmnsouthbc.jpg
tillmnsuthbc.jpg
The Tilman Pass ice fall.

The Tilman Pass ice fall.

The Tilman Pass ice fall. We had to ascend the rocks to the right to bypass the icefall.

The Tilman Pass ice fall. We had to ascend the rocks to the right to bypass the icefall.

IMG_5561.jpeg
The upper secion of the icefall.

The upper secion of the icefall.

Almost there, reaching the crest of the Tillman Pass. The glacier we came from is visible below.

Almost there, reaching the crest of the Tillman Pass. The glacier we came from is visible below.

IMG_5586.jpg
Tilman Pass 5,300m. Mount Ganchempo looms above.

Tilman Pass 5,300m. Mount Ganchempo looms above.

The elevation of the Tilman Pass

The elevation of the Tilman Pass

Tilman Pass 5,300m.

Tilman Pass 5,300m.

Looking back south from the top of the Tilman Pass.

Looking back south from the top of the Tilman Pass.

IMG_5610.jpg
IMG_5674.jpeg
Tilman Pass, view to the north. The mountain in the centre of the photo is Langshisa Ri.

Tilman Pass, view to the north. The mountain in the centre of the photo is Langshisa Ri.

The Langtang Himal from the pass. The Tilman Pass is not the best for the views of the Langtang range. However, the area around the high camp and Langshisa Glacier is fabulous!

The Langtang Himal from the pass. The Tilman Pass is not the best for the views of the Langtang range. However, the area around the high camp and Langshisa Glacier is fabulous!

The crevices were visible so it was easy to navigate around them.

The crevices were visible so it was easy to navigate around them.

IMG_5617.jpg
Descending the glacier using the fixed rope.

Descending the glacier using the fixed rope.

The steeper section had a fixed rope for the porters as they had no crampons. The fixed rope made for an easy and quick descent for everyone.

The steeper section had a fixed rope for the porters as they had no crampons. The fixed rope made for an easy and quick descent for everyone.

IMG_5694.jpeg
Descending from Tilman Pass glacier to the high camp. This section was steep, icy and unstable. Negotiating the endless moraines was the biggest challenge for the porters.

Descending from Tilman Pass glacier to the high camp. This section was steep, icy and unstable. Negotiating the endless moraines was the biggest challenge for the porters.

IMG_5718.jpeg
The high camp was by the frozen lake. Mount Langshisa Ri and Langshisa Glacier are behind the lake.

The high camp was by the frozen lake. Mount Langshisa Ri and Langshisa Glacier are behind the lake.

The High camp on the north side of the Tilman Pass

The High camp on the north side of the Tilman Pass

The High camp on the north side of the Tilman Pass

The High camp on the north side of the Tilman Pass

Langshisa Glacier Valley

Langshisa Glacier Valley

Looking towards Langshisa Kharka and the Langtang Valley from the high camp of the Tilman Pass. This was a very beautiful area to explore.

Looking towards Langshisa Kharka and the Langtang Valley from the high camp of the Tilman Pass. This was a very beautiful area to explore.

Langshisa Glacier - our descent route down to Langtang Valley.

Langshisa Glacier - our descent route down to Langtang Valley.

The Yala Peak is on the rock ridge on the left - it is hard to believe that it is 5,500m high!

The Yala Peak is on the rock ridge on the left - it is hard to believe that it is 5,500m high!

The pointy peak is the Yala Peak

The pointy peak is the Yala Peak

Our camp at the north side of the Tilman Pass

Our camp at the north side of the Tilman Pass

IMG_8275.jpg
IMG_8279.jpg
The view from the moraine of the Langshisa Glacier to the high camp of the Tilman Pass.

The view from the moraine of the Langshisa Glacier to the high camp of the Tilman Pass.

IMG_5886.jpeg
Around the north high camp of the Tilman Pass.

Around the north high camp of the Tilman Pass.

Langshisa Glacier. On the left is Gur Karpo Ri 6,892m, in the middle is Loempo Gang 6,979m and on the right is Dorje Lakpa 6,966m.

Langshisa Glacier. On the left is Gur Karpo Ri 6,892m, in the middle is Loempo Gang 6,979m and on the right is Dorje Lakpa 6,966m.

Langshisa Glacier

Langshisa Glacier

IMG_5809.jpeg
IMG_5844.jpeg
IMG_5843.jpeg
Looking at the Tilman Pass

Looking at the Tilman Pass

IMG_6016.jpg
IMG_6026.jpeg
7EC26F14-90F9-4FEF-BBFA-0EC8B484D1B1_1_201_a.jpg
Descending to the Langshisa Glacier on loose, unstable and steep moraine.

Descending to the Langshisa Glacier on loose, unstable and steep moraine.

Steep and loose; this area is prone to rock fall and turns many people around if they are trying to approach the pass from the north. The rocks were falling with high frequency.

Steep and loose; this area is prone to rock fall and turns many people around if they are trying to approach the pass from the north. The rocks were falling with high frequency.

Crazy moraines! After the sun hits this slope, the bombardment starts. The rocks are held by consolidated frozen mud. Mount Dorje Lakpa 6,966m dominates the end of the valley.

Crazy moraines! After the sun hits this slope, the bombardment starts. The rocks are held by consolidated frozen mud. Mount Dorje Lakpa 6,966m dominates the end of the valley.

We descended the crazy moraine on the right! It was like walking through a giant rock quarry.

We descended the crazy moraine on the right! It was like walking through a giant rock quarry.

IMG_6083.jpeg
The snout of the Langshisa Glacier with an impressive ice cave. Neither David nor Shyam were keen to explore the inside of it!

The snout of the Langshisa Glacier with an impressive ice cave. Neither David nor Shyam were keen to explore the inside of it!

Lower part of the Langshisa Glacier. Almost off the rubble! The snout is now in the distance.

Lower part of the Langshisa Glacier. Almost off the rubble! The snout is now in the distance.

We were ready to ford the Langtang River but to our surprise there was this beautiful bridge. The snout of the Langtang Glacier is in the distance.

We were ready to ford the Langtang River but to our surprise there was this beautiful bridge. The snout of the Langtang Glacier is in the distance.

Langshisa Kharka

Langshisa Kharka

Gangchempo towering above the Langshisa Glacier

Gangchempo towering above the Langshisa Glacier

Looking down the Langtang Valley

Looking down the Langtang Valley

Langtang Trek - Ganjala Pass

In October of 2018, we traveled to Nepal to complete the Tilman Pass and Ganjala Pass trek. We approached the Tilman Pass from the south side via the Panch Pokari Ridge. We then descended to the Langtang Valley, explored the Langtang Glacier and exited the Valley via the Ganjala Pass. We also managed to take a helicopter tour of the Langtang Valley north of Kyanjing Gomba. All in all, it was a wild and challenging trek through wild and remote area of the Langtang Himal.

Thanks again to mountainsunvalley.com for all the help with putting this together.

For Annotated Photos from the Ganjala Pass see here.

IMG_8416 (1).jpg
Map of Langtang valley trek.jpg

See the Link for Annotated photos from Langtang Himal from the Helicopter

We were lucky again and managed to get in a helicopter in Kynjang Gomba. So it happened that a group of trekkers were taking a helicopter back to Kathmandu while we were there. We hired the helicopter for a tour of the upper Langtang Valley.Pemthang…

We were lucky again and managed to get in a helicopter in Kynjang Gomba. So it happened that a group of trekkers were taking a helicopter back to Kathmandu while we were there. We hired the helicopter for a tour of the upper Langtang Valley.

Pemthang Karpo Ri’s North-west ridge from 19,000ft!

Langtang Lirung

Langtang Lirung

Panoramic view of the Langtang Valley. The Langtang Glacier is in the middle. Shishapangma in Tibet is on the horizon. Penthang Karpo Ri is on the right.

Panoramic view of the Langtang Valley. The Langtang Glacier is in the middle. Shishapangma in Tibet is on the horizon. Penthang Karpo Ri is on the right.

IMG_6319.jpeg
Shishapangma

Shishapangma

On the left is Shalbachum Glacier, and on the right is the Langtang Glacier with Mt. Shishapangma looming above in the centre.

On the left is Shalbachum Glacier, and on the right is the Langtang Glacier with Mt. Shishapangma looming above in the centre.

Langtang Heli-Flight Yansa Tsenji + Shalbachum from SE.jpg
Langtang Heli-Flight Langtang Ri + Porong Ri from S.jpg
Langtang Himal from the helicopter. Kyunggari 6,599m on the left and Shaishapangma 8,013 on the right. The Shalbachum Glacier is in the middle.

Langtang Himal from the helicopter. Kyunggari 6,599m on the left and Shaishapangma 8,013 on the right. The Shalbachum Glacier is in the middle.

The Langtang Himal from the helicopter. The high mountain on the left/centre is Shalbachum 6,707m and the pointy peak on the right is Kyunggari 6,599m.

The Langtang Himal from the helicopter. The high mountain on the left/centre is Shalbachum 6,707m and the pointy peak on the right is Kyunggari 6,599m.

The point peak is Kyunggari 6,599 and the one on the horizon is Lantang Ri.

The point peak is Kyunggari 6,599 and the one on the horizon is Lantang Ri.

Langtang Heli-Flight Kyungka Ri + Langtang Ri from SSE.jpg
Langtang Heli-Flight Gurkarpo Ri from ESE_1.jpg
Langtang Heli-Flight Gurkarpo Ri from ESE_2.jpg
IMG_6378.jpeg
Kyungari 6,599m

Kyungari 6,599m

Langtang Ri and the end of the Langtang Glacier. The langtang Glacier is 35 km Long. It is actually a multi day hike to get to the base of the Langtang Ri. Although the glacier is in Nepal, all the surrounding mountains are in Tibet.

Langtang Ri and the end of the Langtang Glacier. The langtang Glacier is 35 km Long. It is actually a multi day hike to get to the base of the Langtang Ri. Although the glacier is in Nepal, all the surrounding mountains are in Tibet.

Shishapangma 8,013m in Tibet

Shishapangma 8,013m in Tibet

Shishapangma south face 8,013m located entirely in Tibet.

Shishapangma south face 8,013m located entirely in Tibet.

Langshisa Glacier and Ganchempo Peak.

Langshisa Glacier and Ganchempo Peak.

Lanshisa Glacier in the middle and the Tilman Pass in the right upper corner of the photo.

Lanshisa Glacier in the middle and the Tilman Pass in the right upper corner of the photo.

Langtang+Heli-Flight+Gangchenpo+%2B+Urgyenmang+from+NNW.jpg
A close up of the Tilman Pass and the high camp by the green lake. This was our route. Down the glacier to the green lake.

A close up of the Tilman Pass and the high camp by the green lake. This was our route. Down the glacier to the green lake.

Langtang Heli-Flight Dorje Khakpa + Urgyenmang from WNW.jpg
Langtang Heli-Flight Langshisa Ri + Gangchenpo from N.jpg
Langtang Heli-Flight Langshisa Ri from NW.jpg
Yala Peak on the right (high point of the rocky ridge) and the Langtang Lirung group on the left.

Yala Peak on the right (high point of the rocky ridge) and the Langtang Lirung group on the left.

Langtang Heli-Flight Kimshung + Yansa Tsenji from ESE.jpg
Langtang Heli-Flight Naya Kangri from NE.jpg
Langtang Heli-Flight Langtang Lirung from SE.jpg
Lantang Lirung (Yala Peak is on the right)

Lantang Lirung (Yala Peak is on the right)

Looking down the lower Langtang Valley

Looking down the lower Langtang Valley

IMG_6258.jpeg
IMG_6444.jpg
Exploring the Langtang Glacier. It is deceptively long and apparently it takes 3 days to get to the end of it from Langshisa Kharka.

Exploring the Langtang Glacier. It is deceptively long and apparently it takes 3 days to get to the end of it from Langshisa Kharka.

The Langtang Glacier. I am standing across from Langshisa Ri.

The Langtang Glacier. I am standing across from Langshisa Ri.

Langshisa Ri north face and the Langtang Glacier.

Langshisa Ri north face and the Langtang Glacier.

Mount Ganchempo

Mount Ganchempo

The wall along the Langtang Glacier.

The wall along the Langtang Glacier.

IMG_6115.jpeg
The mountains on the border between Nepal and China along the Langtang Glacier.

The mountains on the border between Nepal and China along the Langtang Glacier.

Langtang Lirung (LL) Glacier from the LL BC

Langtang Lirung (LL) Glacier from the LL BC

Standing below LL

Standing below LL

Langtang Lirung

Langtang Lirung

Langtang Lirung BC - looking south

Langtang Lirung BC - looking south

IMG_6247.jpeg
IMG_6249.jpeg
Langtang Lirung Glacier - Looking at the Langtang Valley 5 km away and 800m below.

Langtang Lirung Glacier - Looking at the Langtang Valley 5 km away and 800m below.

Langtang Lirung Icefall

Langtang Lirung Icefall

Langtang Lirung

Langtang Lirung

Kianjing Gompa

Kianjing Gompa

Looking back at Langtang Lirung Glacier from the ascend to Ganjala Pass

Looking back at Langtang Lirung Glacier from the ascend to Ganjala Pass

Kianjing village is now down below

Kianjing village is now down below

The entire approach to Yala Peak is on the left with Shishapangma towering on the horizon.

The entire approach to Yala Peak is on the left with Shishapangma towering on the horizon.

The BC for Ganjala Pass

The BC for Ganjala Pass

Ascend to Ganjala Pass

Ascend to Ganjala Pass

Langtang Valley

Langtang Valley

Langtang Lirung and the LL Glacier

Langtang Lirung and the LL Glacier

The Langtang Panorama from the ascent to the Ganjala

The Langtang Panorama from the ascent to the Ganjala

Langtang Valley, Mt. Langtang Lirung (left) and Mt. Shishapagma (in the distance with a line of clouds above it) from the climb to Ganjala Pass.

Langtang Valley, Mt. Langtang Lirung (left) and Mt. Shishapagma (in the distance with a line of clouds above it) from the climb to Ganjala Pass.

Langtang Lirung from the basecamp for Ganjala Pass at 4,300m.

Langtang Lirung from the basecamp for Ganjala Pass at 4,300m.

Morimoto 6,150m and Dragmarpori 6,578m.

Morimoto 6,150m and Dragmarpori 6,578m.

Kyungari 6,599m

Kyungari 6,599m

Shishapangma 8,013m

Shishapangma 8,013m

Shishapagma

Shishapangma 8,013m is the only 8,000m mountain located entirely in China’s Tibet

Shishapangma 8,013m is the only 8,000m mountain located entirely in China’s Tibet

Ascend to Galjala Pass.  Naya Kanga is on the right.

Ascend to Galjala Pass. Naya Kanga is on the right.

Naya Kanga

Naya Kanga

We still can’t see the pass - it is behind the slope on the right.

We still can’t see the pass - it is behind the slope on the right.

IMG_8532.jpeg
Looking back at the Langtang Himal from near the Ganjala Pass. Shishapangma dominates the view. We hiked from 4,300 to 5,130m in 4 hours.

Looking back at the Langtang Himal from near the Ganjala Pass. Shishapangma dominates the view. We hiked from 4,300 to 5,130m in 4 hours.

Rocky approach to the Gajala Pass. It was dry but wobbly and steep.

Rocky approach to the Gajala Pass. It was dry but wobbly and steep.

Dragmarpori 6,578m

Dragmarpori 6,578m

Pemthang Karpo Ri 6,865m.

Pemthang Karpo Ri 6,865m.

Shishapangma 8,013m

Shishapangma 8,013m

IMG_6583.jpg
IMG_6585.jpg
The steep final approach to the Ganjala Pass.

The steep final approach to the Ganjala Pass.

Ganjala Pass, the approach is via the snow covered shelf on the upper right. Chains have been installed for safety and a ladder for the porters.

Ganjala Pass, the approach is via the snow covered shelf on the upper right. Chains have been installed for safety and a ladder for the porters.

The steep and exposed Ganjala Pass 5,150m

The steep and exposed Ganjala Pass 5,150m

The final ascend to Ganja La Pass

The final ascend to Ganja La Pass

IMG_6726.jpeg
Ganja La N 5180 nach NO_01.jpg
The altitude of Ganjala Pass.

The altitude of Ganjala Pass.

This was our 20th major trip! A true milestone for David and me. I am lucky to have a good friend in David to share the interest and passion for travel to wild places.

This was our 20th major trip! A true milestone for David and me. I am lucky to have a good friend in David to share the interest and passion for travel to wild places.

Ganjala Pass 5,150m. It is a surprisingly beautiful pass and yet not very popular! It is so close to Kathmandu and near such popular trekking route. It did remind me of Renjo La a little.

Ganjala Pass 5,150m. It is a surprisingly beautiful pass and yet not very popular! It is so close to Kathmandu and near such popular trekking route. It did remind me of Renjo La a little.

Looking down at the approach route to the Ganjala Pass from the now distant Langtang Valley.

Looking down at the approach route to the Ganjala Pass from the now distant Langtang Valley.

Ganjala Pass and back side of Naya Kanga.

Ganjala Pass and back side of Naya Kanga.

Looking south from Ganjala Pass. The south high camp is located by the two small lakes below at an altitude of approx 5,000m.

Looking south from Ganjala Pass. The south high camp is located by the two small lakes below at an altitude of approx 5,000m.

Looking south from Ganjala Pass.

Looking south from Ganjala Pass.

The view from the pass. The Yala Peak is the rocky ridge on the right. It was sad to see how the glacier retreated in the last decade. We went there in 2009 (see the post) and most of our hiking was on ice.

The view from the pass. The Yala Peak is the rocky ridge on the right. It was sad to see how the glacier retreated in the last decade. We went there in 2009 (see the post) and most of our hiking was on ice.

Morimoto 6,150m from the Pass.

Morimoto 6,150m from the Pass.

Pemthang Karpo Ri 6,865m.

Pemthang Karpo Ri 6,865m.

Pemthang Karpo Ri and Langshisa Ri.

Pemthang Karpo Ri and Langshisa Ri.

Shishapangma 8,013m.

Shishapangma 8,013m.

The rocky ridge extending from Ganjala Pass

The rocky ridge extending from Ganjala Pass

Coming down the steep south side of the pass.

Coming down the steep south side of the pass.

Looking back at the rocky descent from the Ganjala Pass. You can spot our porters on the left!

Looking back at the rocky descent from the Ganjala Pass. You can spot our porters on the left!

Distant view of the Ganjala Pass area from the south.

Distant view of the Ganjala Pass area from the south.

The Jugal Himal in Tibet right before the sunrise seen from our descent round from the Ganjala Pass.

The Jugal Himal in Tibet right before the sunrise seen from our descent round from the Ganjala Pass.

Looking back to where we came from.  We crossed the range on the horizon via the Tilman Pass.

Looking back to where we came from. We crossed the range on the horizon via the Tilman Pass.

The fantastic view of the Langtang Range from the hills of Helambu.  The trek down was not really down at all.  We had to cross numerous ridges.  1000m up and 1200 down.  We were tired and every ridge seemed much harder the lower we went.  We were h…

The fantastic view of the Langtang Range from the hills of Helambu. The trek down was not really down at all. We had to cross numerous ridges. 1000m up and 1200 down. We were tired and every ridge seemed much harder the lower we went. We were happy to arrive at the road end - flat ground!

The end. Packed and ready for our 75 km 10 hour drive back to Kathmandu and home. What a FANTASTIC trip it was!

The end. Packed and ready for our 75 km 10 hour drive back to Kathmandu and home. What a FANTASTIC trip it was!

IMG_8678.jpeg

Paria River Wilderness - USA, Utah

In September of 2018 we did a short trip to the Paria River Canyon. Since September is considered a “monsoon season” in Southern Utah, we had the Canyon to ourselves (not counting snakes). The area is absolutely spectacular and the feel of remoteness adds to the sense of adventure. The entire Paria Canyon crossing is 34 miles long. Since we had limited amount of time, we hiked to the Paria River and Buckskin Gulch confluence from the Whitehouse campground (12 miles) and back. It really gave us a sense of what the entire crossing would be like. Since the river is very silty, water is a major concern. We carried 5 litres each. Since it is very hot, 5 lites is good for max 2 days. The nearest spring is 13 to 14 miles from the start. Because of the massive flooding in the summer of 2018, parts of the Canyon were completely submerged and dotted with deep water holes. This forced us to swim across long stretches in some spots. In other places, the water was up to our armpits but walkable. After the hike, everything was covered in filmy mud that required serious scrubbing with soap to wash off. Thankfully, we did not get caught in any quick sand.

Greater-So-Utah-Zion-Map.jpg
paria map 2.gif
IMG_4599.jpg
The Whitehouse campground area

The Whitehouse campground area

IMG_4588.jpg
The entrance to the canyon proper

The entrance to the canyon proper

IMG_4253.jpg
We encountered MUD and a lot of it!

We encountered MUD and a lot of it!

constantly sliding through pools of liquid mud

constantly sliding through pools of liquid mud

IMG_4271.jpg
IMG_4283.jpg
Spectacular scenery of the Paria River Canyon

Spectacular scenery of the Paria River Canyon

IMG_4396.jpg
IMG_4300.jpg
Caverns made by rushing Paria River. When we were there, the river was running at 2 cubic feet per second. We encountered a small flash flood and the river flow increased to 9 cubic feet per second. It was already hard to swim against the current an…

Caverns made by rushing Paria River. When we were there, the river was running at 2 cubic feet per second. We encountered a small flash flood and the river flow increased to 9 cubic feet per second. It was already hard to swim against the current and our packs got washed away. During the severe flooding in July of 2018, the river was punching 10,000 cubic feet per second!!!! Wow!

Small side slot canyon along the Paria River Canyon

Small side slot canyon along the Paria River Canyon

The gift from nature

The gift from nature

IMG_4544.jpg
IMG_4542.jpg
IMG_4522.jpg
The sun bakes the soil. It was very hot in the sun.

The sun bakes the soil. It was very hot in the sun.

Our campsite on the banks of the Paria River.

Our campsite on the banks of the Paria River.

Drying out in the blazing sun - it was at least 40C

Drying out in the blazing sun - it was at least 40C

IMG_7747.jpg
Preparing to swim through a deep pool of liquid mud. I did not realize that there were snakes in the water! One got logged inside the pack after it was washed away by the river during a small flash flood.

Preparing to swim through a deep pool of liquid mud. I did not realize that there were snakes in the water! One got logged inside the pack after it was washed away by the river during a small flash flood.

IMG_4288.jpg
Exploring the Paria Canyon. We left our packs behind and during our exploration the river flow quadrupled. The packs got washed away. We found them downstream from where we left them. One of them had a snake stuck in it. When the river is flowing hi…

Exploring the Paria Canyon. We left our packs behind and during our exploration the river flow quadrupled. The packs got washed away. We found them downstream from where we left them. One of them had a snake stuck in it. When the river is flowing high, the snakes flow with it :-). After our hike, we received a lecture from a local on the types of snakes in the canyon. Apparently, the bad one has eyes of a cat. It is hard to check when you are freaking out after finding one in your pack!

In the Paria River, crossing one of the deeper sections

In the Paria River, crossing one of the deeper sections

Photo by David Holberton

Photo by David Holberton

IMG_4418.jpg
IMG_4423.jpg
IMG_4427.jpg
IMG_4320.jpg
IMG_4389.jpg
IMG_4414.jpg
IMG_4241.jpg
IMG_4441.jpg
IMG_4476.jpg
IMG_4446.jpg
Near the confluence of the Paria Canyon and the Buckskin Gulch

Near the confluence of the Paria Canyon and the Buckskin Gulch

IMG_4402.jpg
IMG_4405.jpg
IMG_4566.jpg
IMG_4482.jpg
IMG_4515.jpg
The Whitehouse campsite run by the BLM

The Whitehouse campsite run by the BLM

Escalante NP/Paria Wilderness

Escalante NP/Paria Wilderness

The badlands of the Paria Wilderness/Escalante

The badlands of the Paria Wilderness/Escalante

IMG_3876.jpg

Zion National Park and Cedar Breaks - USA, Utah

Greater-So-Utah-Zion-Map.jpg
ZBCB.jpg
zion 1.jpg
The Zion main valley of the Virgin River from the trail to the Observation Point

The Zion main valley of the Virgin River from the trail to the Observation Point

IMG_3182.jpg
Red Rock Canyon

Red Rock Canyon

IMG_3186.jpg
IMG_3195.jpg
IMG_3201.jpg
IMG_3233.jpg
Cedar Breaks at 10,000 ft elevation

Cedar Breaks at 10,000 ft elevation

Cedar Breaks Canyon

Cedar Breaks Canyon

Cedar Breaks Canyon

Cedar Breaks Canyon

IMG_3271.jpg
IMG_3277.jpg
The incredible colours of the Cedar Breaks Canyon

The incredible colours of the Cedar Breaks Canyon

IMG_7169.jpg
Looking down at the Cedar Breaks Canyon

Looking down at the Cedar Breaks Canyon

Hiking the Narrows of the Virgin River in the Zion NP

Hiking the Narrows of the Virgin River in the Zion NP

In the Narrows

In the Narrows

IMG_3347.jpg
IMG_3355.jpg
One of the tight sections of the Narrows

One of the tight sections of the Narrows

IMG_3368.jpg
The Narrows

The Narrows

IMG_3381.jpg
IMG_3414.jpg
IMG_3447.jpg
Virgin River and the Narrows

Virgin River and the Narrows

IMG_3465.jpg
IMG_3473.jpg
IMG_3478.jpg
IMG_3482.jpg
IMG_3488.jpg
IMG_3494.jpg
IMG_3575.jpg
IMG_3599.jpg
IMG_3612.jpg
IMG_3620.jpg
IMG_3624.jpg
IMG_3630.jpg
IMG_3631.jpg
IMG_3642.jpg
IMG_3716.jpg
Virgin River Valley from the Observation Point

Virgin River Valley from the Observation Point

The Narrows Canyon from the Observation Mountain

The Narrows Canyon from the Observation Mountain

IMG_3799.jpg
IMG_3805.jpg
IMG_3828.jpg
The Parks Service Bus negotiating the road up the Virgin River Valley

The Parks Service Bus negotiating the road up the Virgin River Valley

IMG_3850.jpg
IMG_3871.jpg
IMG_7492.jpg
IMG_7432.jpg

Norway

fjords2.gif
fjords of norway.jpg
IMG_0719.jpg
IMG_0752.jpg
Near Flam

Near Flam

IMG_0931.jpg
Kayaking near Flaam

Kayaking near Flaam

The Pulpit Rock near Stavenger

The Pulpit Rock near Stavenger

Sitting at the edge of a 600m drop on top of the Pulpit Rock near Stavenger

Sitting at the edge of a 600m drop on top of the Pulpit Rock near Stavenger

IMG_4358.jpg
600 m down...

600 m down...

The Pulpit Rock and Lysefjord near Stavenger

The Pulpit Rock and Lysefjord near Stavenger

IMG_4396.jpg
AAlesund

AAlesund

Sugerloaf Mountain in Aalesund

Sugerloaf Mountain in Aalesund

IMG_5054.jpg
Pretty Allesund

Pretty Allesund

Allesund

Allesund

IMG_5187.jpg
IMG_5241.jpg
IMG_5330.jpg
Hinking down from Myrgal to Flam

Hinking down from Myrgal to Flam

IMG_5370.jpg
Hiking above Bergen

Hiking above Bergen

Bergen and the oncoming storm. 10 minutes later I was engulfed in a complete fog...

Bergen and the oncoming storm. 10 minutes later I was engulfed in a complete fog...